Fiordland National Park, December 2025
If you want to try something utterly unique and extremely remote – read on for this edition of ‘Dart of destiny – Fiordland edition’. A fly in – fly out, rugged 3 day / 2 night mission on a remote mainland peninsula between Wet Jacket Arm and Dusky Sound.
First – what is the ‘Dart of destiny’ concept? Basically, it was a random idea for a friend and I to create a unique mission in one of the best outdoor locations in NZ – Fiordland national park.
The concept was we would each throw a dart at a large map of Fiordland, get to pick our location between the two, helicopter into that location, and make our way out.
Details below on the selected mission outcome. Full disclosure – the trip outlined here represents an adjusted exit from our intention at the time of the heli-drop – due to potentially impassable sections later in the trip (spotted via heli), much slower than expected bush travel time (driven by navigating bluffs), and the consequential likely situation of running out of food.
Anyhow, heaps of good learnings – read on to get inspired for a create-your-own-adventure type mission!
Mission scoping and throwing the dart
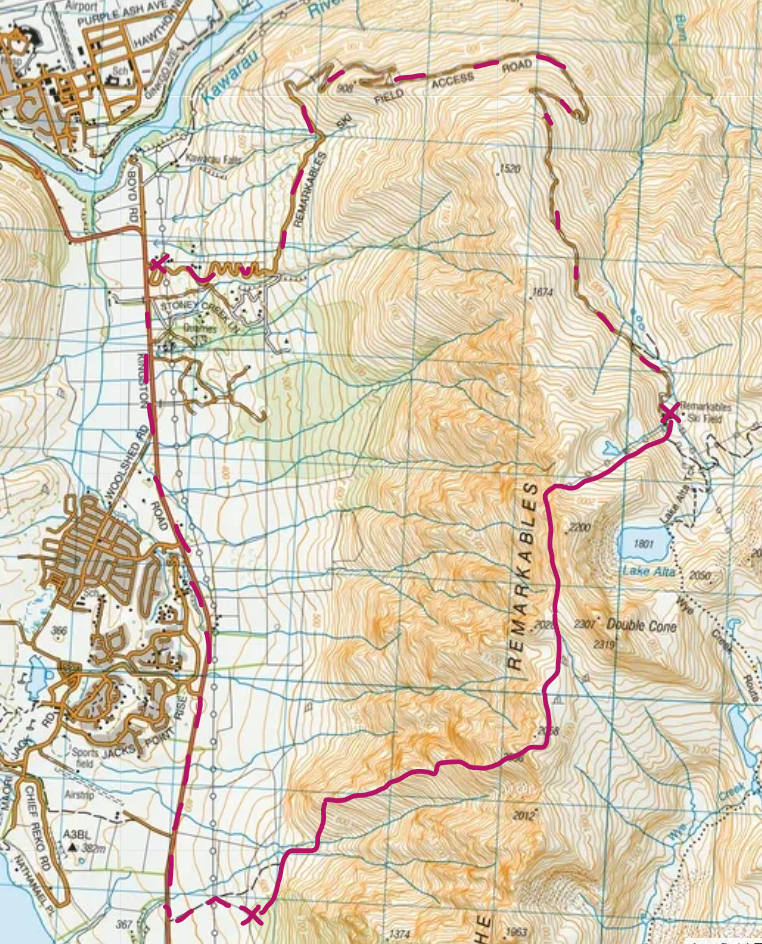
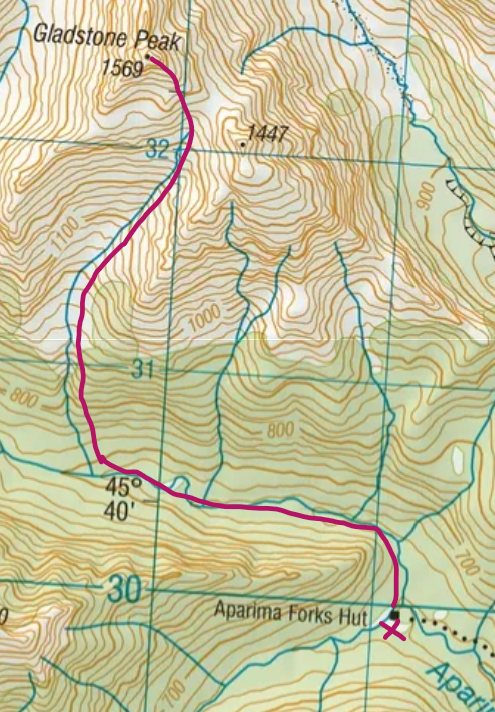
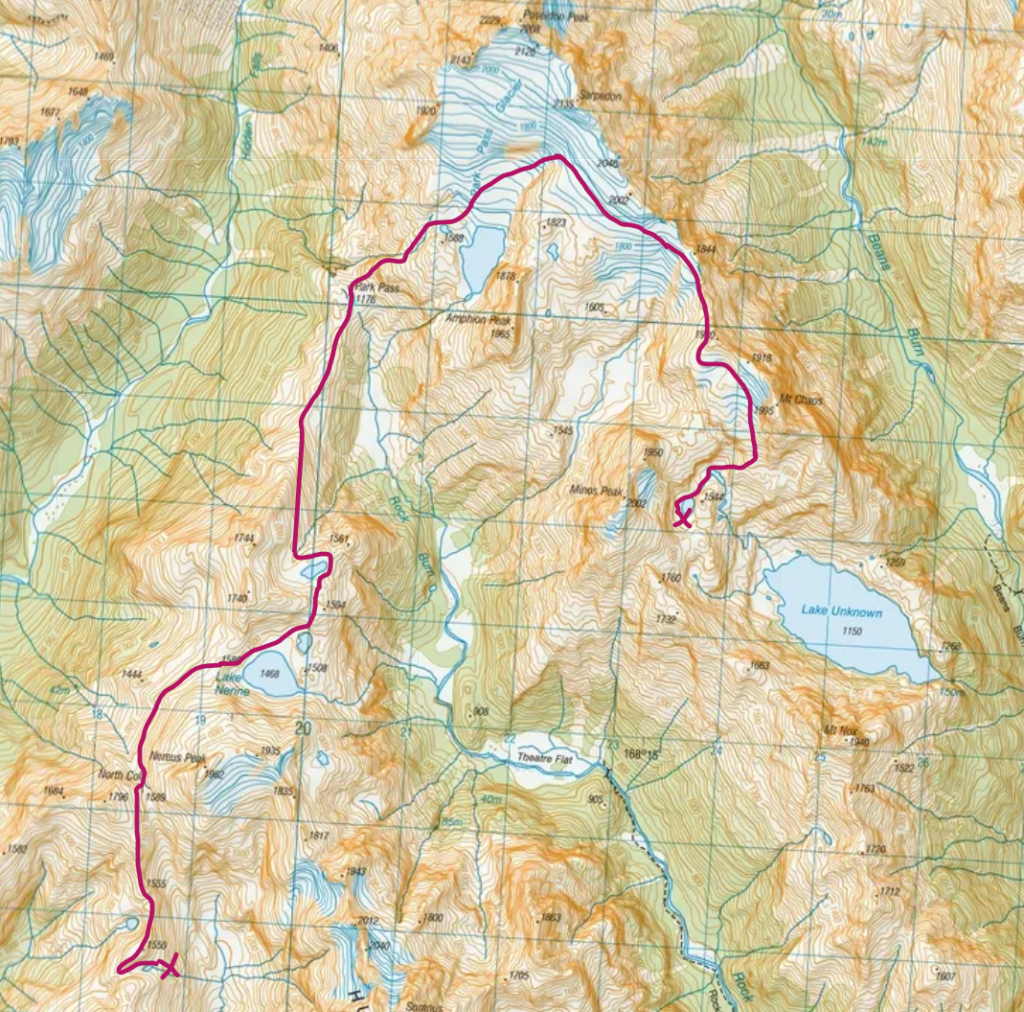
With a large map of Fiordland printed out, and some basic principles agreed (our choice of a dart-throw-each, and ideally a 4+ day mission for the logistics effort), we threw our darts and the selected location is shown by the red ‘x’ on the topo map below. Now it was time to figure out how we would get out…..
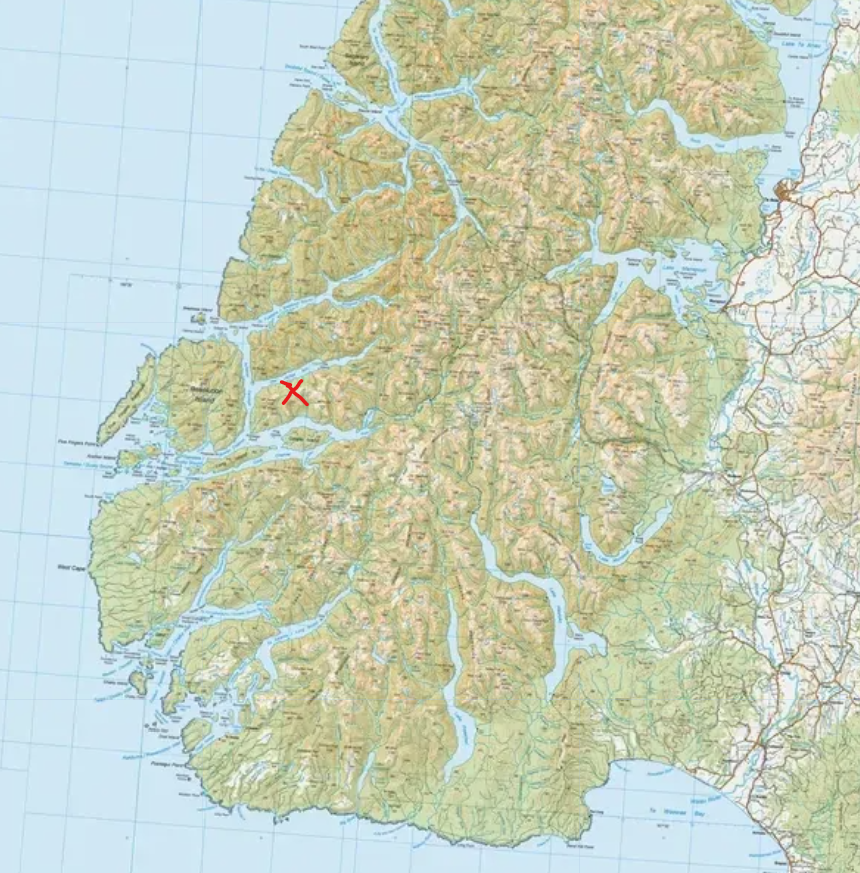
The red cross marks where our chosen dart landed
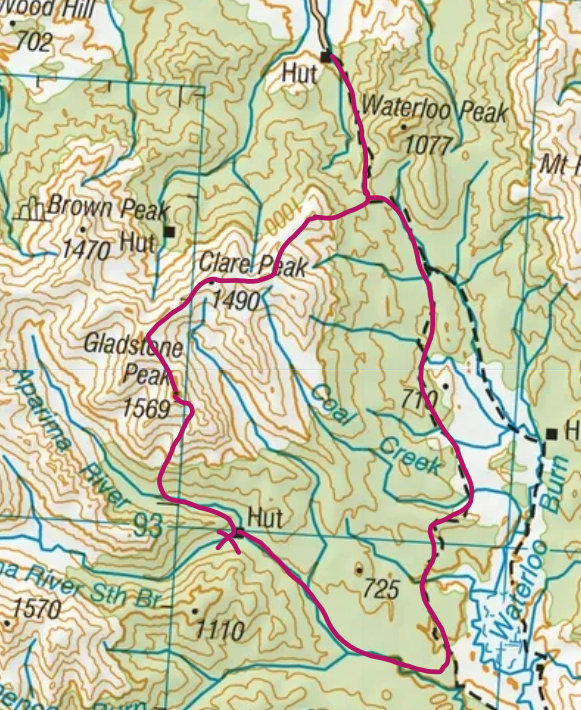
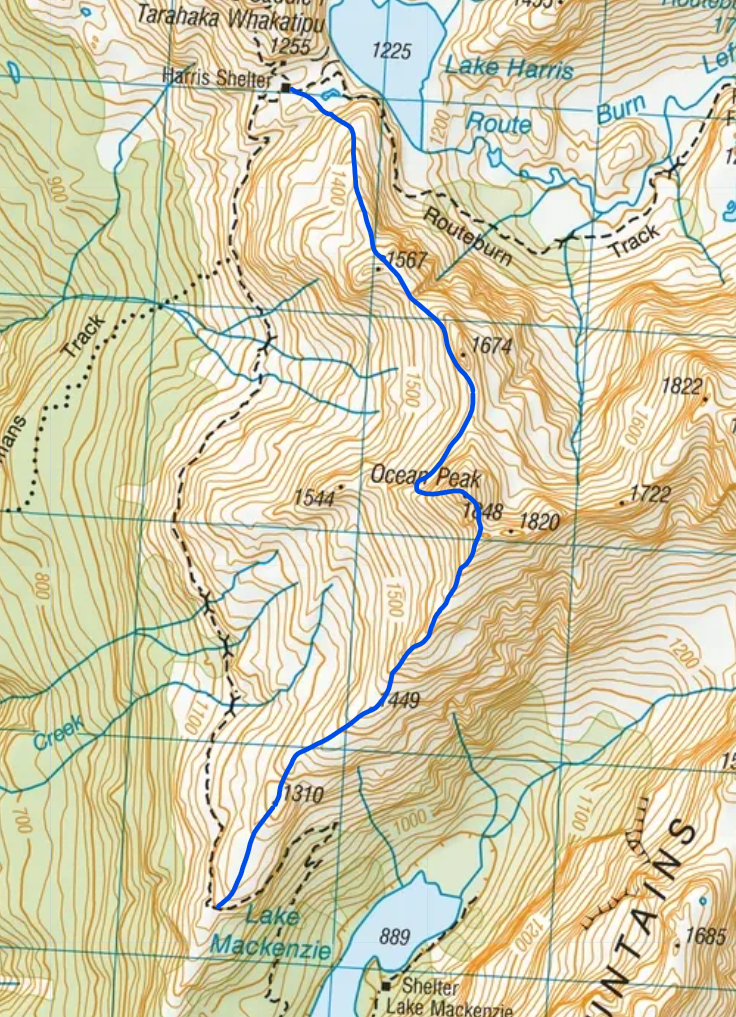
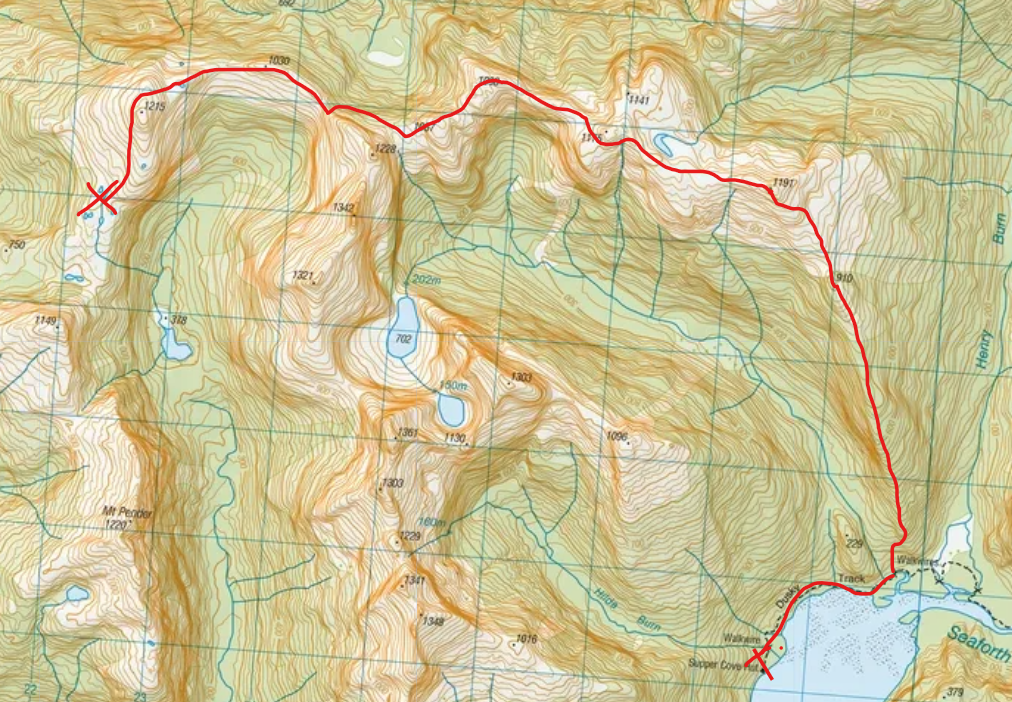
Our way out from our heli-drop ‘x’ location included a hike over some tops (with some committing choices along the way), and a float plane out from Supper Cove Hut, Dusky Sound. See the topo of our route below.

Our full topo line: helidrop at the left ‘x’, camp spot at the middle ‘x’, and second night at Supper Cove Hut
Some last minute recruitment saw 2 others join our party and I’m quite sure all involved found it one of the most adventurous and unique outdoor missions any of us had done in a while!
Day 1 – Dart of Destiny
After an early morning drive from Queenstown, four of us left Manapōuri Airport via helicopter around 10am to our drop location. It was a beautiful day, and it really did feel remote once the heli left, and we knew we were likely the only humans on this peninsula at the time.
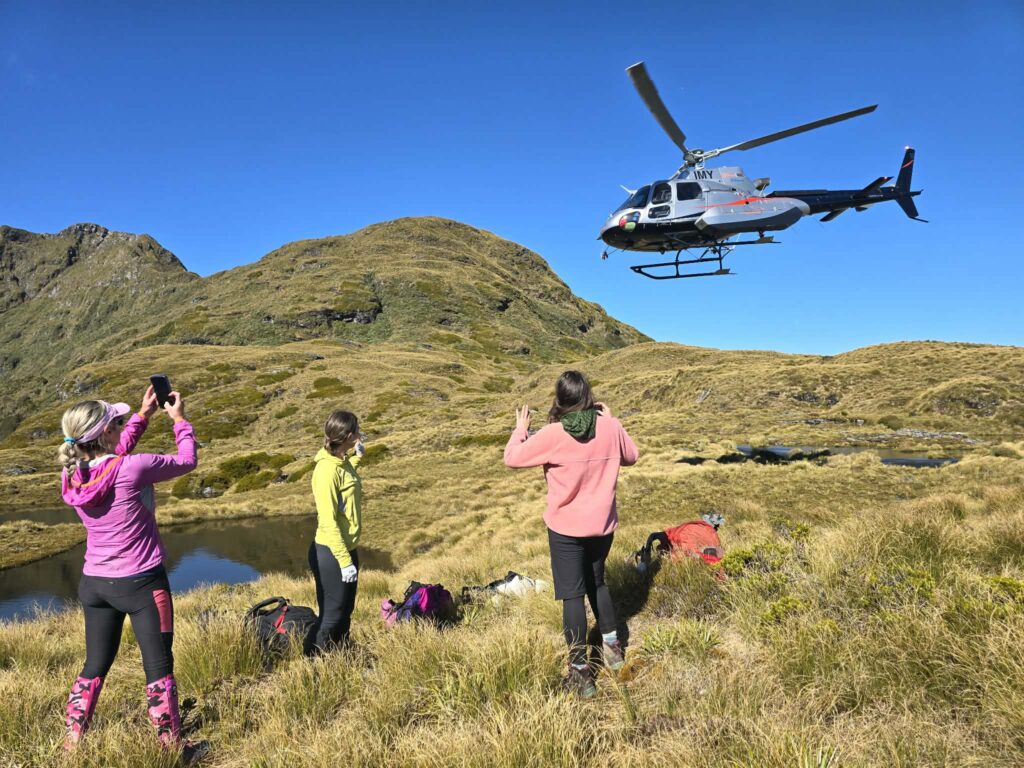
Heli drop at our ‘dart’ location around 11am day 1
A zoomed in topo line of our day 1 travel below.
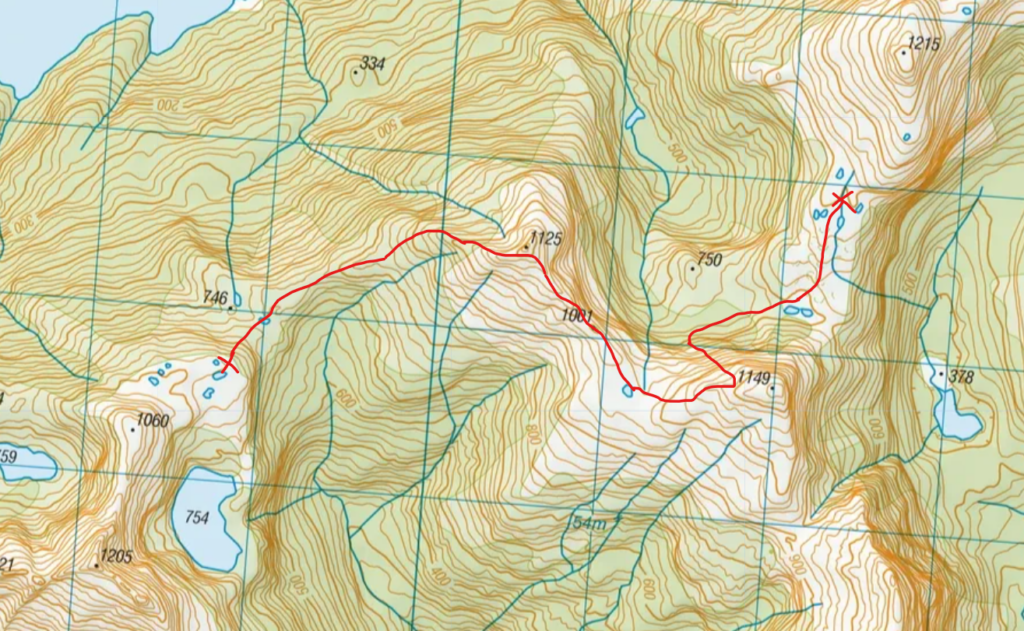
Day 1 topo route from heli drop to camp
Prior to our trip, I did compare Google Earth imagery to the topo – just to see if there was more to pick up re density of the bush or tarns. Google Earth showed quite a few more tarns than the topo map did, which turned out to be quite aligned with what was on the ground i.e., there was no risk of running out of water!
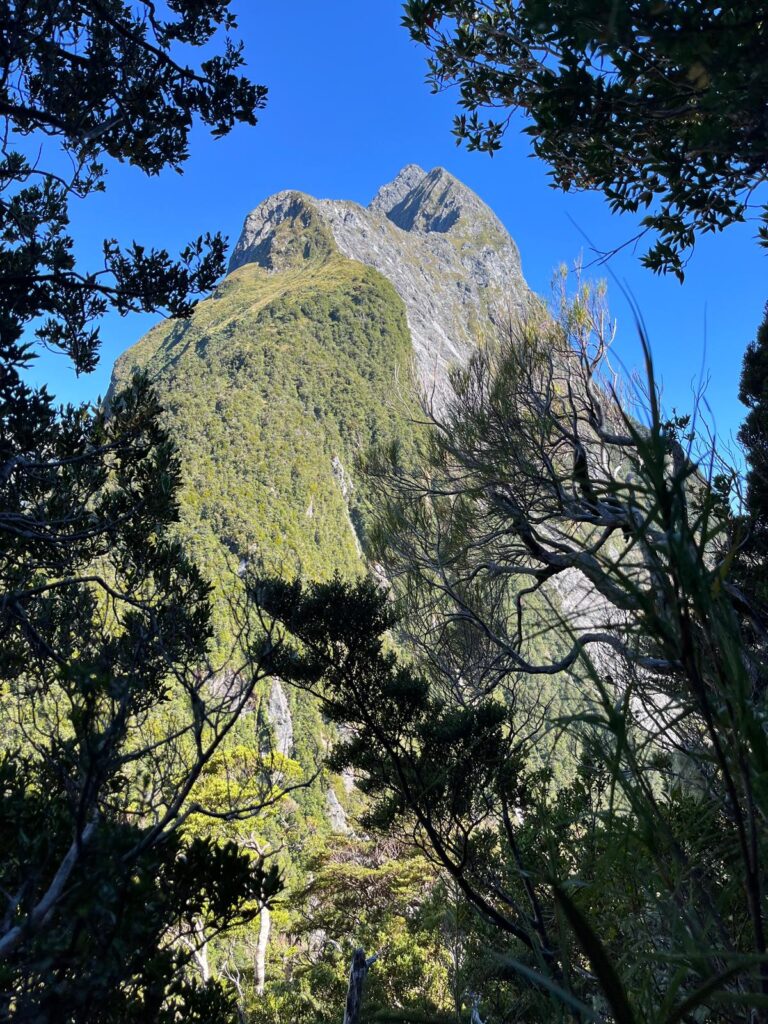
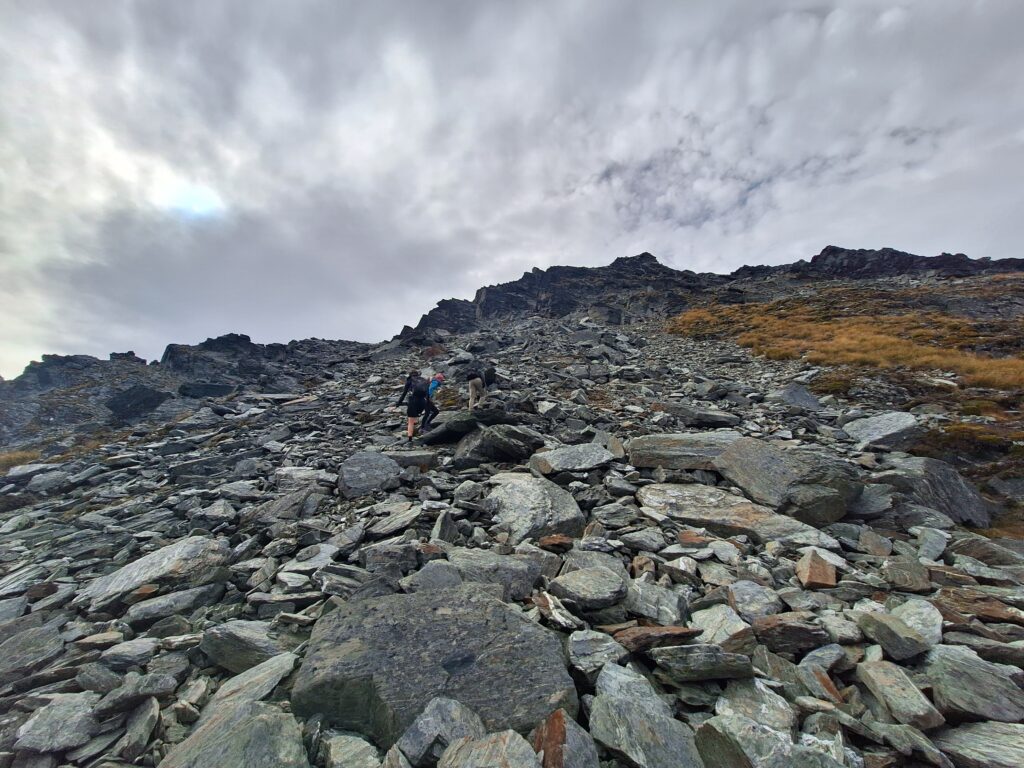
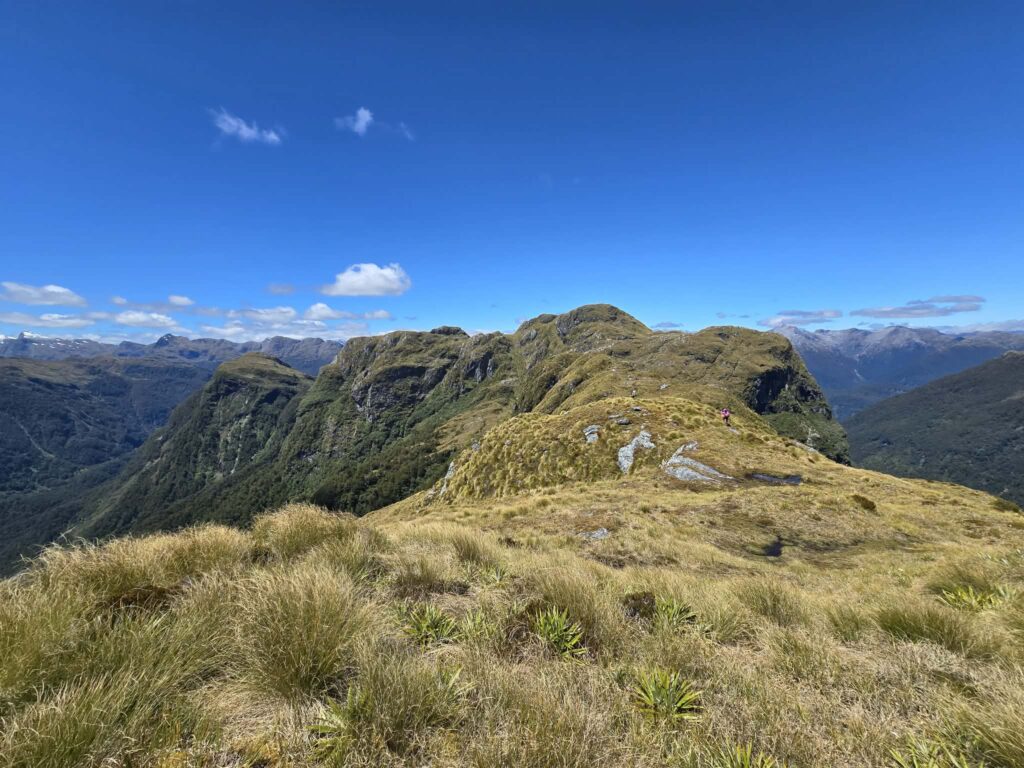
Travel over to pt 1125m was pretty good going – relatively open and no major bush bashing. Heading up the broad tussock ridge to the high point was quite pleasant with great views down to Wet Jacket Arm.
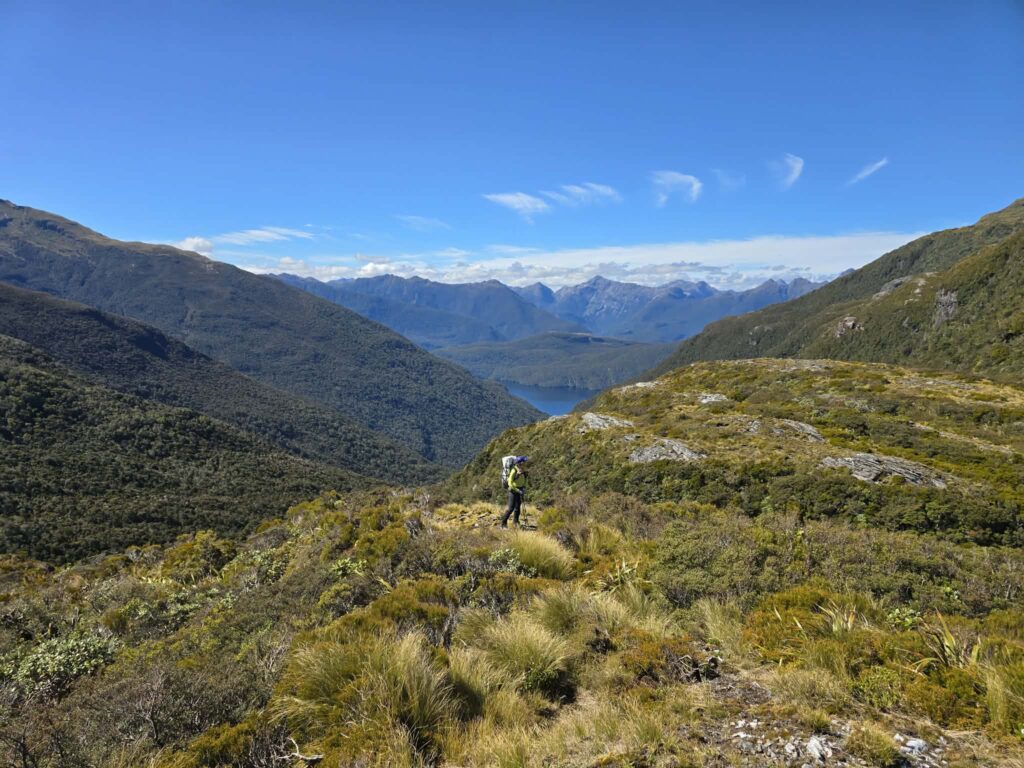
Day 1 – a few kms on from the heli drop
Day 1 – a few kms on from the heli drop
Day 1 – making our way up to point 1125m
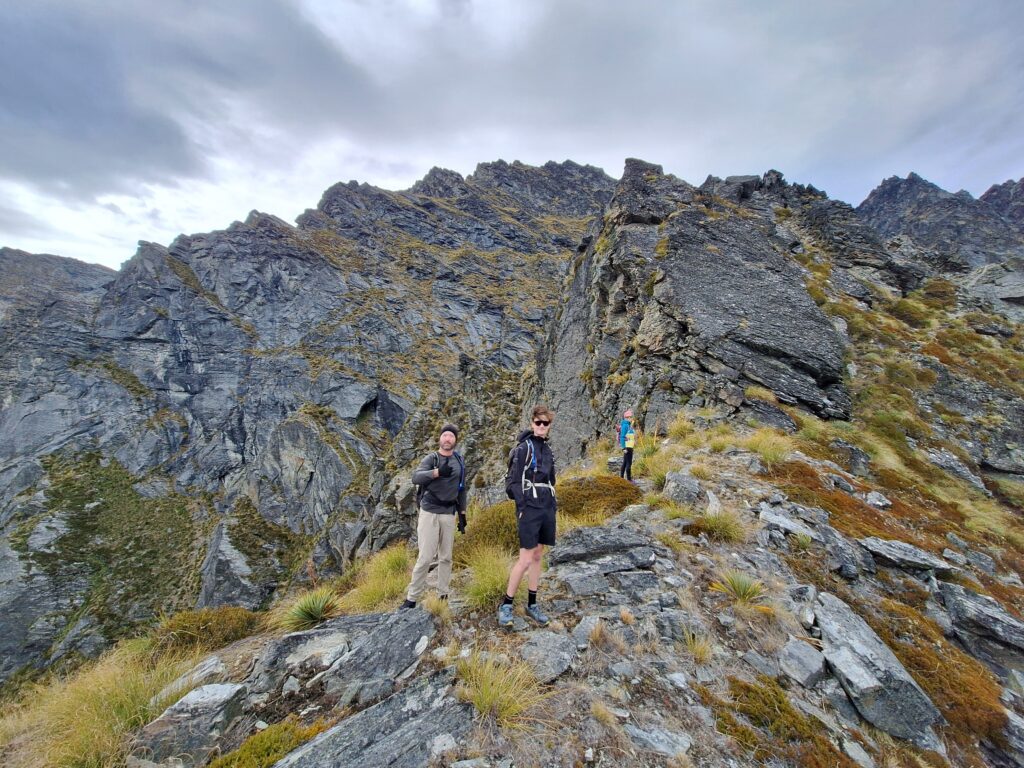
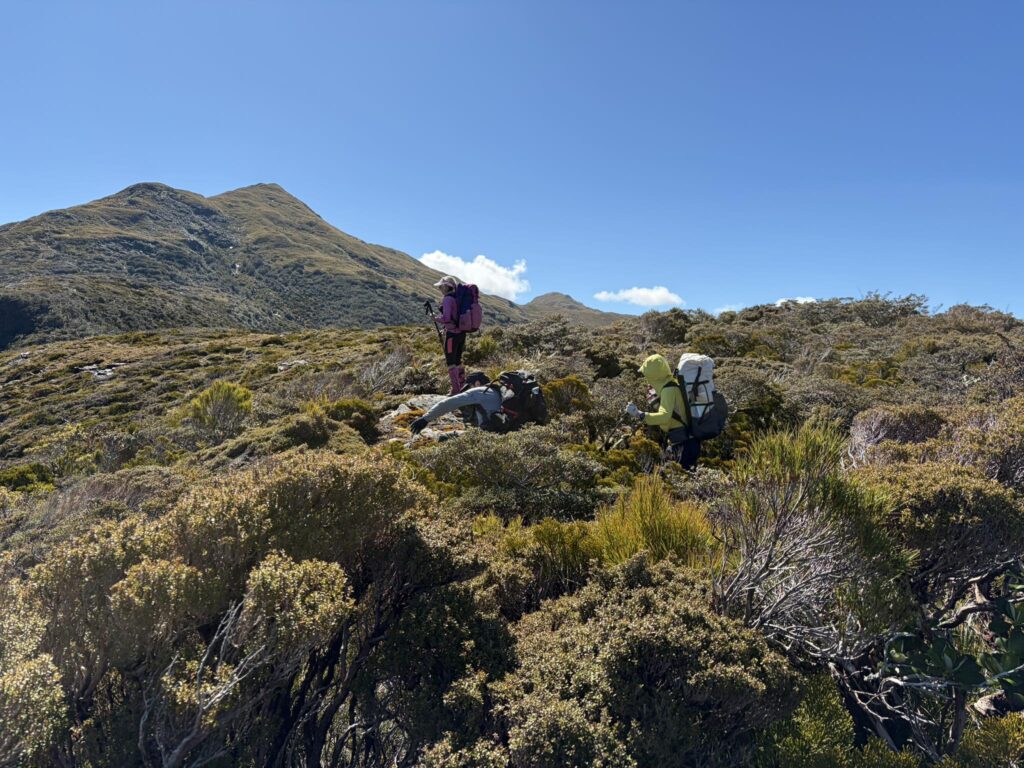
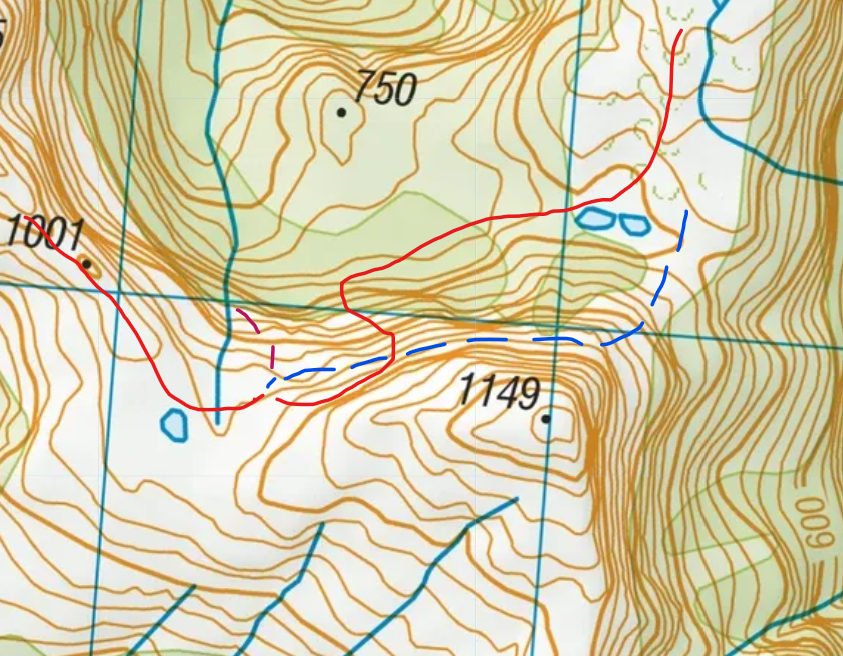
As we made our way to some tarns at the 1,000m saddle ahead of pt 1149m we all did some scoping of what lay ahead. Prior to seeing things in person, we had intended to hold elevation on the north side at around 980m (blue dashed line below), but on arrival the terrain appeared notably steeper than the topo and not passable.
We talked through choices of going up to point 1149m and down (which a few in our party preferred to avoid slow bush travel), and based on what we saw in person – we spotted and opted to first try a potential shelf shown by the red dashed line below (which avoided exposure risk in steep snow grass/tussock terrain).
I think it’s fair to say that for most other back country locations I have been in – the alignment between the topo map and what is on the ground has been relatively far better aligned. But in a Fiordland context, it didn’t just seem that there was a lot more happening between the 20m contour lines, but it really did feel that the terrain in general was quite different. We wondered if there had been large slips in the past which had changed things. It was certainly very vertical.
After being turned back on a few different lines around that red dashed line, we concluded we weren’t going to find a way through the bluffs in this location and so started to head back up assuming we were either going to go up to pt 1149m and down – or potentially head south of pt 1149m, and loop back around at elevation 750m-ish to our intended saddle. But there would have been a fair bit of uncertainty with what we might come across via this ‘plan C’ option based on what we’d just attempted.
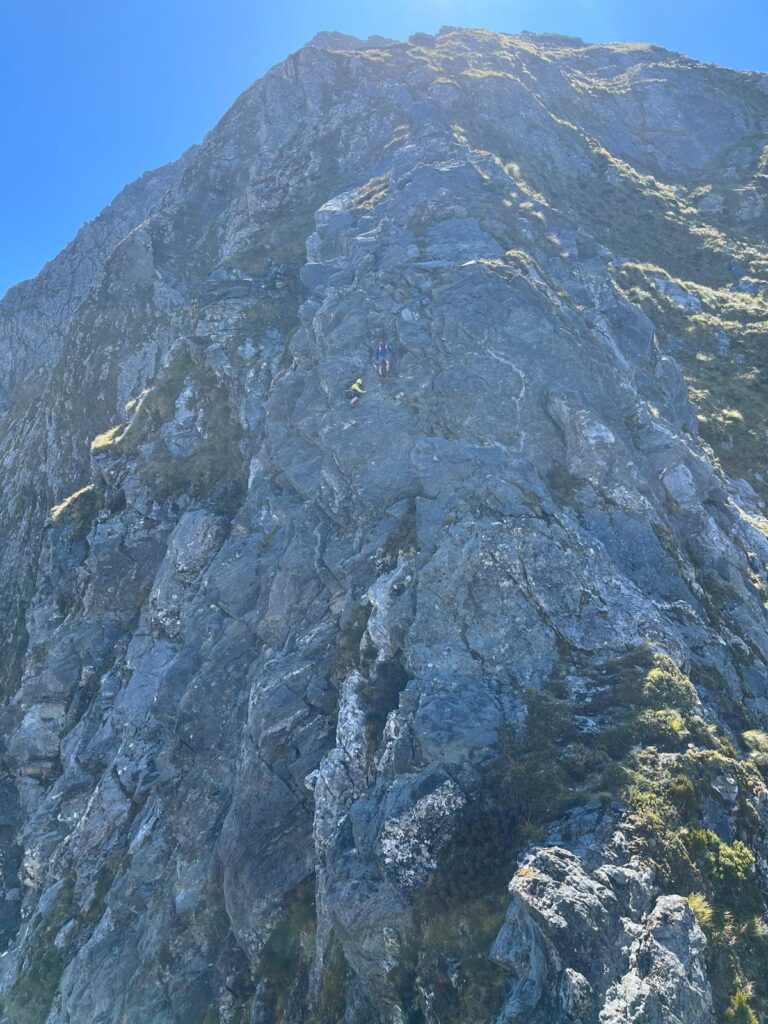
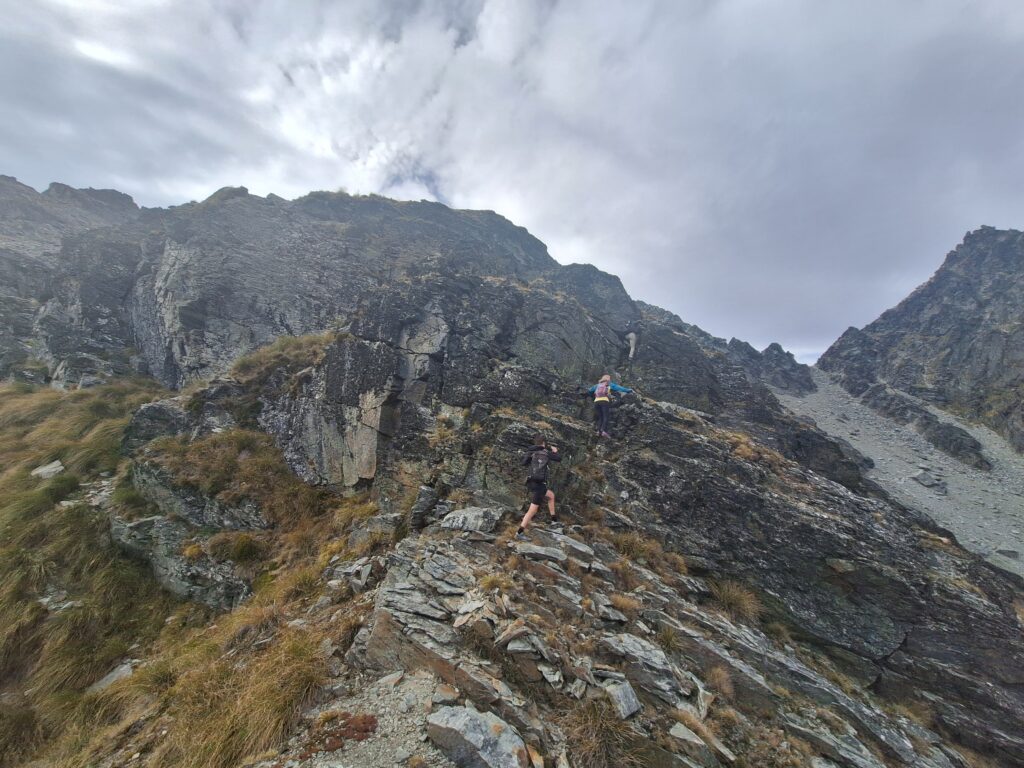
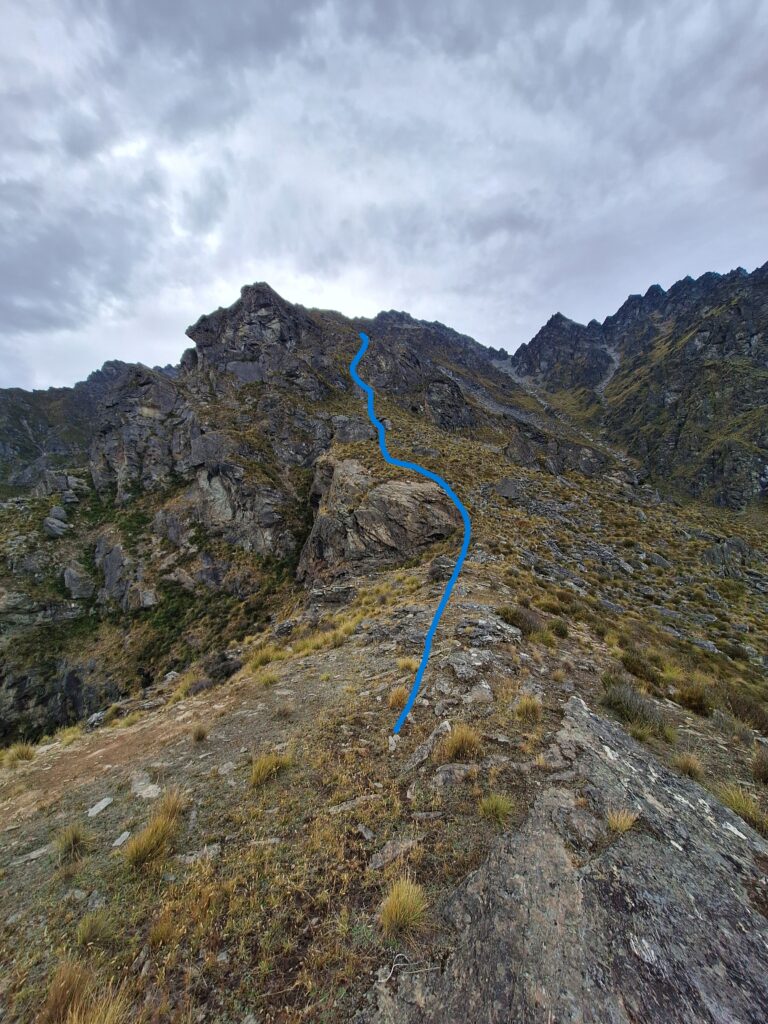
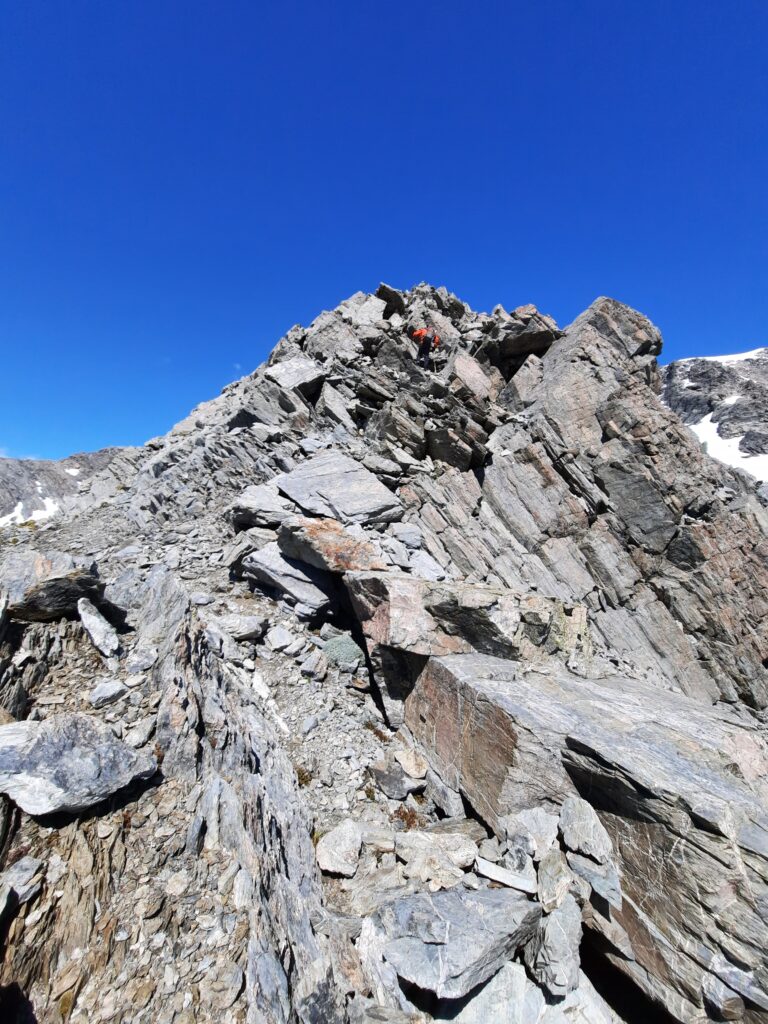
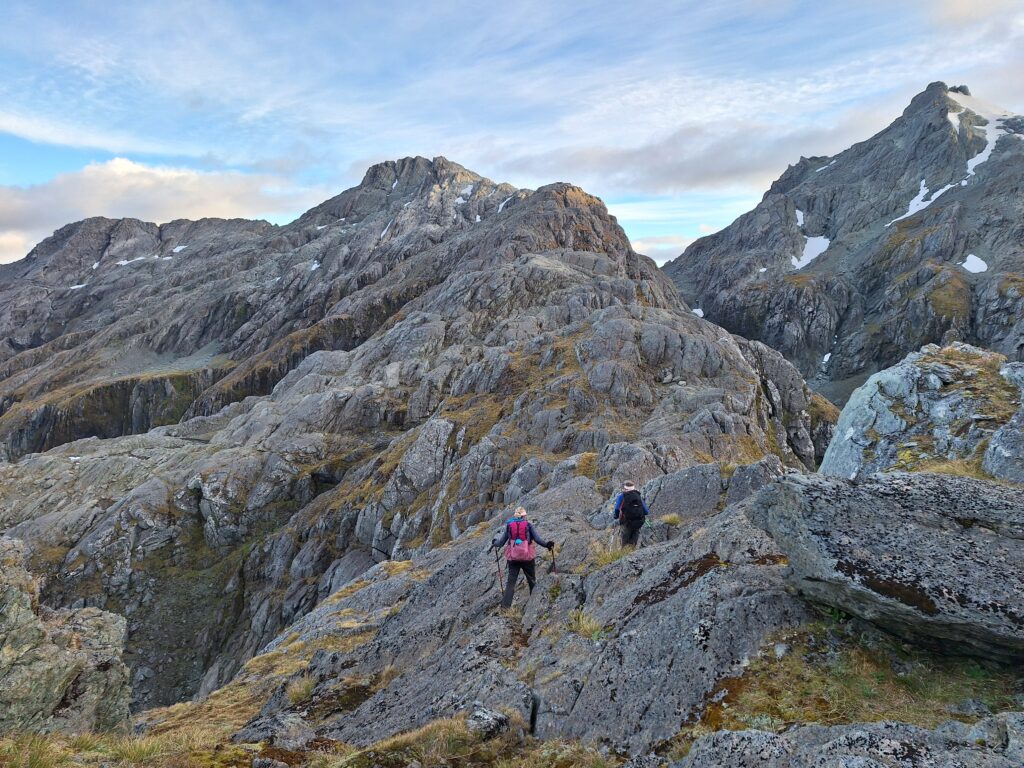
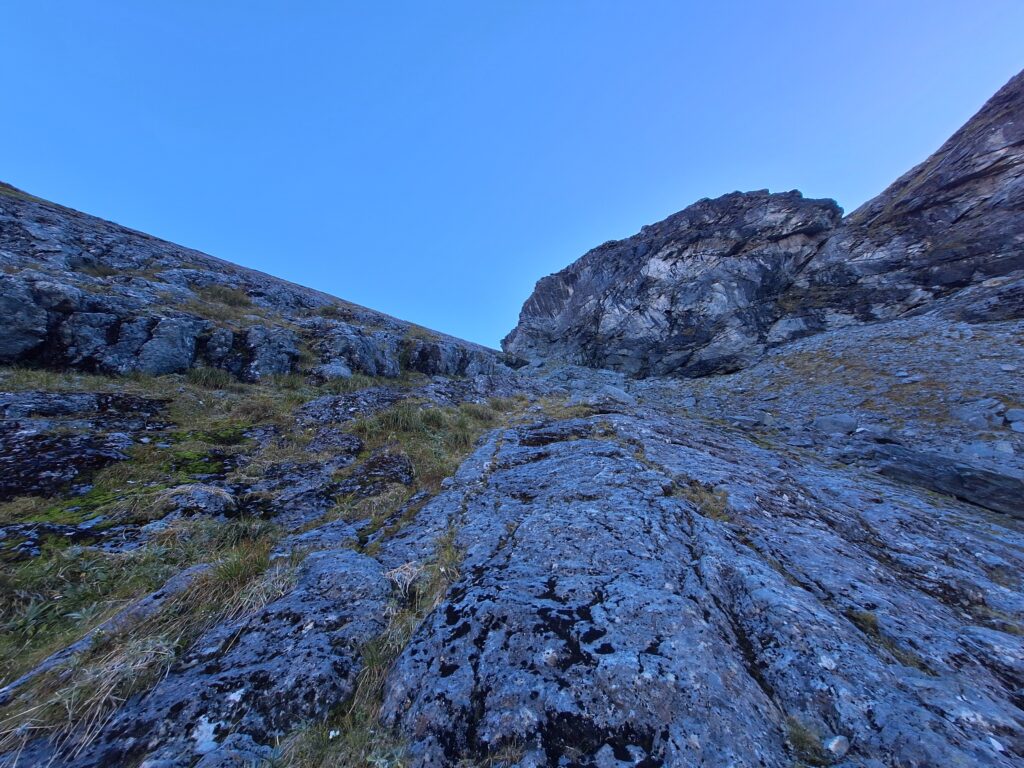
As we climbed, we spotted a potential other route – which is what we had success with – marked via the red line below. It definitely wasn’t certain as we started this if it would go and so the more confident in our party scouted 15-20m ahead to confirm if it continued to be viable or not.
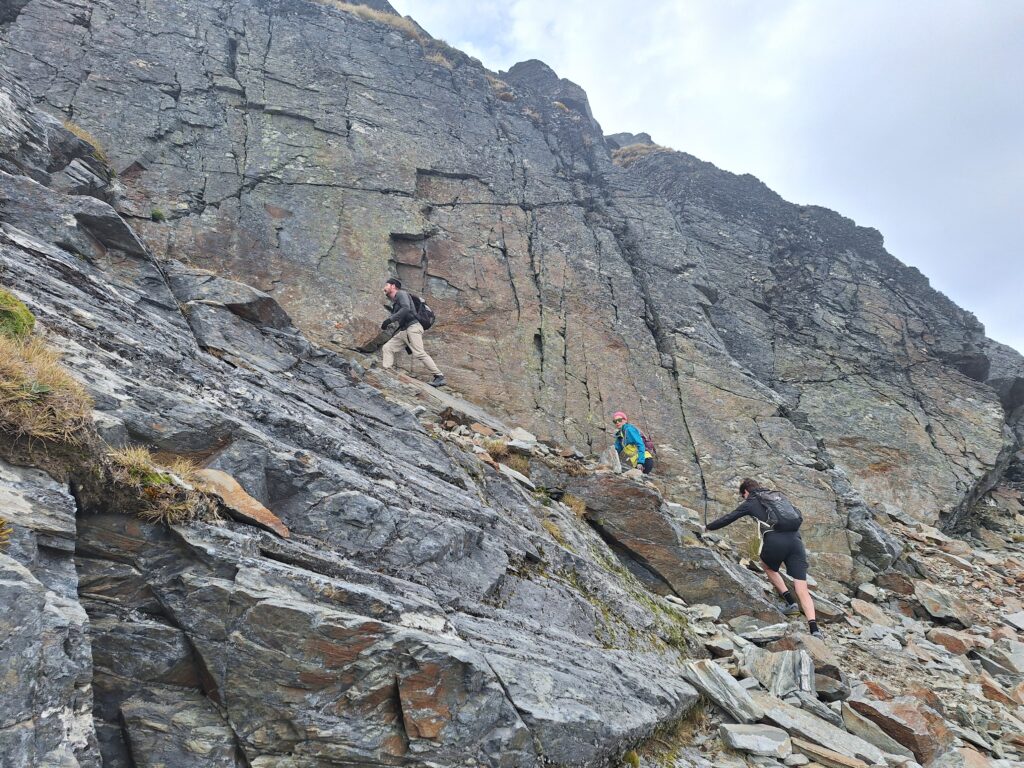
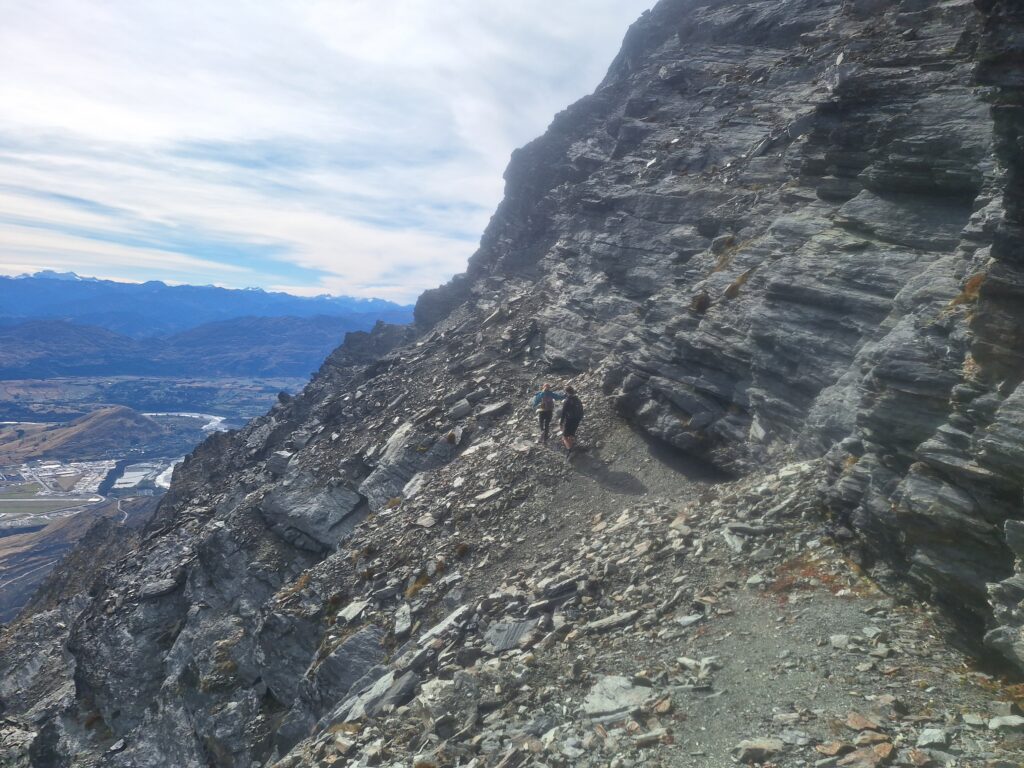
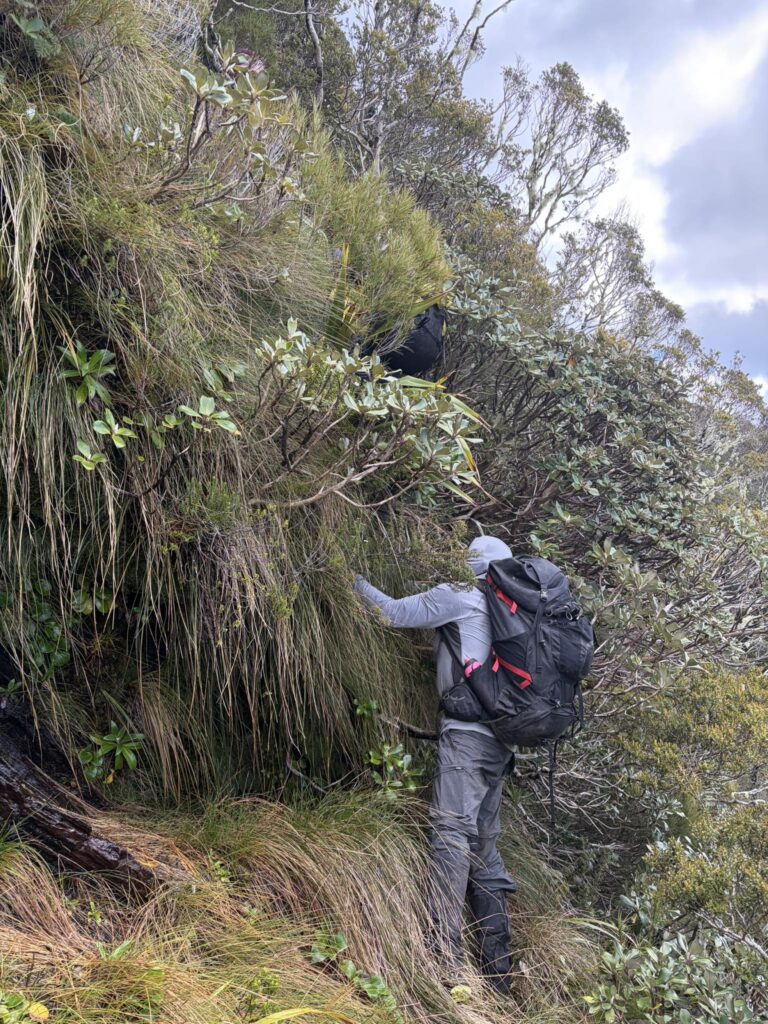
Entering the steeper section around 1,000m was quite intimidating for me, with one very steep 10-15m section in particular at the start through snow grass/tussock that was very exposed. Having had a decent grass slide in the past, I have no desire to experience the acceleration of a grass slide again where consequence is involved.
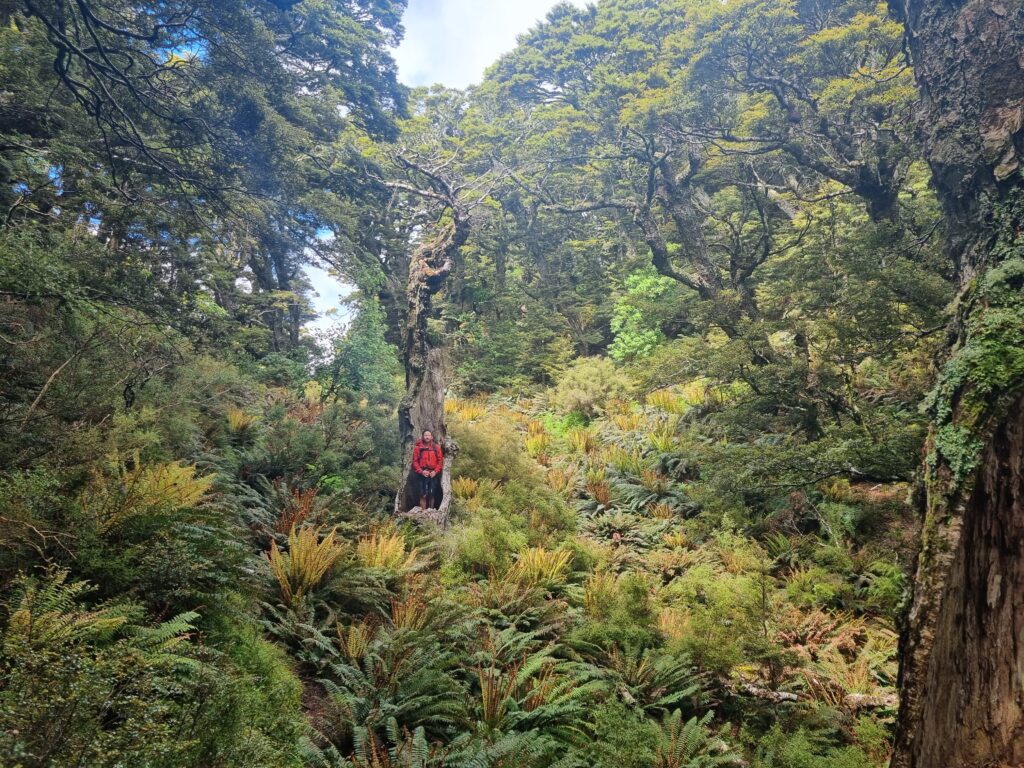
Anyhow, we made our way down section by section and soon we were at the bush line which made travel much safer and more secure.
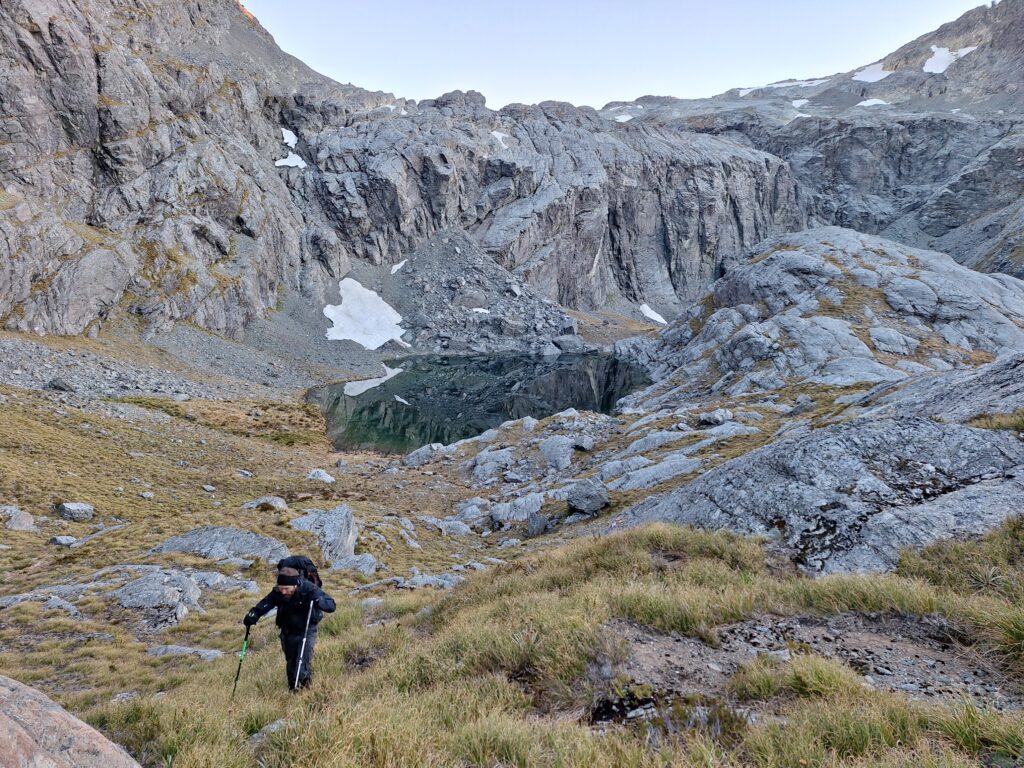
We clearly weren’t taking pictures where things were more intense, but a few images from the bush travel section down to around 780m elevation are below. There were still quite a few bluff sections we had to navigate through to get down but thankfully, we found a viable (but slow) path down.
Day 1 – a long and tricky nav to get past point 1149m
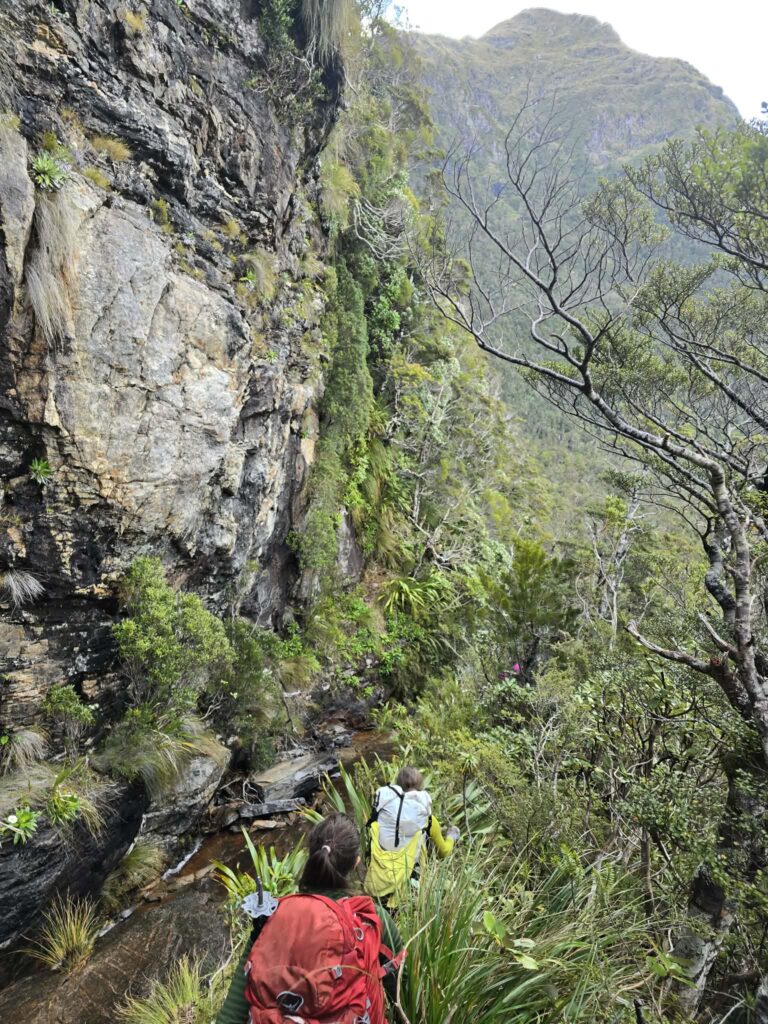
Day 1 – making our way down around 900m elevation
Day 1 – navigating below point 1149m, at around 800m elevation
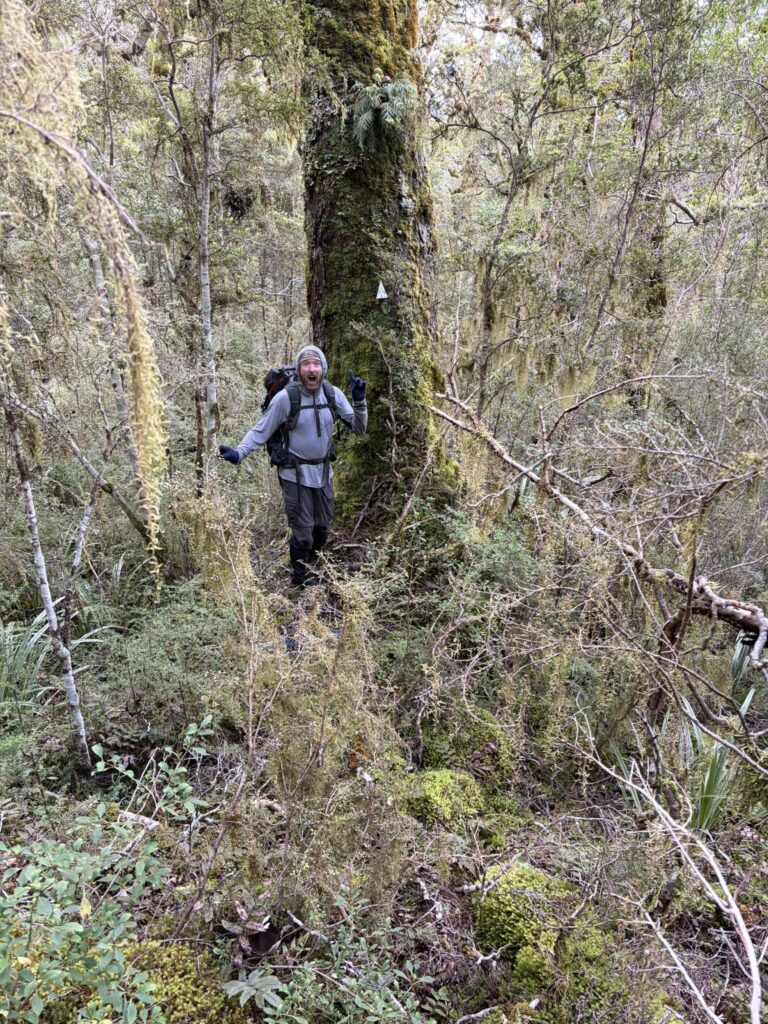
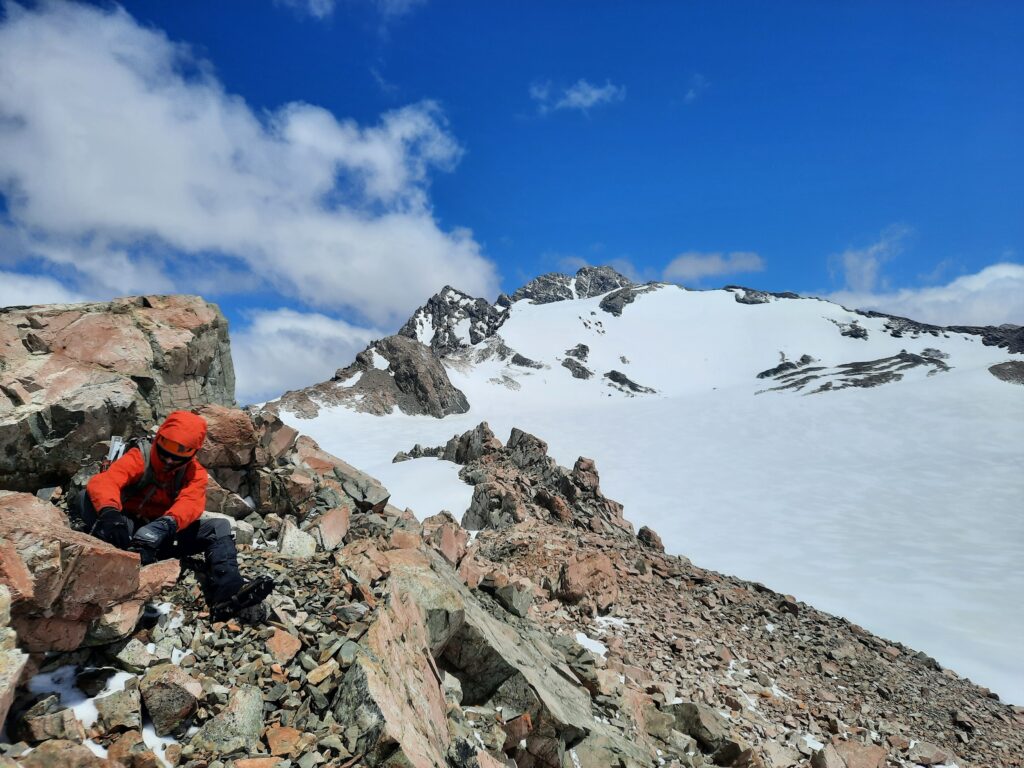
Day 1 – navigating below 1149m, at around 750m – just when you thought no human had been there before, an old metal marker on a tree!
Once we got down to around 750-780m, the terrain noticeably flattened off and we were able to move quite quickly. Despite feeling like we were in extremely remote terrain at this point – considering what we had travelled through to get there – it was quite a surprise to find an old metal triangle on a random tree. Someone had been here before!
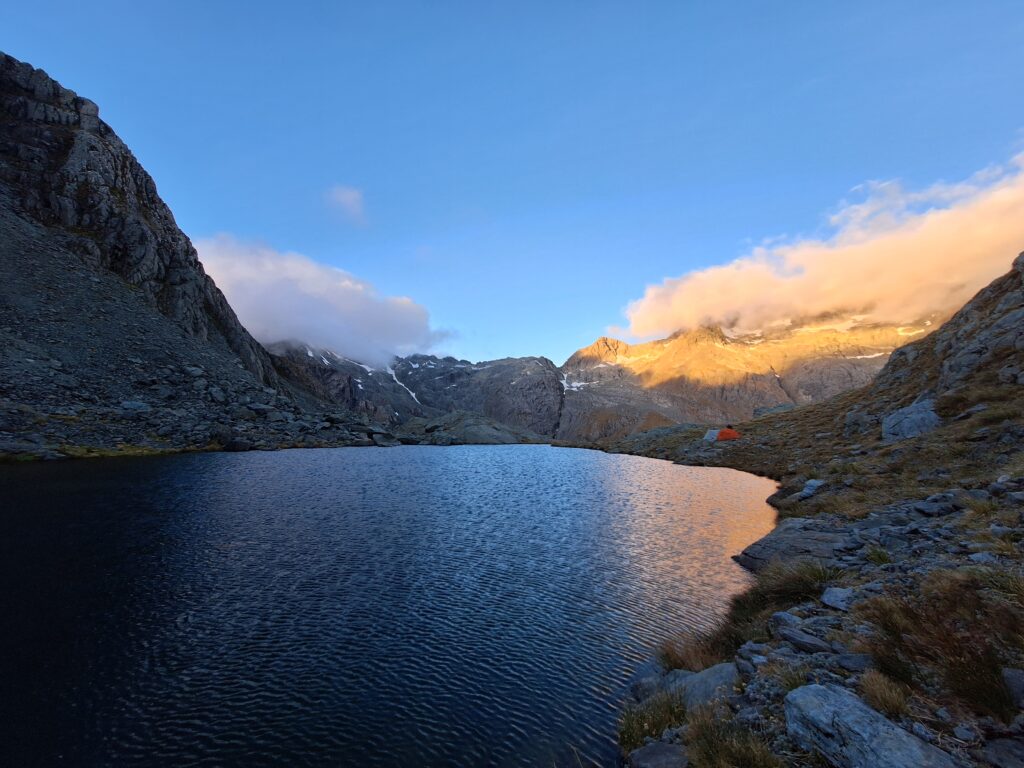
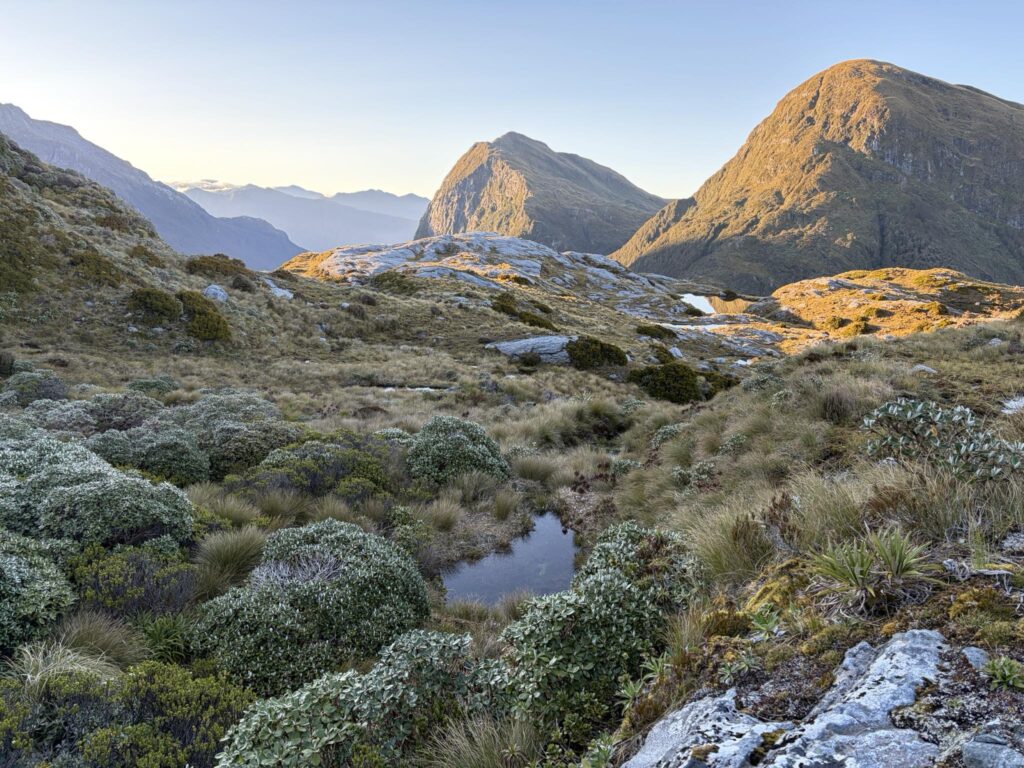
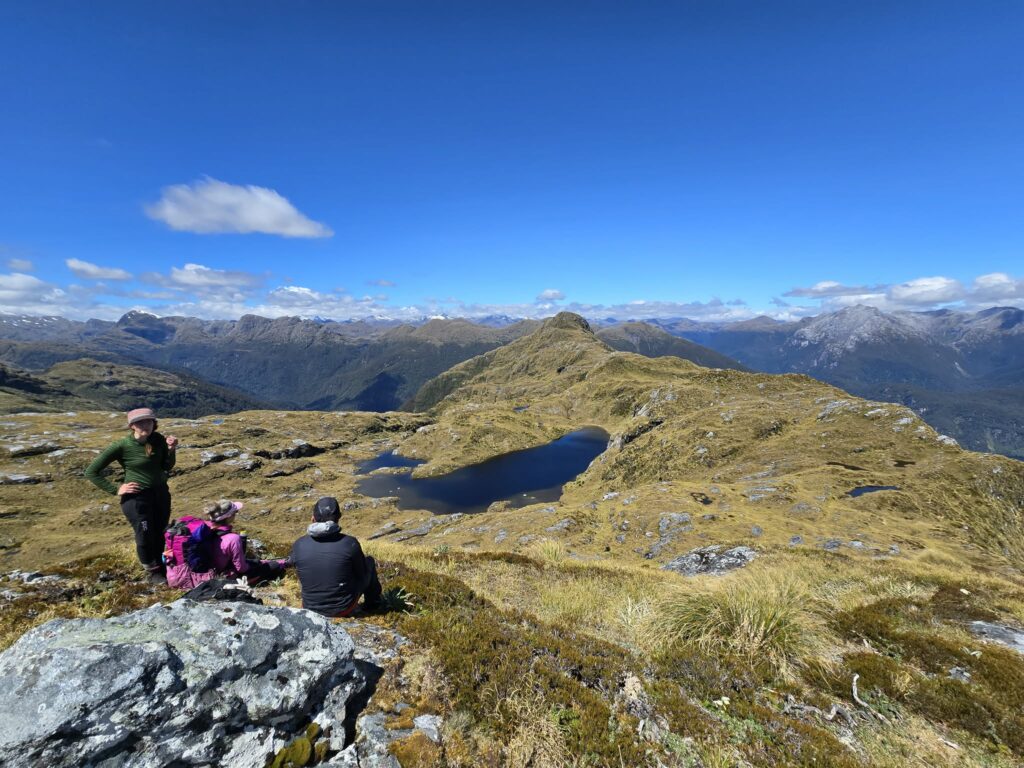
It took us a good 5 hours to get from saddle-to-saddle below pt 1149m, materially more time than expected. So we camped early at a really scenic group of tarns between points 1215m and 1149m. This camp spot was a highlight, and a touch surprising that there were still a good number of sandflies about at this elevation. The sandfly head net came in handy!
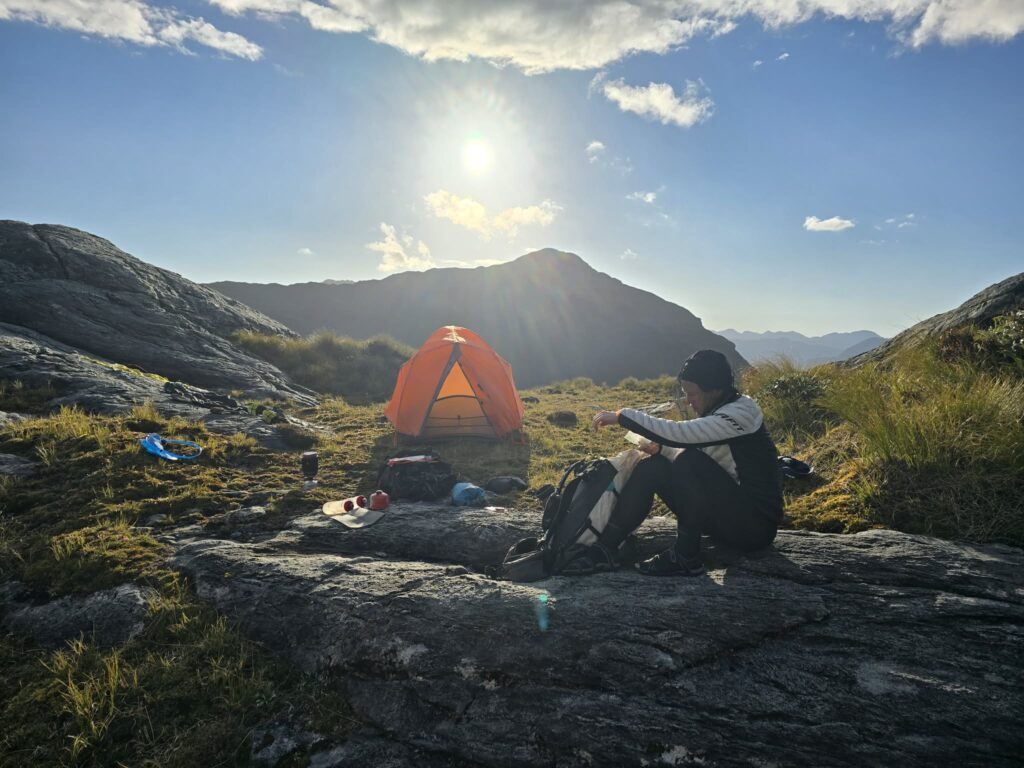
Day 1 – a beautiful camp spot
Day 2 – Dart of Destiny
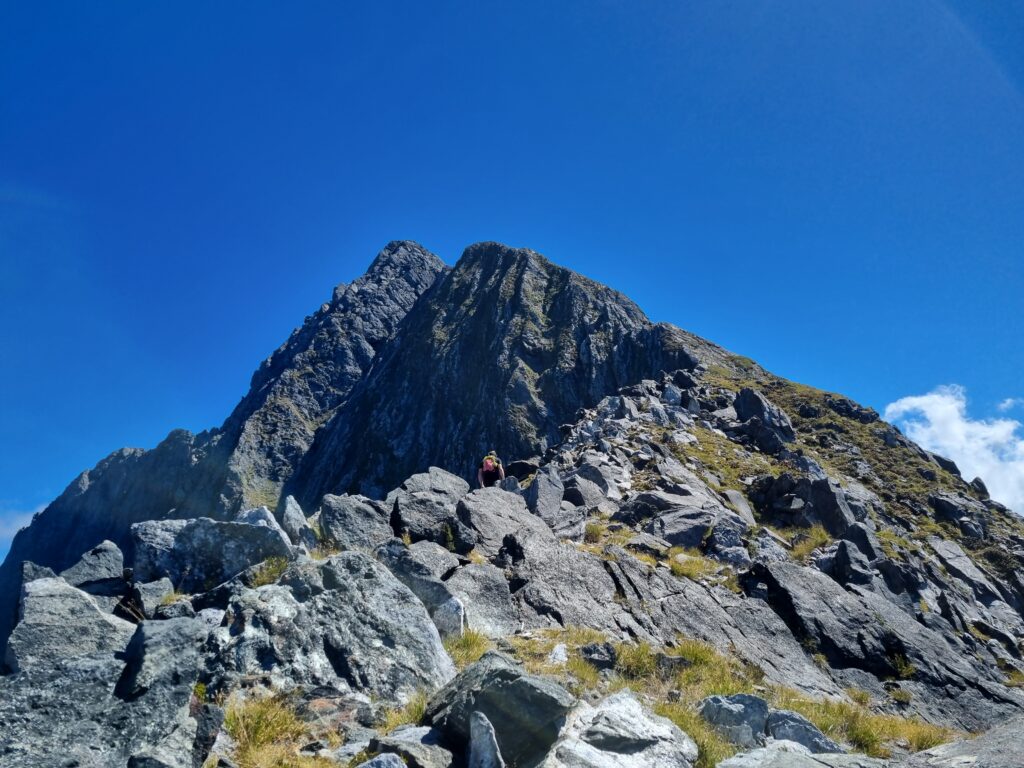
We started day 2 feeling refreshed, but conscious of another ‘crux’ to get around pt 1228m on our intended route – which was similar on the topo map to pt 1149m from the day prior. I knew I was not up for repeating the level of exposure from day 1 in snow grass, but we agreed to just get to the saddle before it and make the best call for the group after a better chance to scout things on the ground.
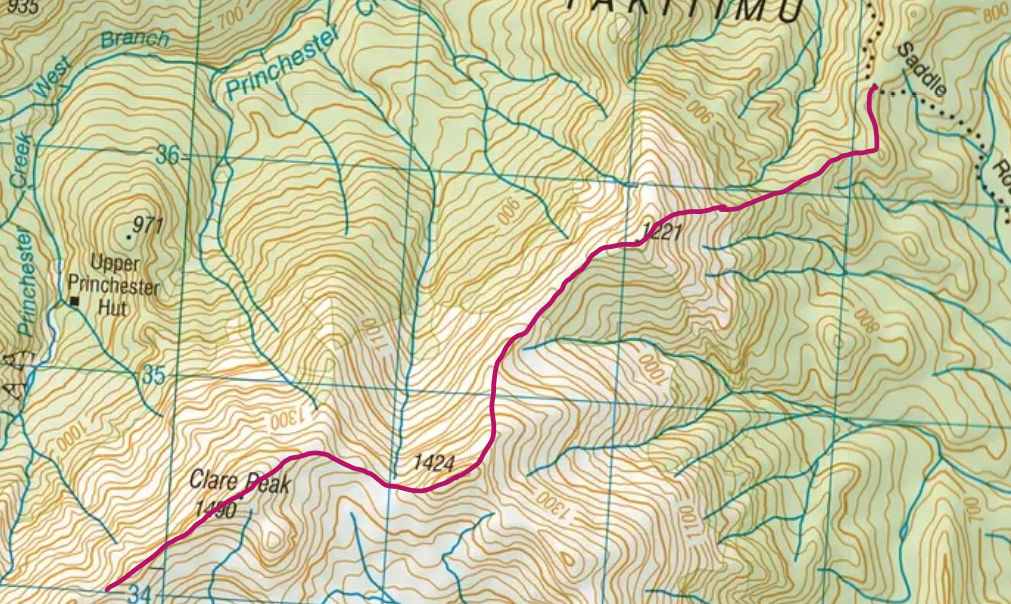
Day 2 – our track between camp 1 and night 2 at Supper Cove Hut
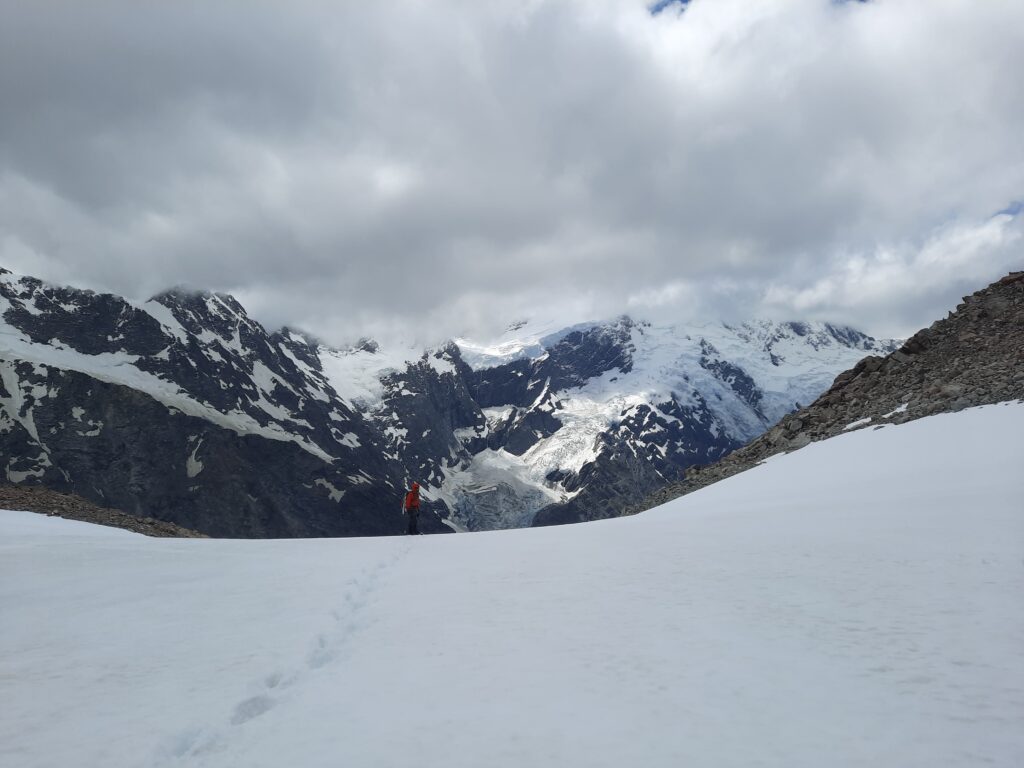
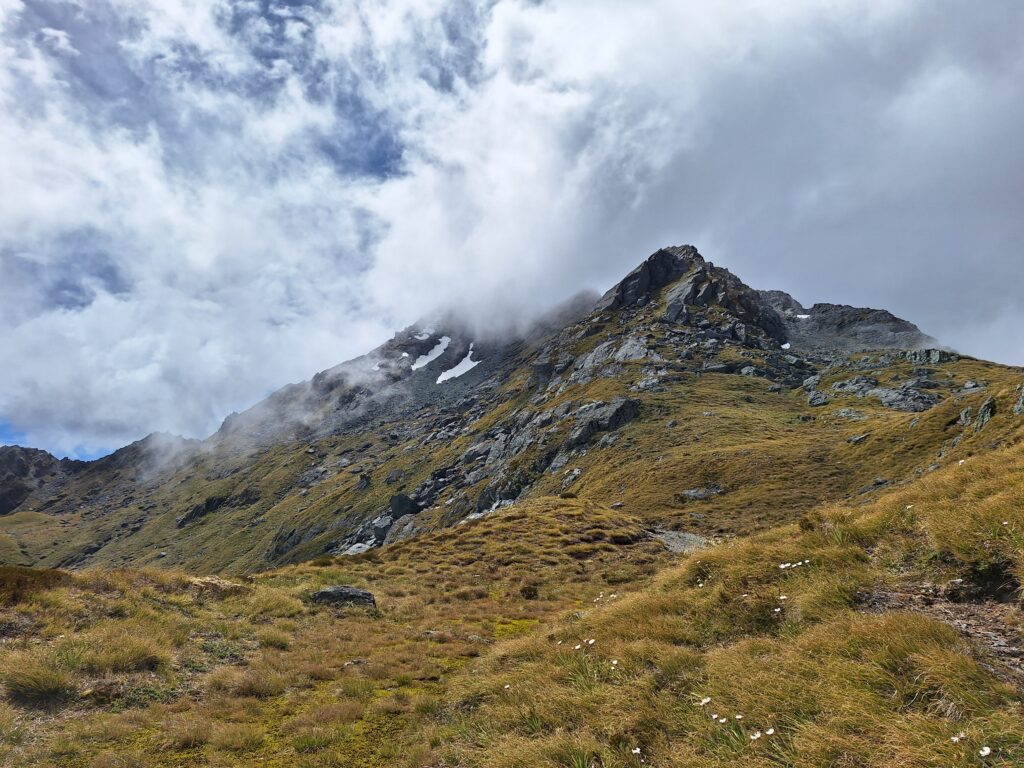
Day 2 – not long from camp 1 in the morning, looking back at pt 1149m
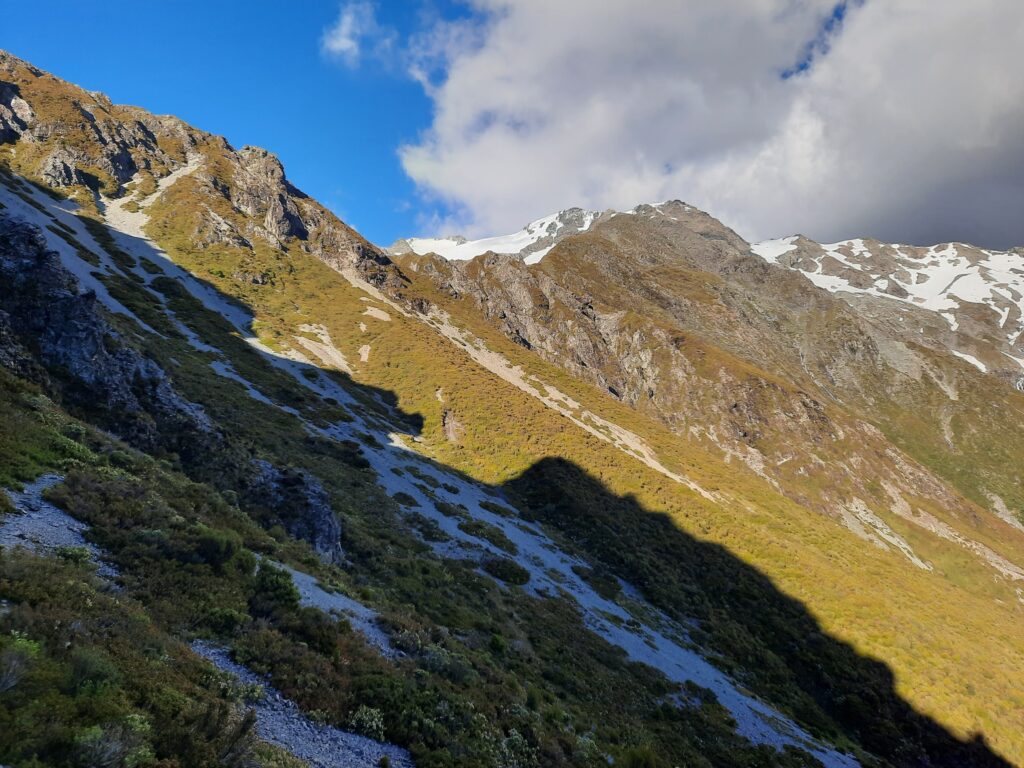
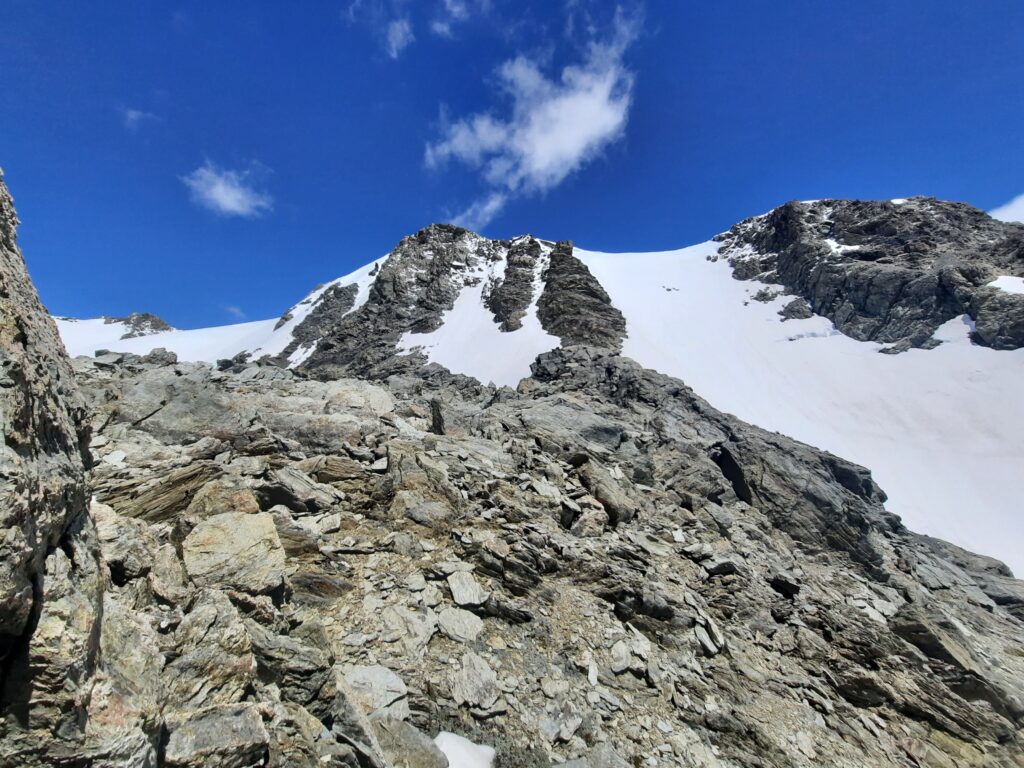
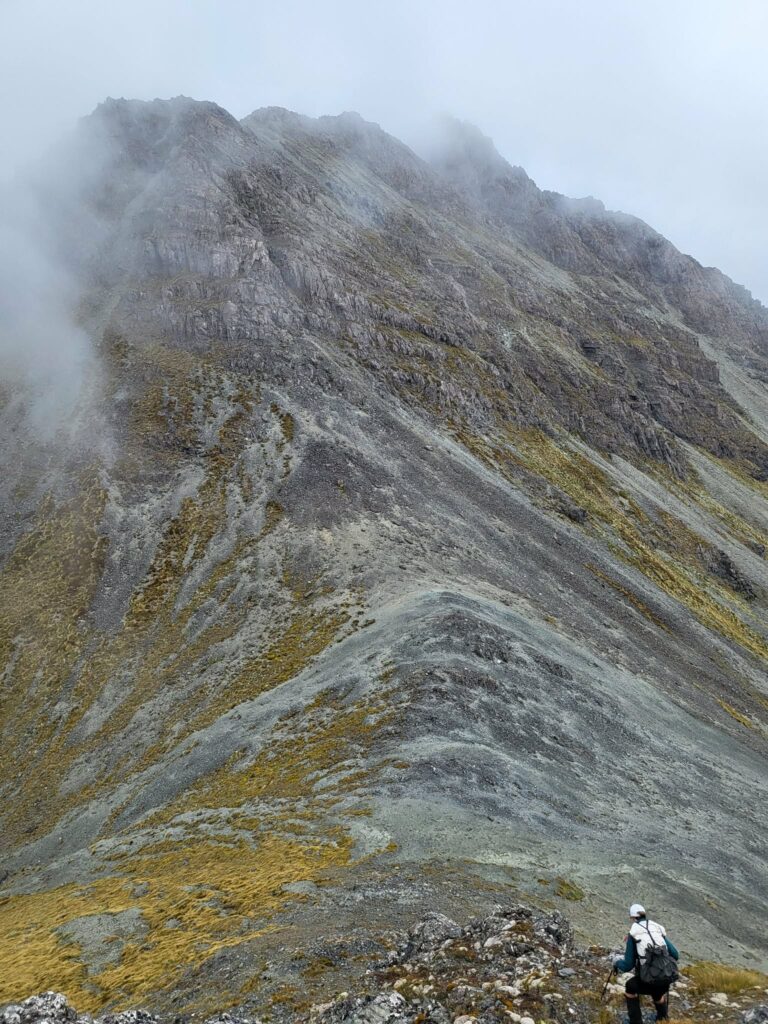
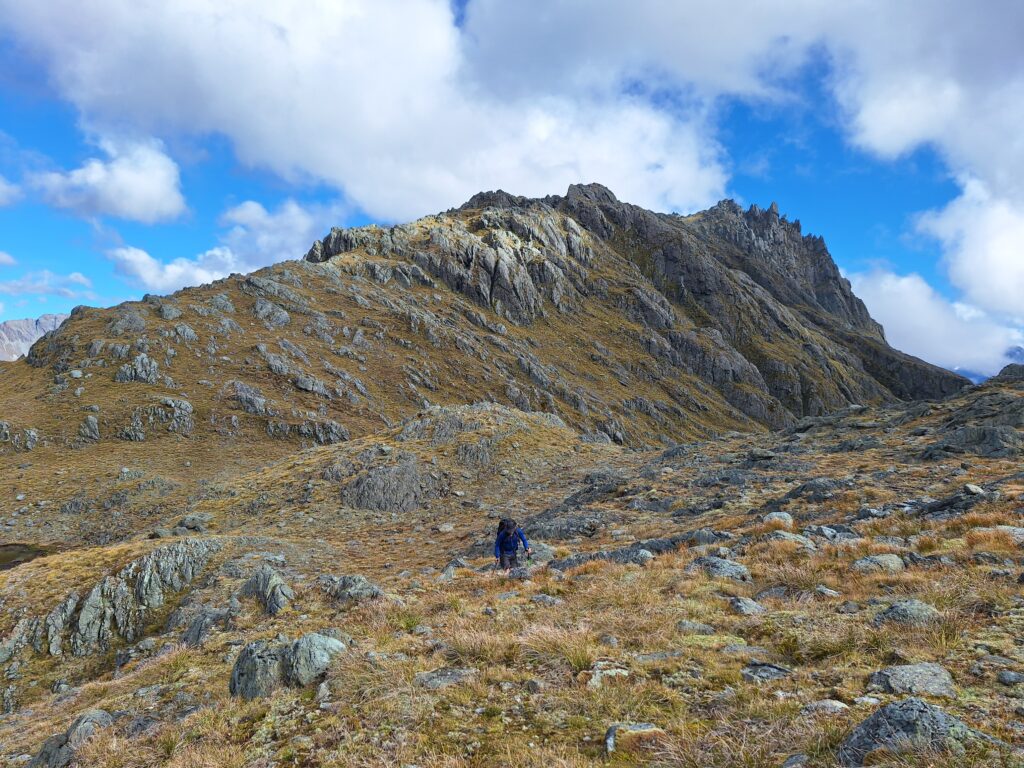
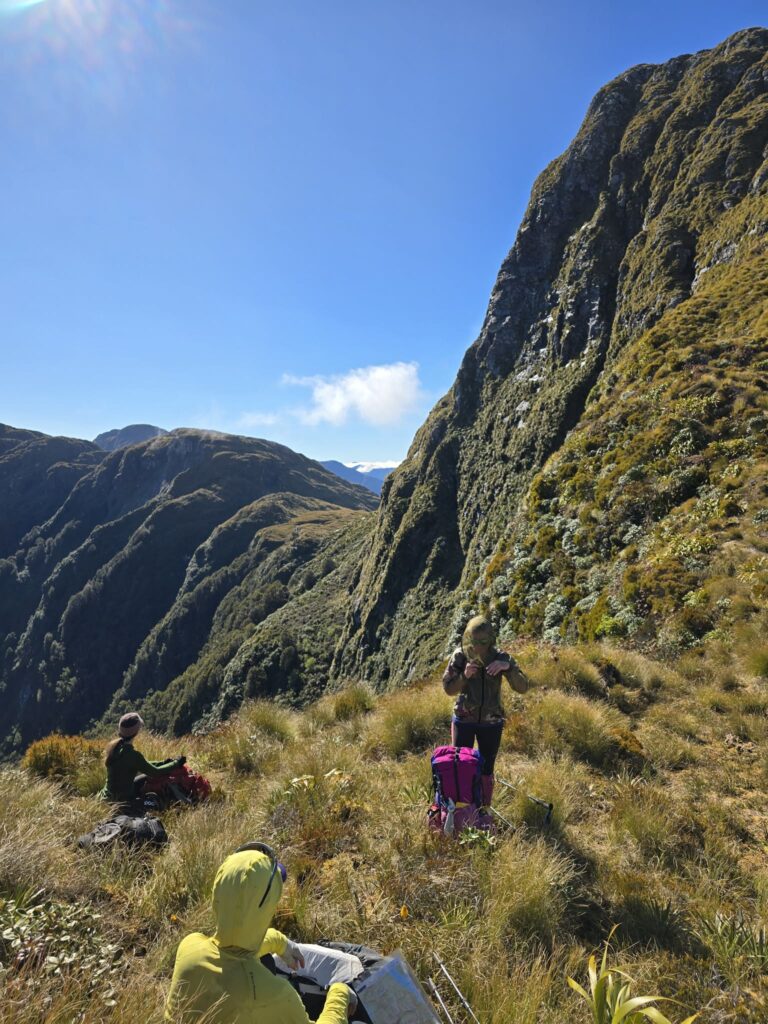
Travel from camp 1 to the saddle before 1228m was really pretty, and straight forward. It wasn’t long before we got a first good look at the north face of pt 1228m (below).
Again, in our trip planning we had expected to traverse here by holding elevation at around 980m (per the blue dashed topo line below), but comparing the topo to the photogragh immediately below should highlight that this was not viable from our perspective. There was also a waterfall section (not fully shown) along here which created a very impassable ‘gut’ on the main face.
Again, we did have some split preferences in the group to get over to the next saddle – largely around avoiding slow bush travel vs steep, exposed terrain on snow grass/tussock. We had good team and collectively decided we needed to go the way where everyone felt safe – that meant slower bush travel and reducing elevation to get around pt 1228m.
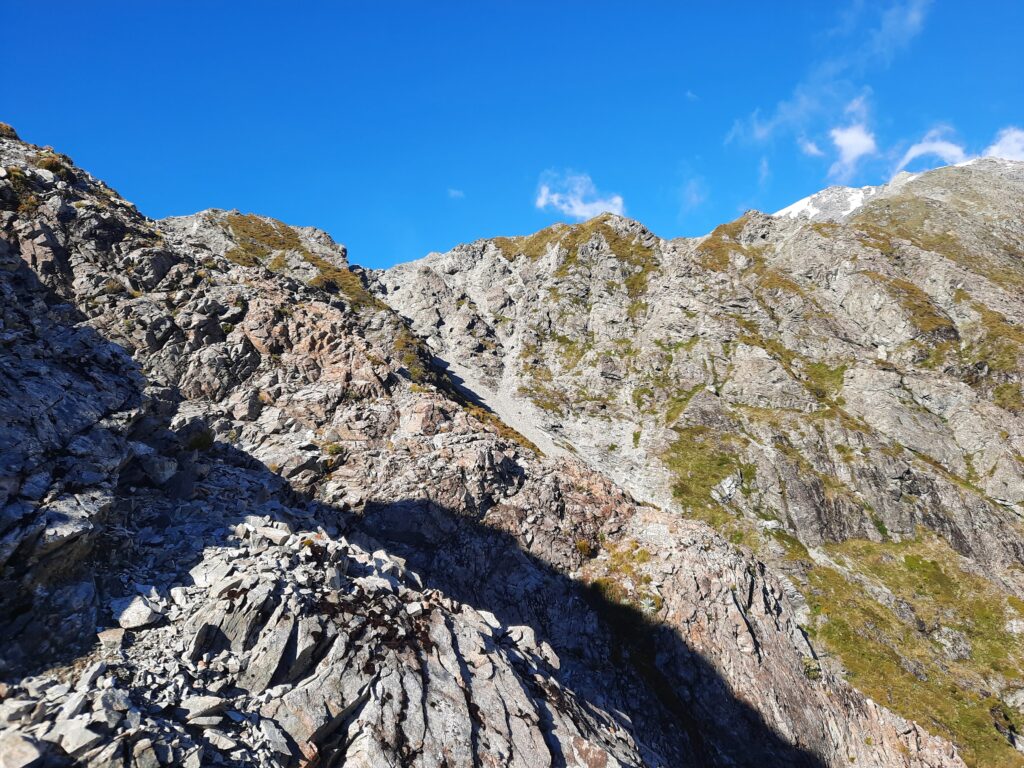
Thankfully we had spotted a good route from the saddle by hugging the bottom of the cliff around 900m.
Having good visibility (i.e., no cloud / fog) – was quite material in terms of helping us spot a way around tricky sections on this trip – given how different things were on the ground relative to the topo map. We purposefully did this trip (adjusted out dates) to make this work during a good weather window – but I would not recommend attempting ‘new’ terrain like this if the weather outlook was anything other than good.
Day 2 – view from saddle around 1,000m looking across below pt 1228m – our intended topo route holding elevation here was a no-go!
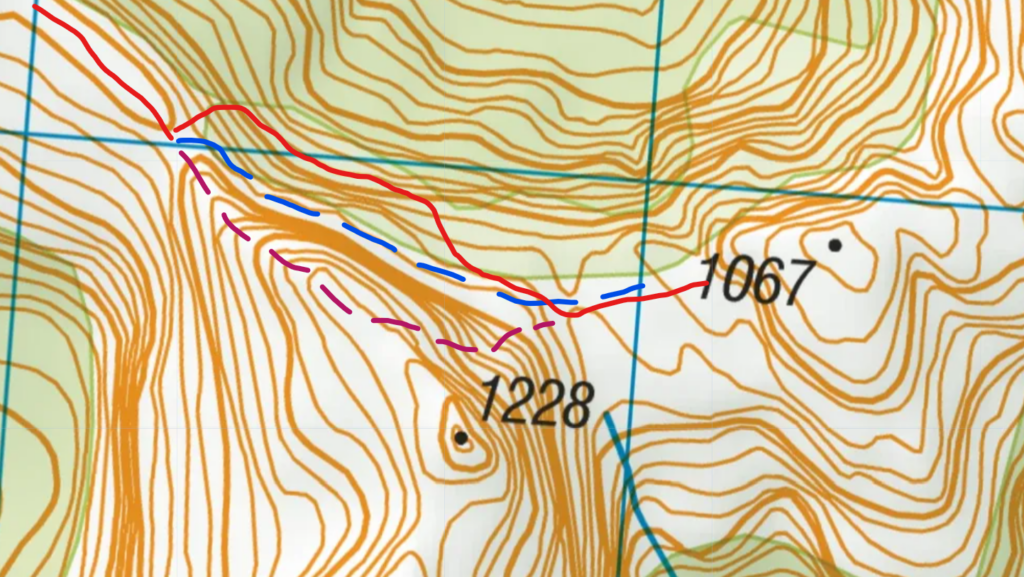
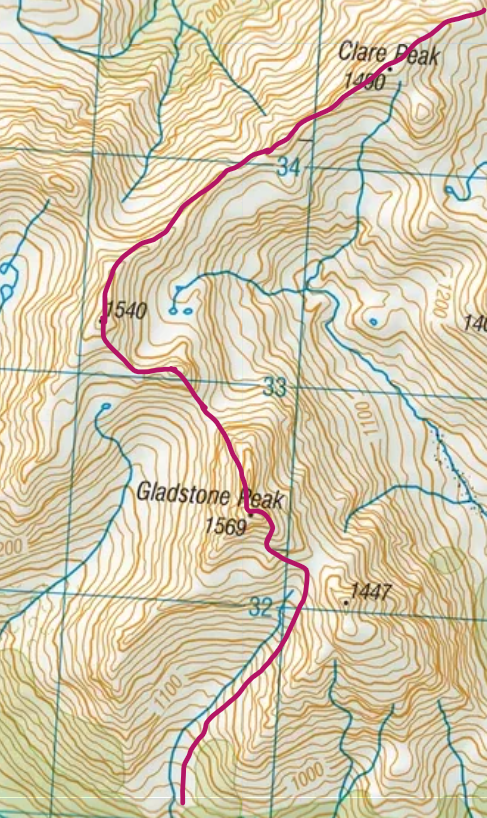
Day 2 – choices we considered to get back 1228m
The topo above shows routes past 1228m that we considered either before or during the trip – the actual route we took (red line) – ended up being quite efficient for bush travel and it took us around 3 hours saddle-to-saddle.
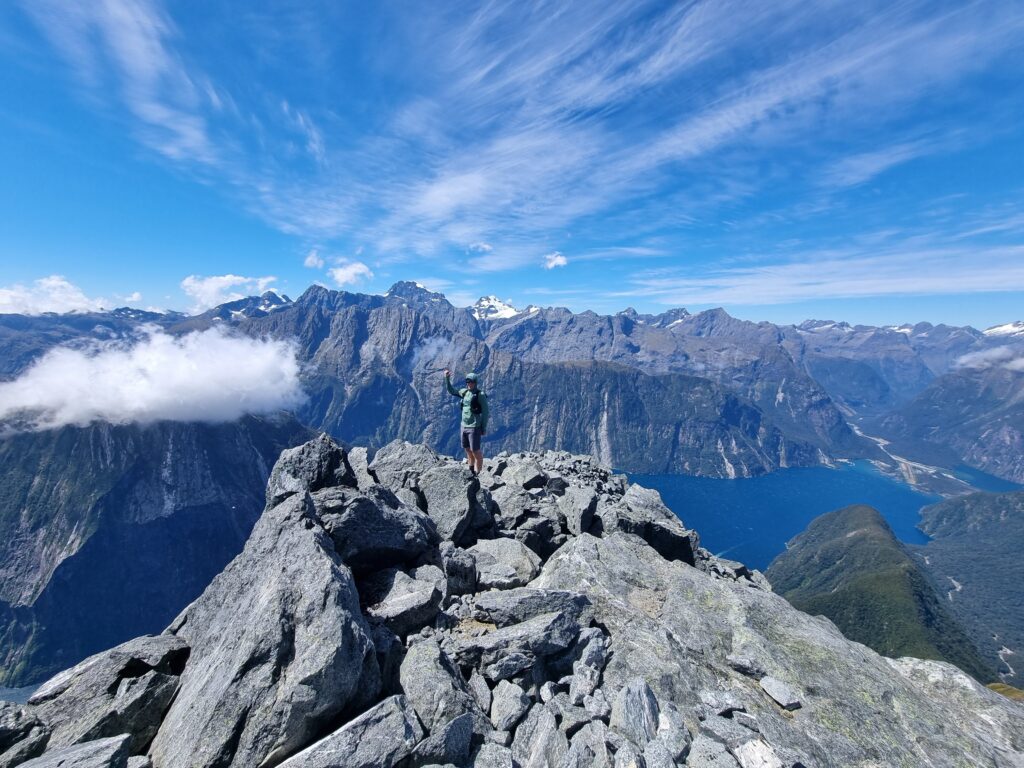
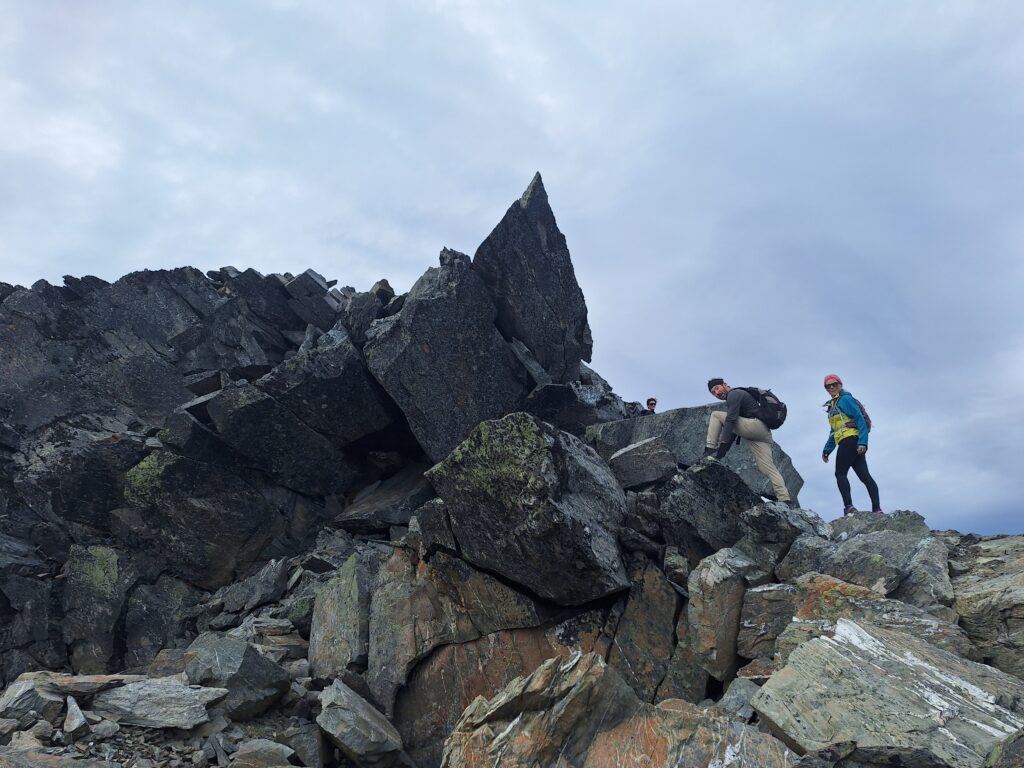
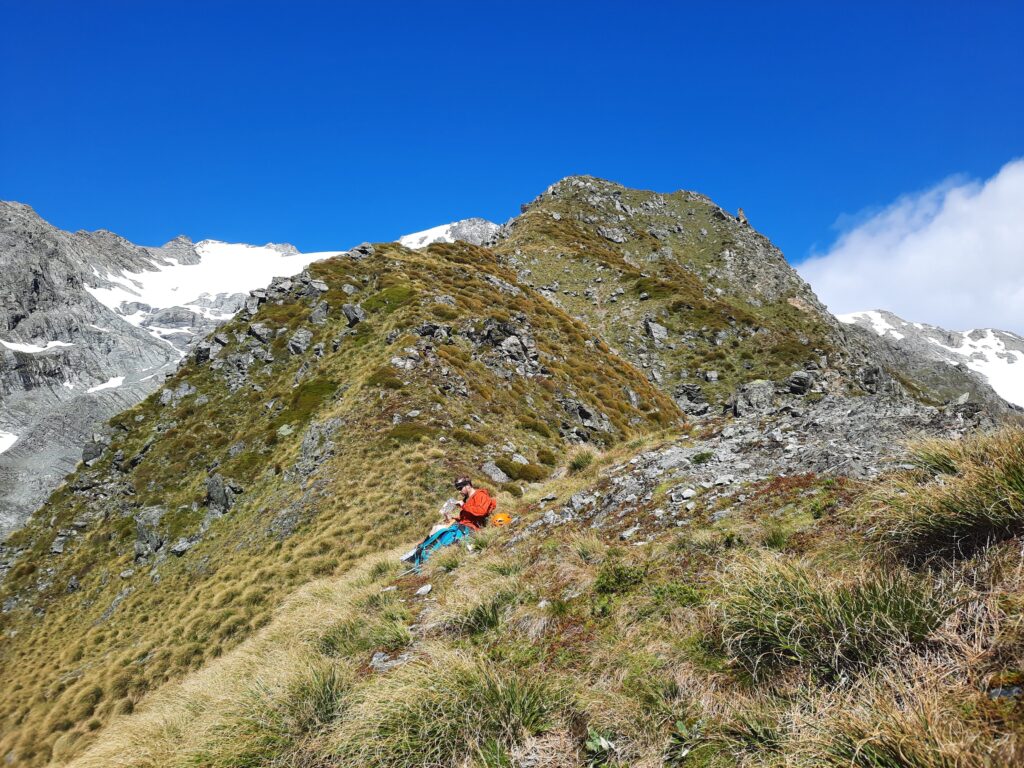
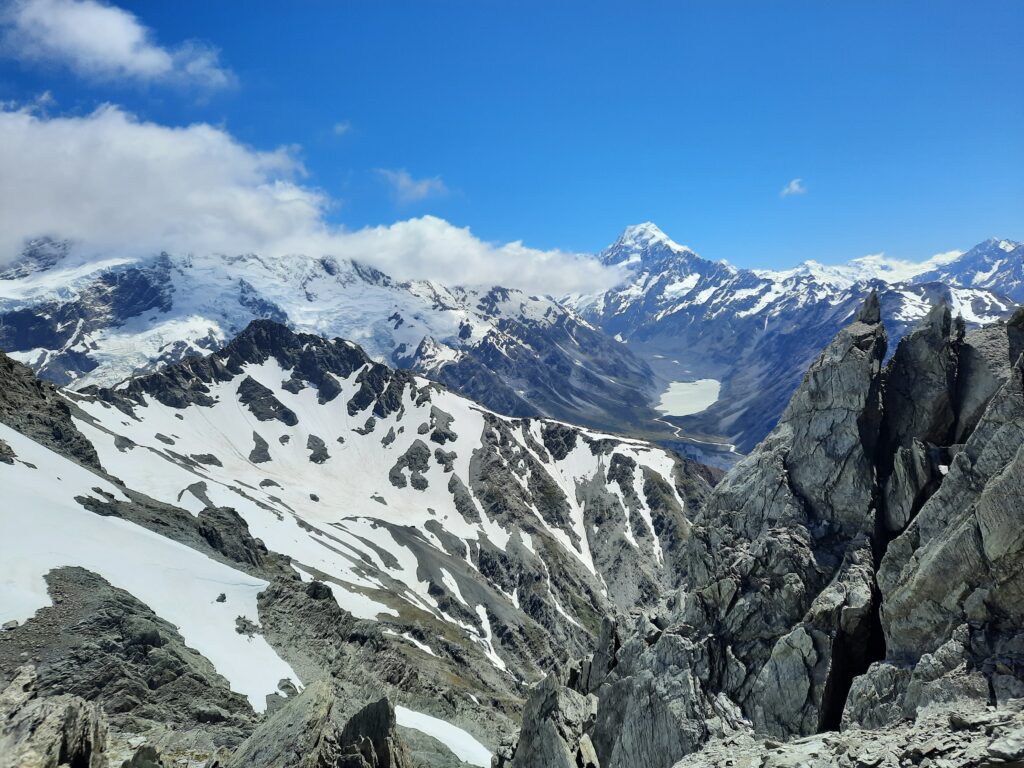
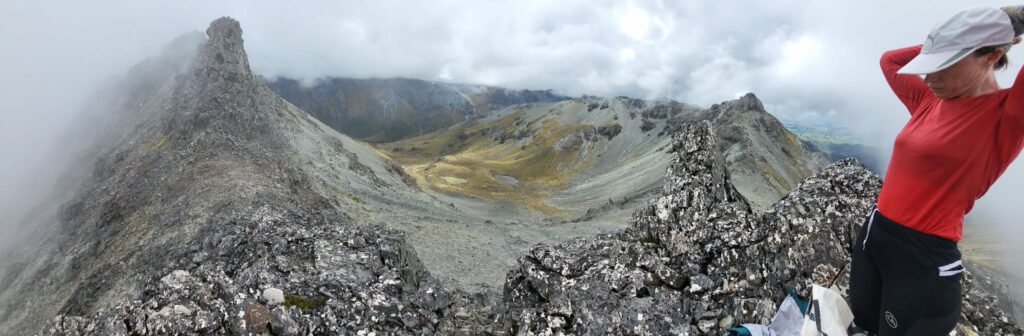
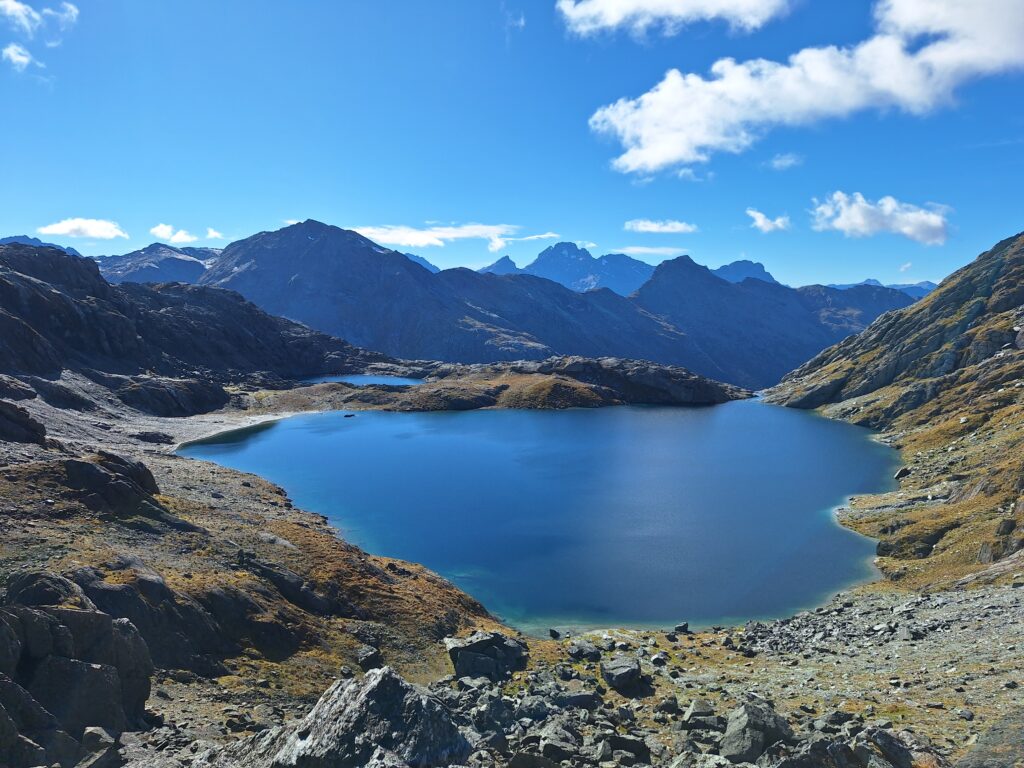
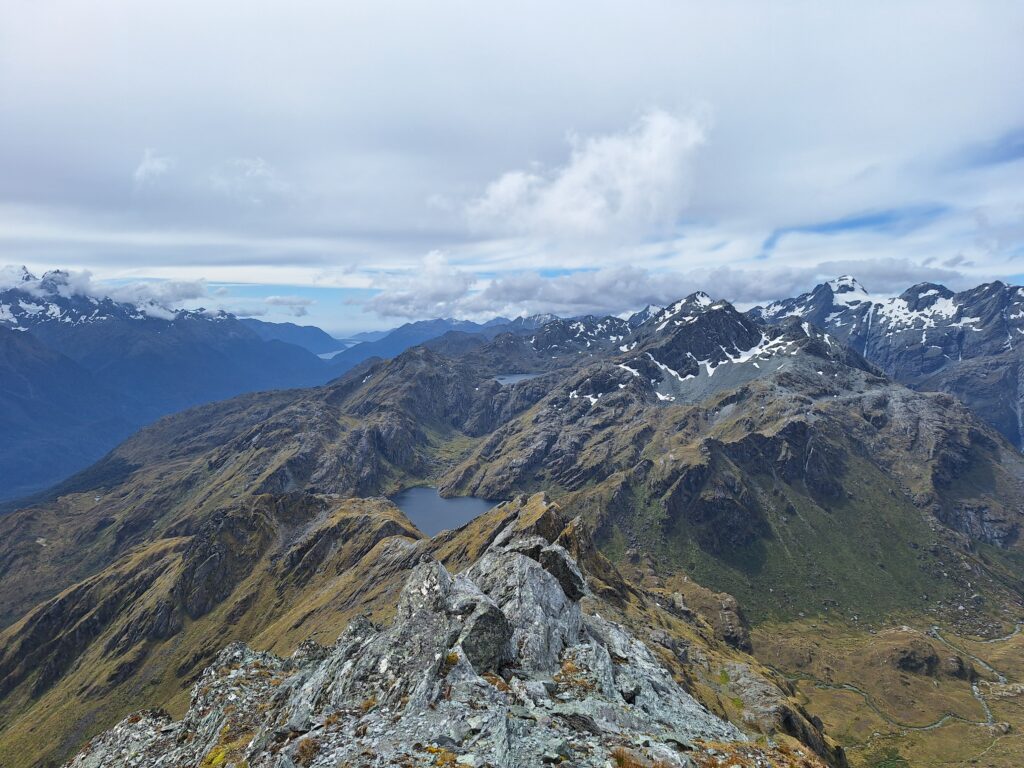
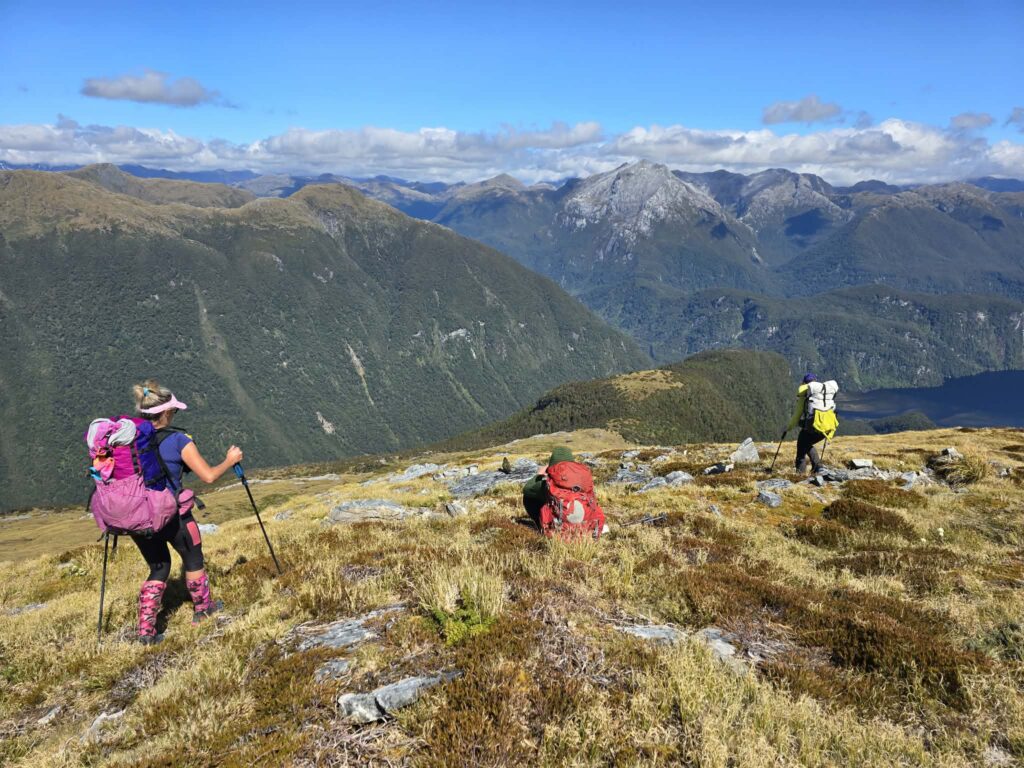
Once we were past pt 1228, the balance of travel on the tops was really great and quite open country. There were some interesting features to get around but again – really straight forward relative to getting past those prior high points and our travel speed picked up a lot. We spotted a few deer along the tops too.
Day 2 – ridge travel
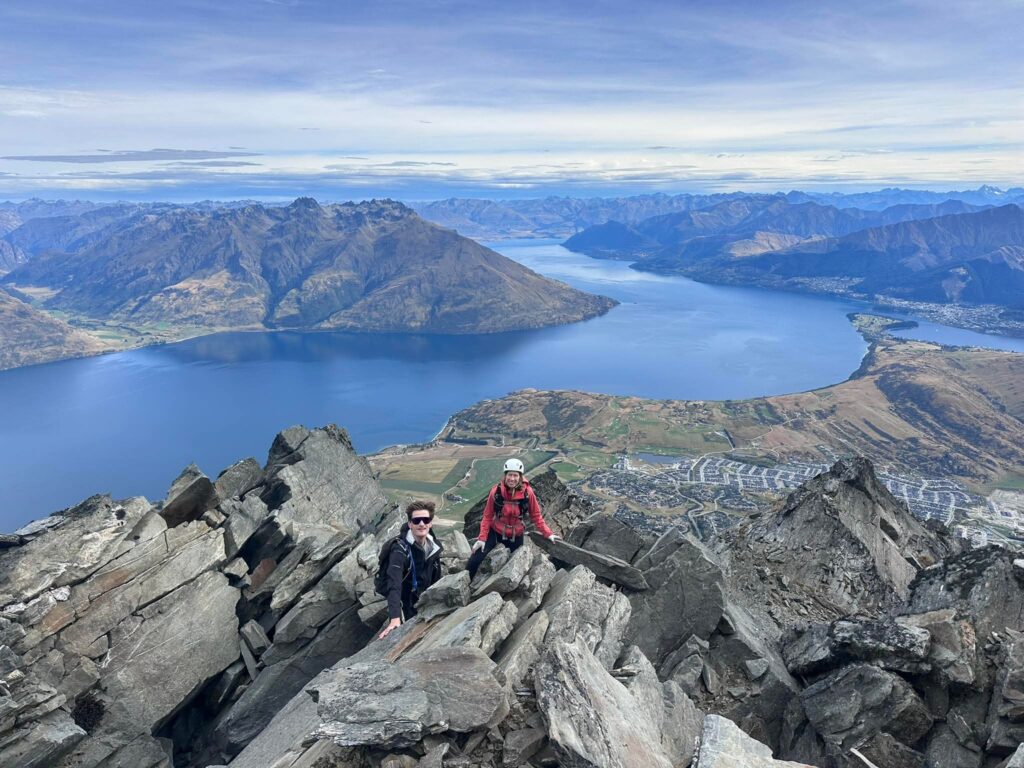
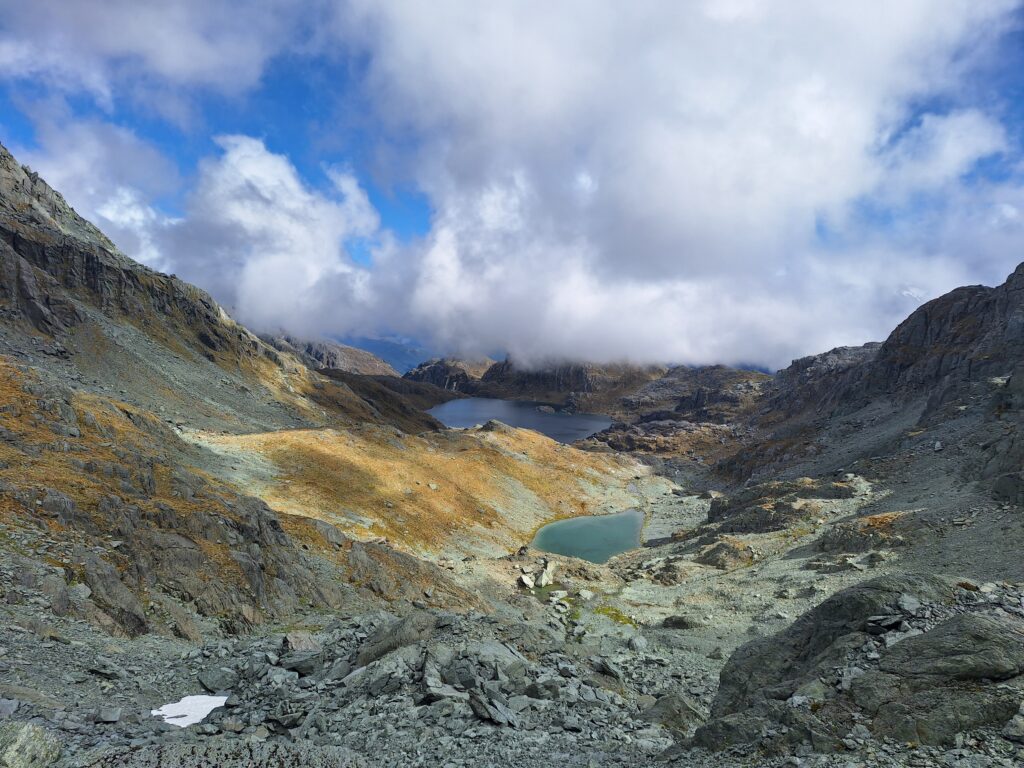
Day 2 – looking down on a large tarn just after pt 1175m
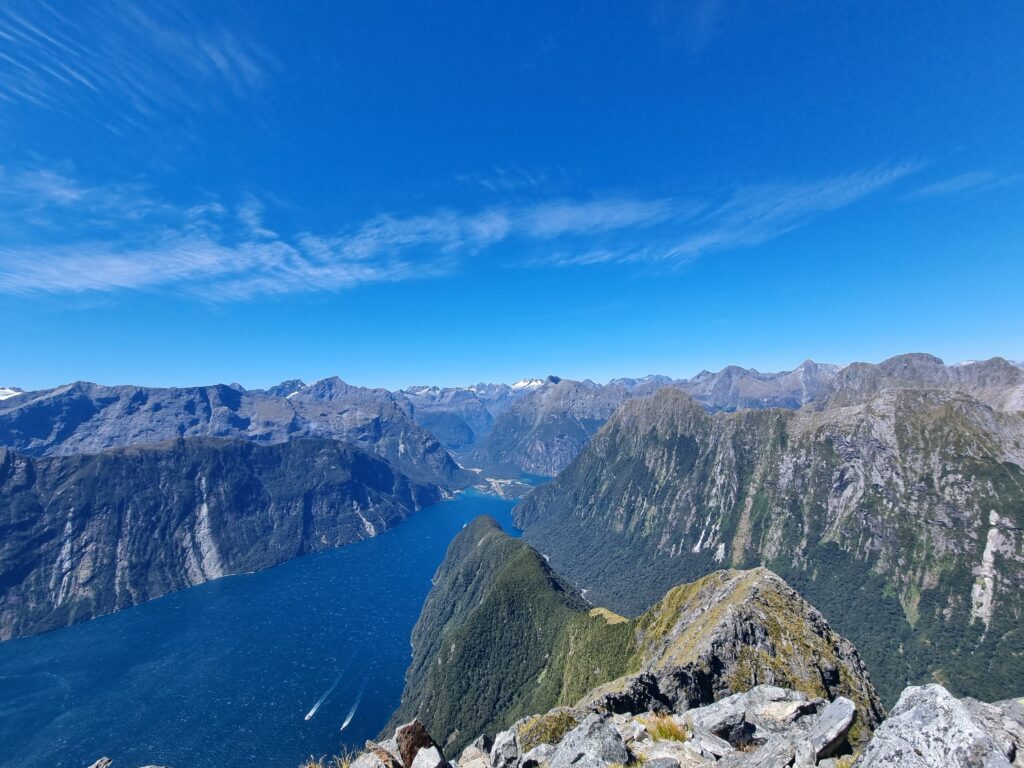
Day 2 – looking down pt 1191m to the ridge that would take us to Dusky Sound
We had thought all the ‘hard stuff’ was behind us once we left pt 1228m, but the terrain kept of offering the odd challenge as we continued. For example, heading SE below pt 1191m there was an unexpected cliff we had to navigate around by heading East a bit to loop back around to the ridge. We also noted the potential for bluffs in the last few hundred metres of elevation before Dusky track – which turned out to be a lot more challenging that expected based on the topo map.
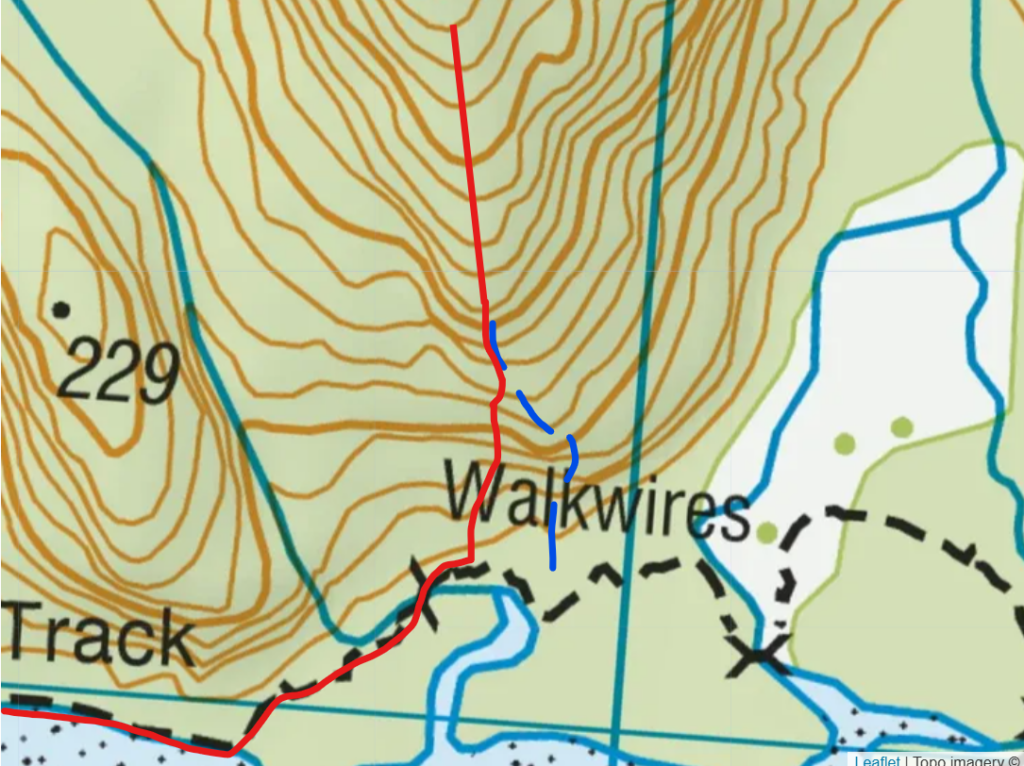
Our intended line to intersect Dusky Track is shown below via the blue dashed line, but as we got to around 150m, things got very bluffy and it was not possible to go down straight. It was round 9pm at this point and having scouted a few options that were a no-go, we were aware we had about an hour of light left to figure out a way down before we were likely ‘camping’ on the ridge.
The topo made the obvious choice look to be heading West, but with major bluffs in this direction, it certainly did not look like the obvious choice on the ground. After a little scouting East and West of the ridge – with neither direction looking ‘obvious and certain’ – we decided to head West assuming we must ‘on average’ have more viable terrain closer to the river shown East of pt 229m on the topo below.
We had to ascend around 50m to get above a cliff in the bush, and the more confident member in our group (rock climber :)), picked a way through tree fall / steep terrain down. We always made sure to scout ahead and look at what the trees were doing below to get a sense of what might be happening on the ground ahead, but it did require us to do some things that were definitely not reversable and so we had to be confident enough that we could get through the next section. It was helpful to know at this point that we had a short 30m rope in the back pack to sling over a tree if we needed to get down a bluffy section.
Thankfully – it felt we had found one of the few (or only?!) viable ways down, and we were quite happy to reach Dusky track around 10pm.
Day 2 – getting to Dusky track
Day 2 – walking Dusky track around 10pm after getting off the ridge
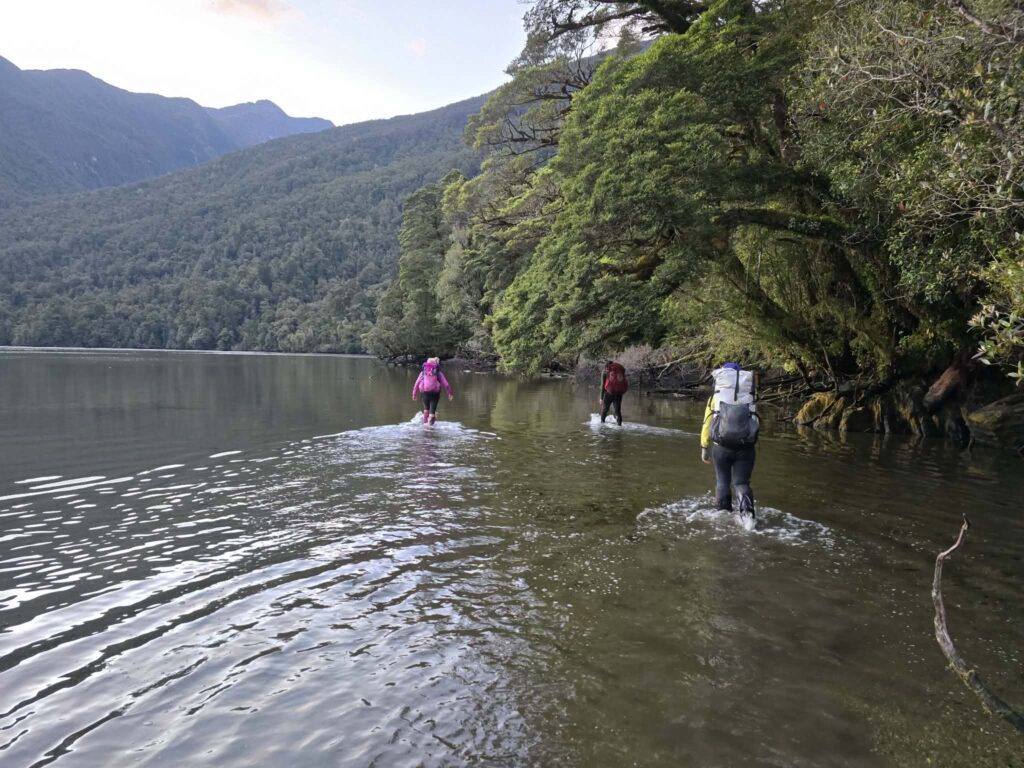
After getting off the ridge, the walk to Supper Cove Hut still took 45-60 minutes. Whist there wasn’t a navigation challenge anymore, the track itself it still quite rocky, with sections walking in the bay.
We were pretty happy to arrive at the hut around 11pm and get changed and have some dinner!
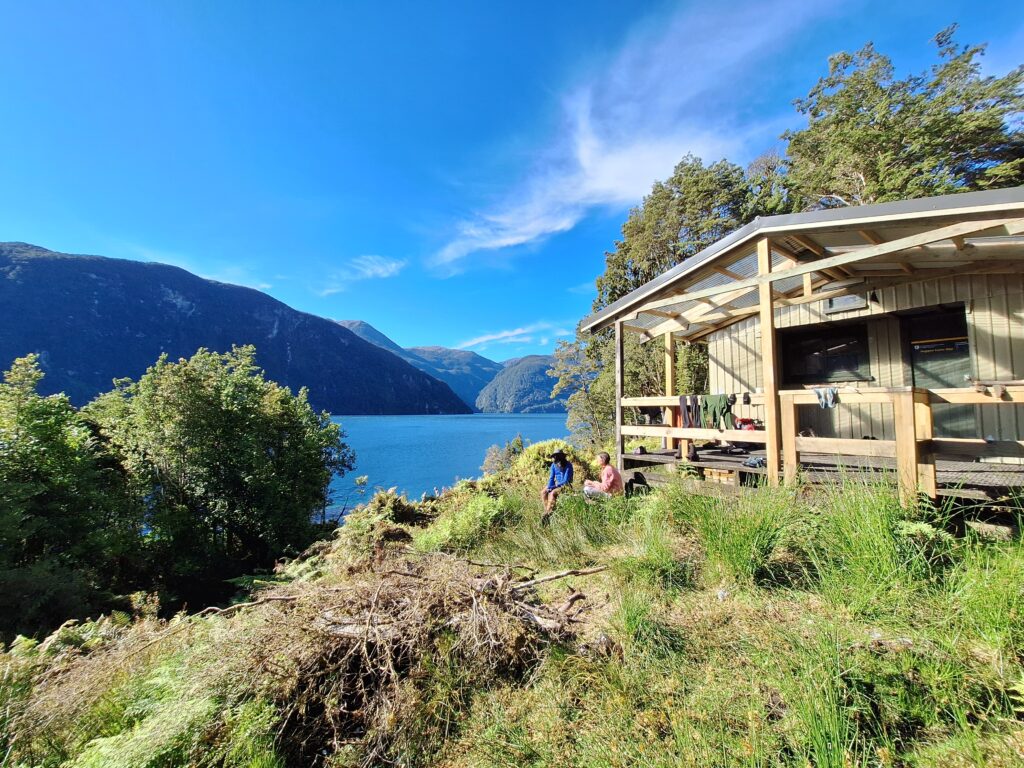
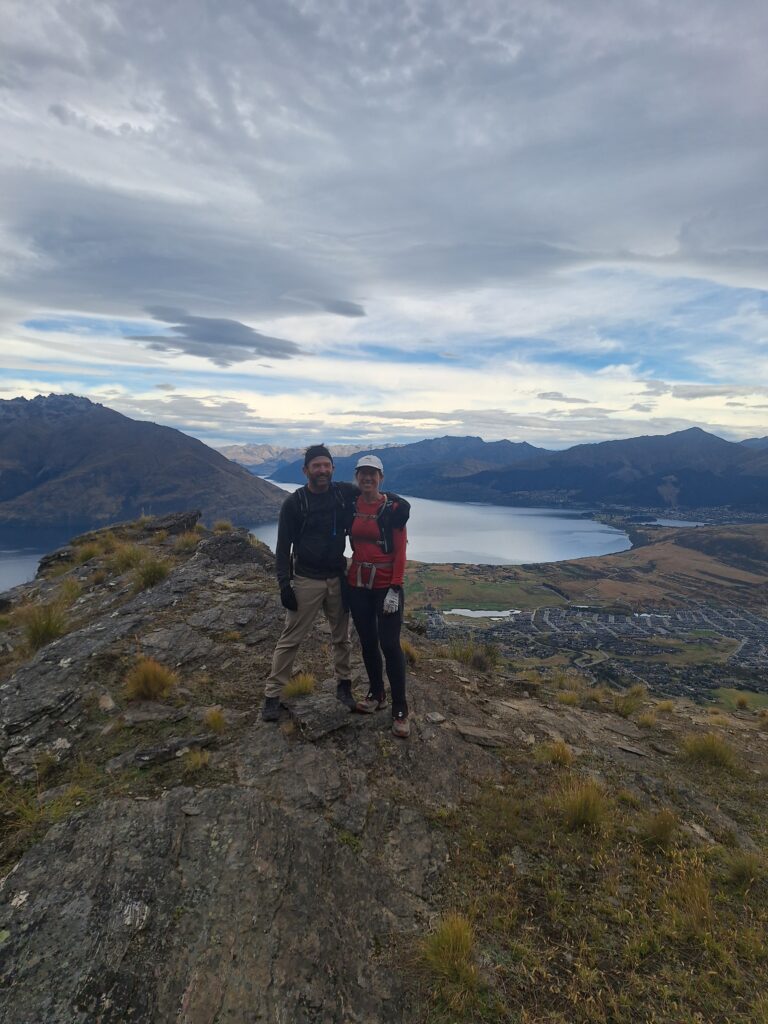
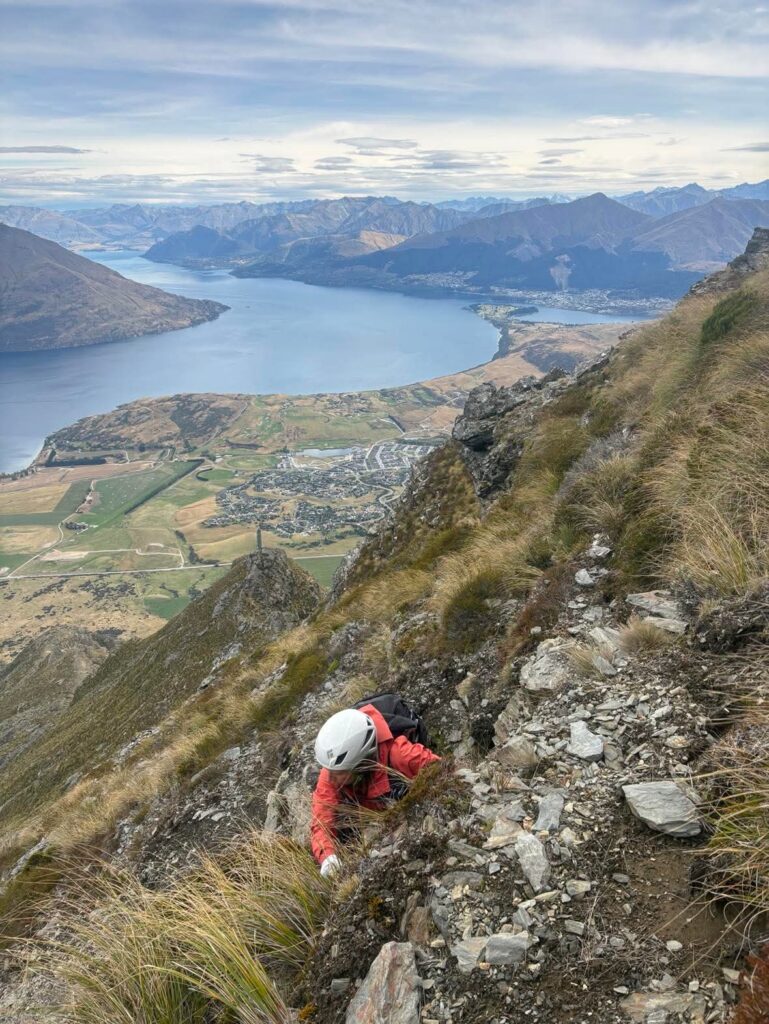
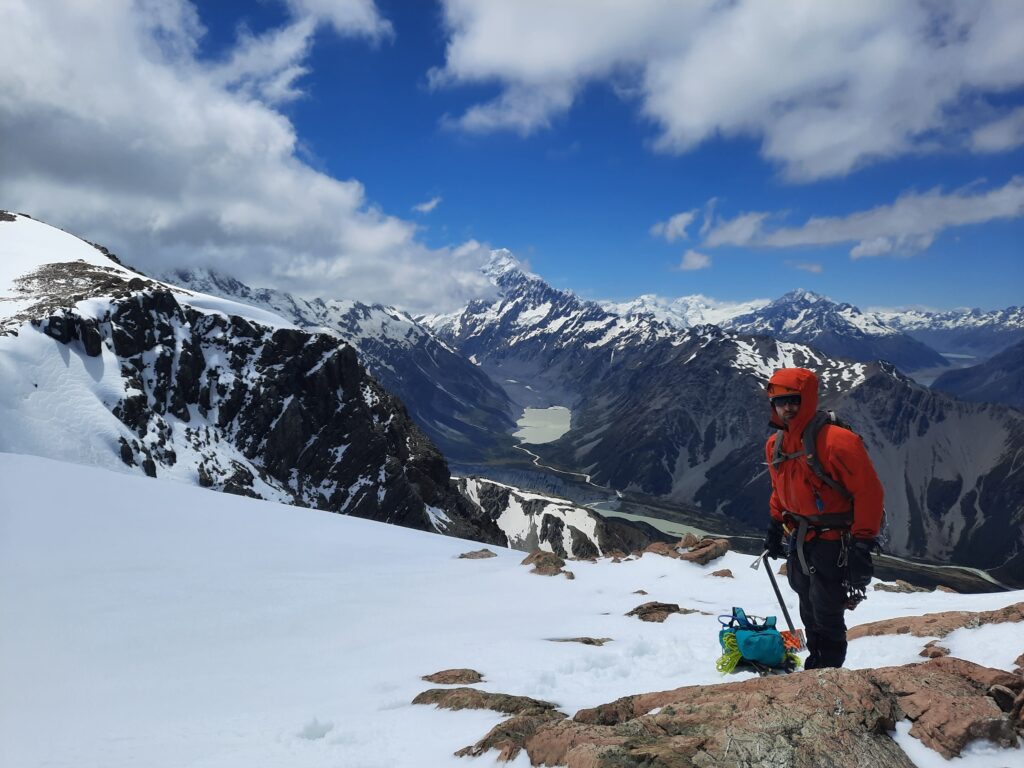
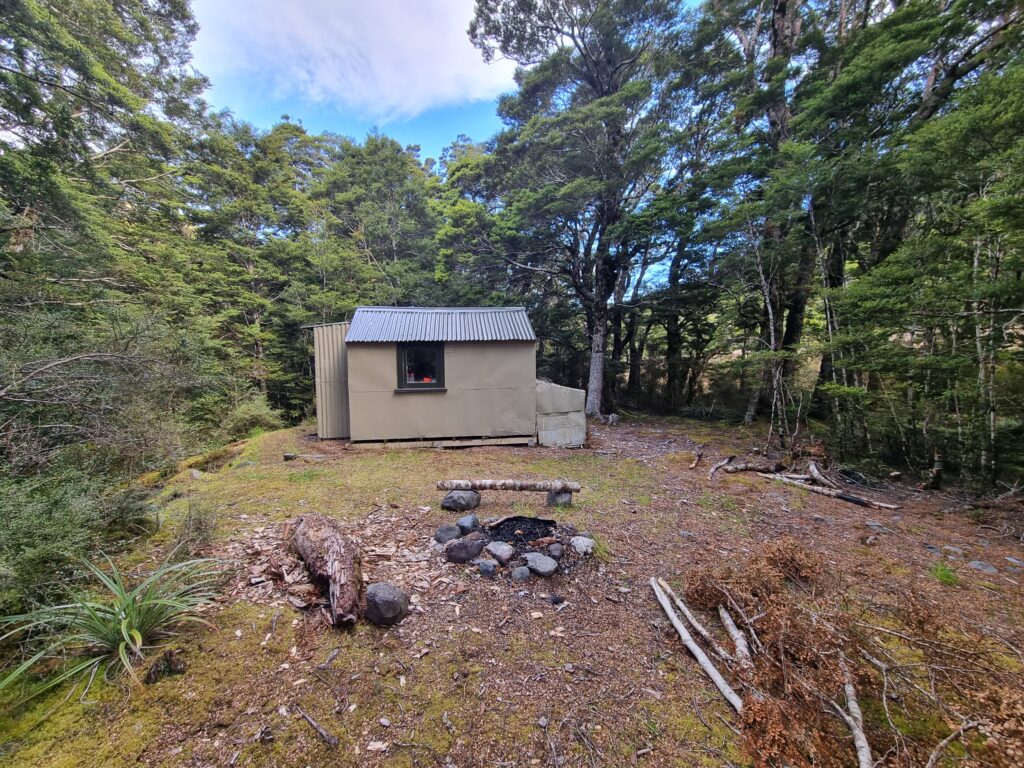
Day 3 – a nice morning at Supper Cove Hut
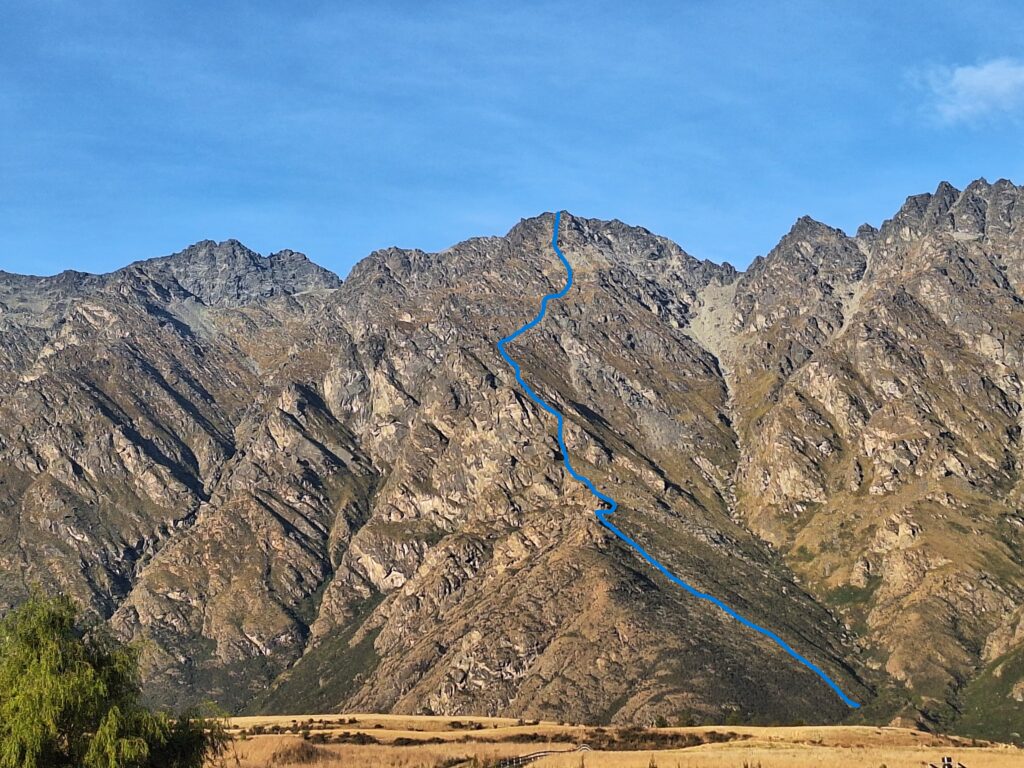
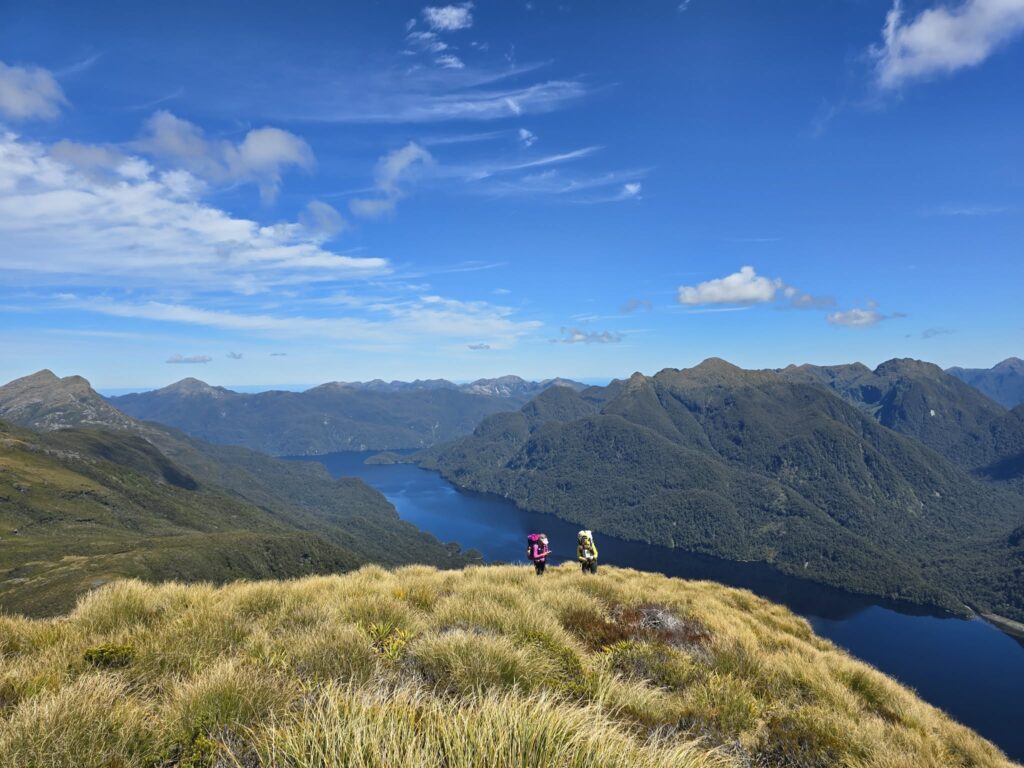
It was quite luxurious to have a relaxed few hours waiting for the float plane, and great to basically get a good view of the full ridge we travelled in the days prior on the way out.
A 10/10 unique adventure trip, and a great create-your-own-mission experience with a good level of navigation challenge for our group. Highly recommended for those already quite experienced in the back country.
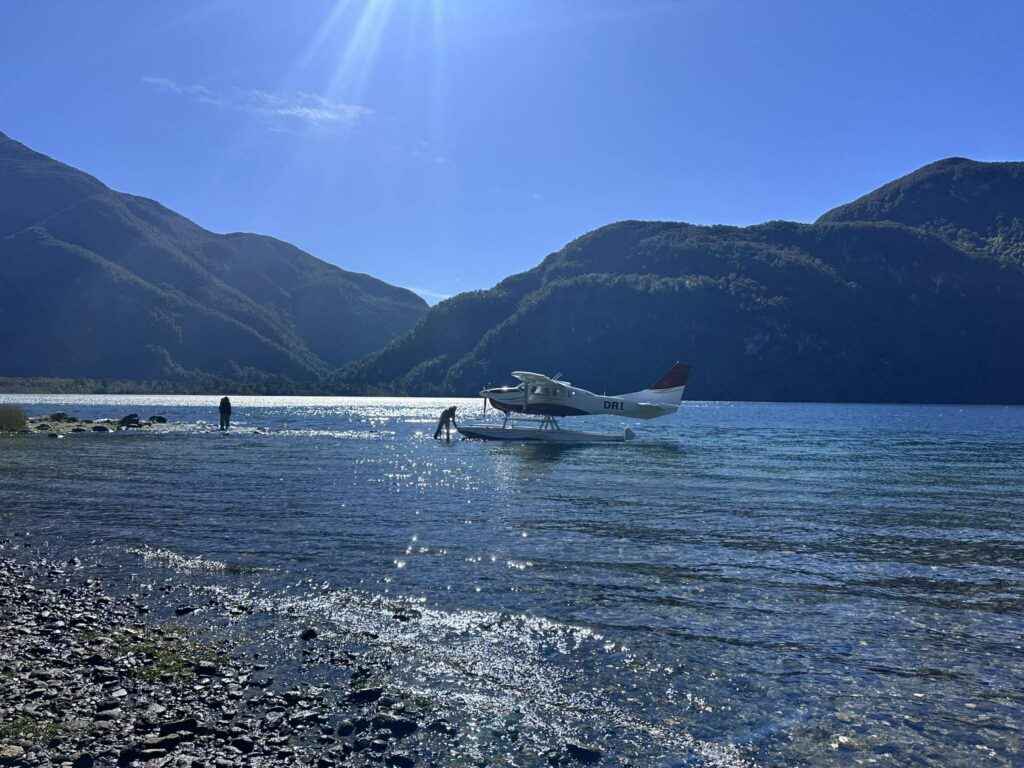
Day 3 – our float plane arriving

Day 3 – float plane from Dusky Sound looking north to the ridge we traversed