A great overnight scramble, with a little exposure heading over Gladstone Peak in the Takitimu Mountains – topped off by a stay in a cute, tucked away hut.
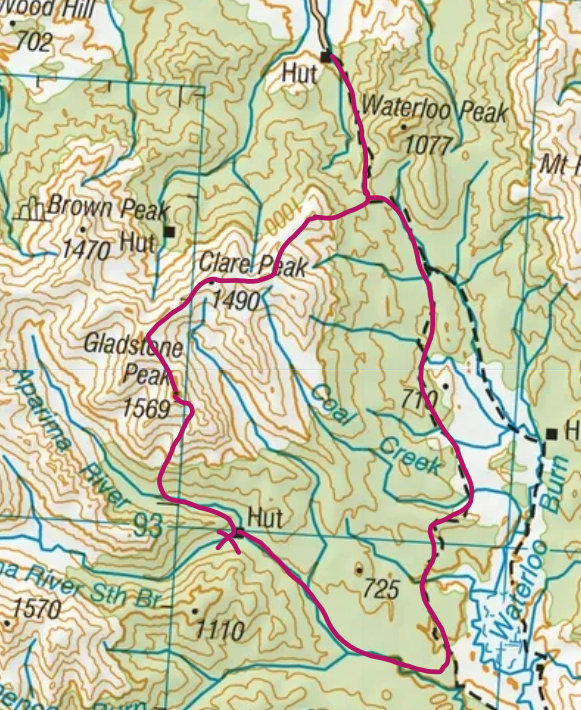
Topo – our full overnight circuit
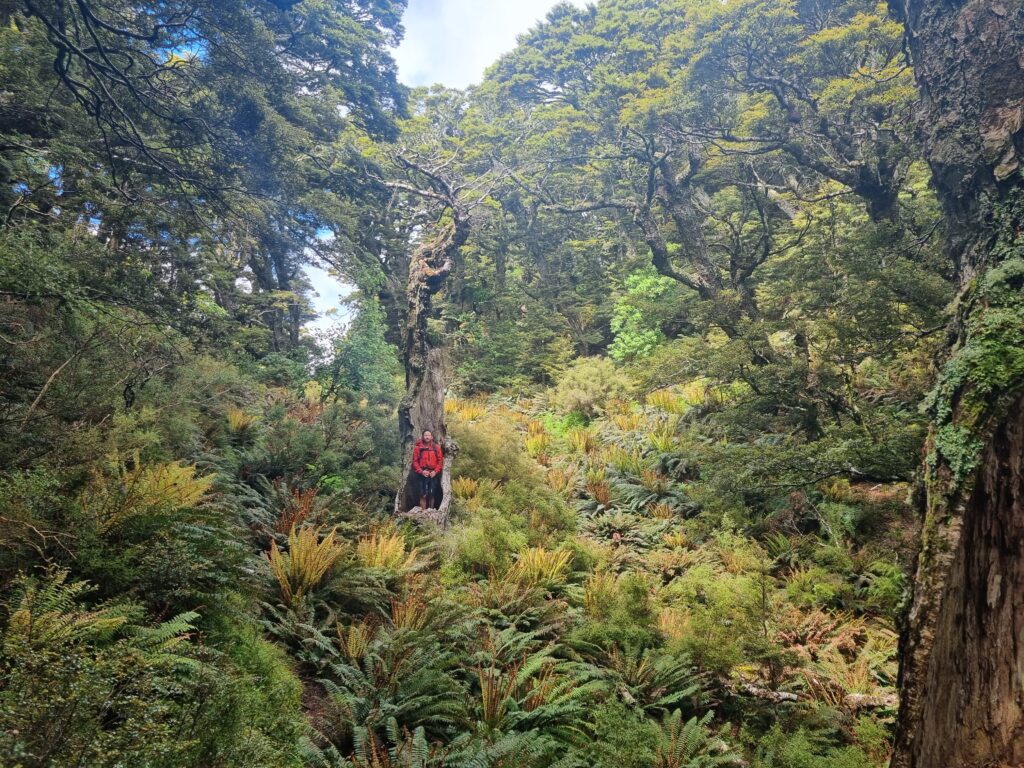
We parked and started our hike at Lower Princhester Hut and headed up Princhester Saddle Route to the 800m saddle. From here, it was helpful to have a map/compass to get through and above the bush line. Pretty bush and a few ferns to get through…
In the bush having left the 800m saddle
Once we cleared the bush line, it was a decent angled climb in the scree up to the ridge, enough of an incline that it was good to pay attention for slips.
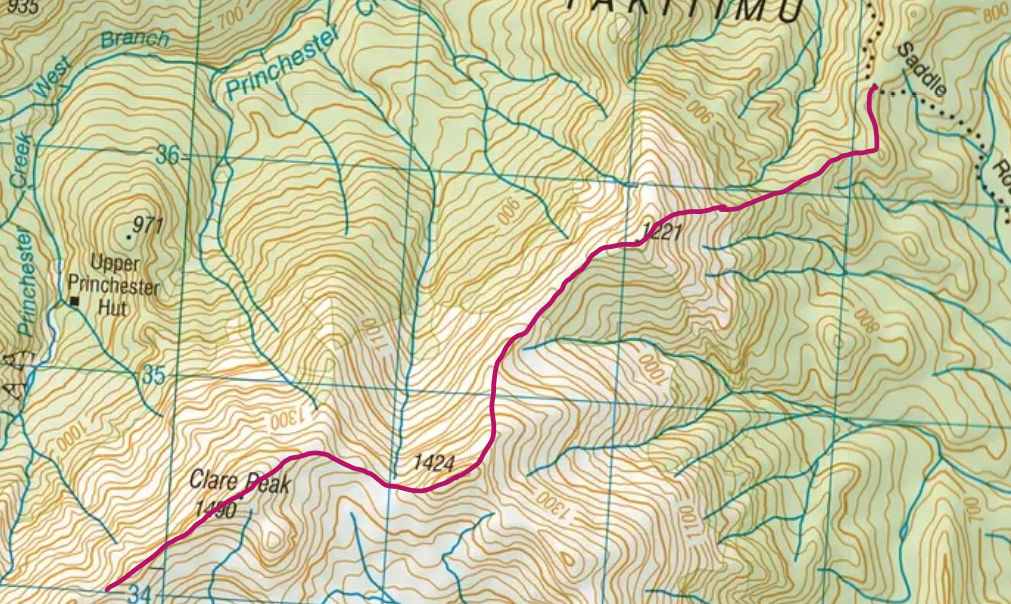
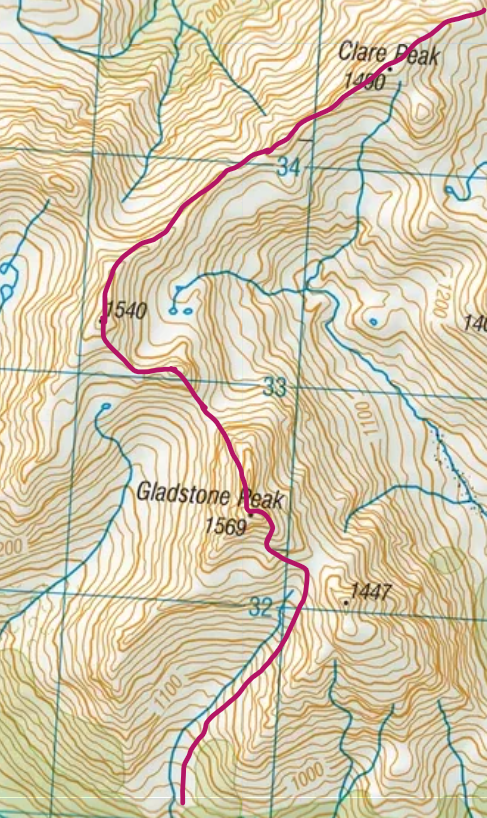
Our line from Princhester Saddle Route up to Clare Peak
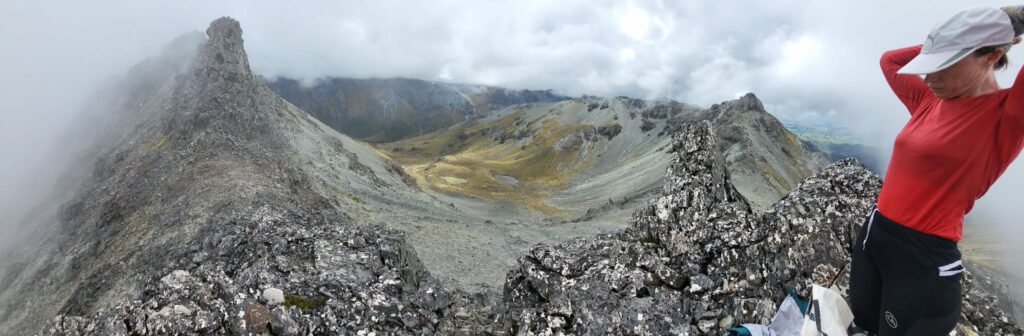
Once up to the 1221m high point, it was really nice ridge travel along to Clare Peak. I can imagine on a very windy day this could be challenging!
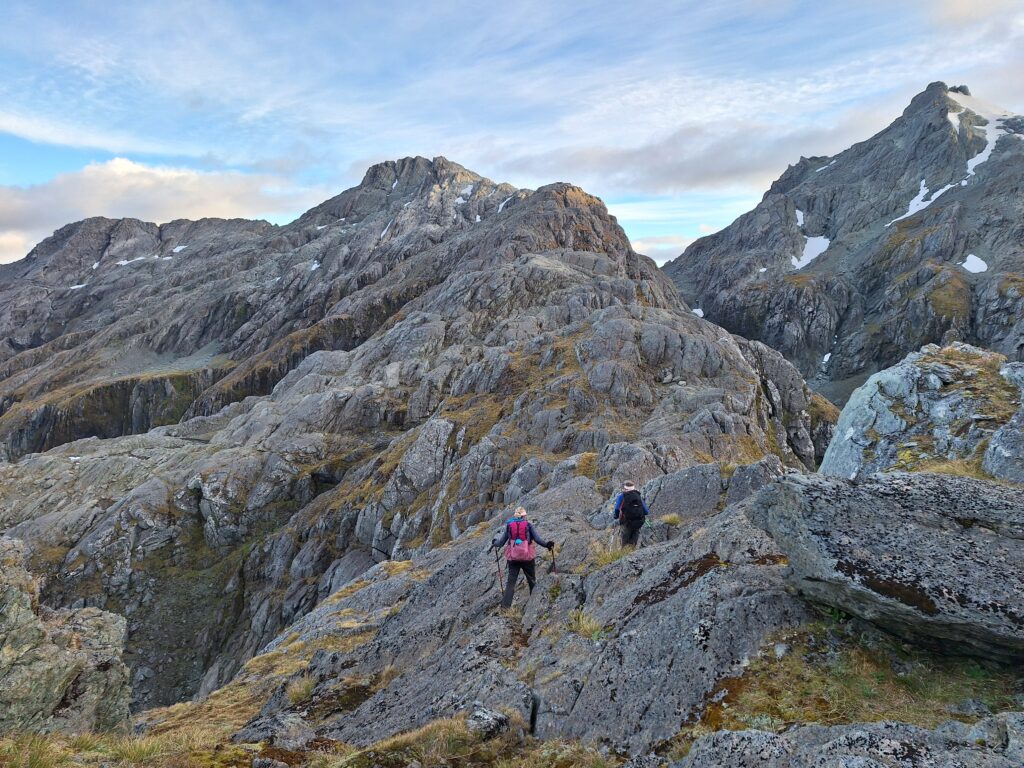
Carrying on past Clare Peak around to the base of Gladstone continued to be nice ridge travel with a few rocky sections easy enough to get through.
Ridge travel between Clare Peak and Gladstone Peak
Topo – our line from Clare Peak to Gladstone Peak
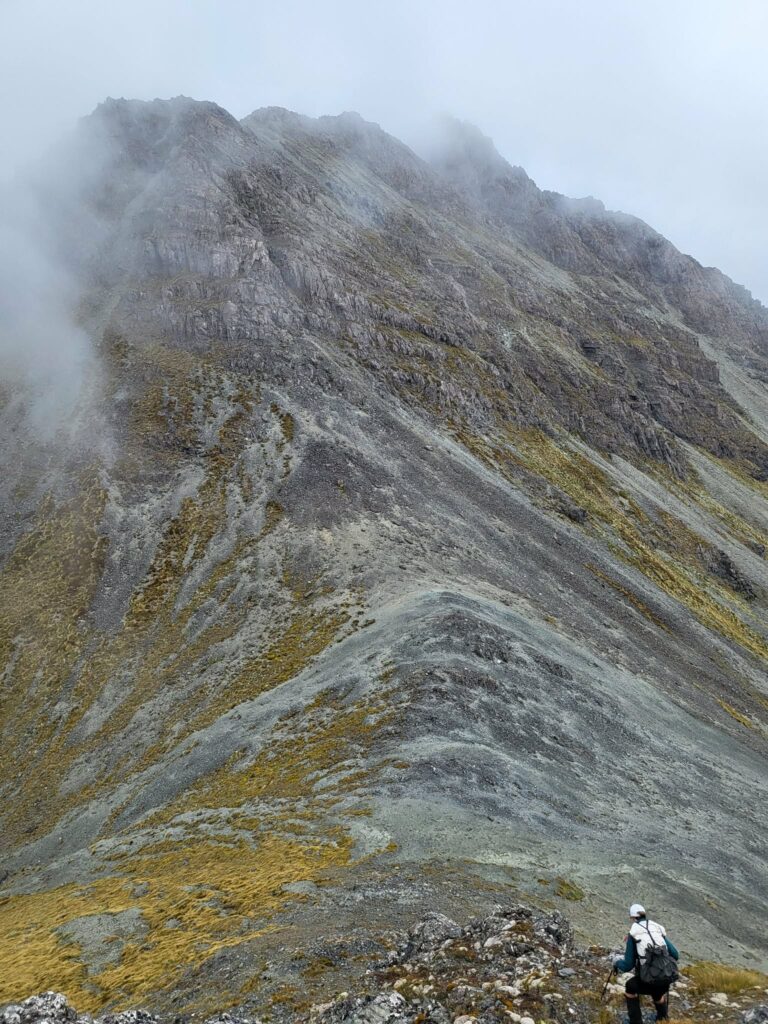
Initially Gladstone appeared a little intimidating – it was definitely a step up in the scrambling level from what we’d done so far. We opted to approach it from the NW following weaknesses in the rock to the top. There were some definite ‘hands and feet’ moves towards the top but it was all ok.
Approaching Gladstone Peak
On arrival to the top of Gladstone Peak, visibility had reduced a lot which made it tricky to make a good call on how to get down to the saddle ahead. It was very bluffy immediately in front of us and looking south. We ended up finding a good way by heading off the peak NE before coming back around and down to the saddle. Getting down off Gladstone Peak at the top, was probably the spiciest part of the trip for us.
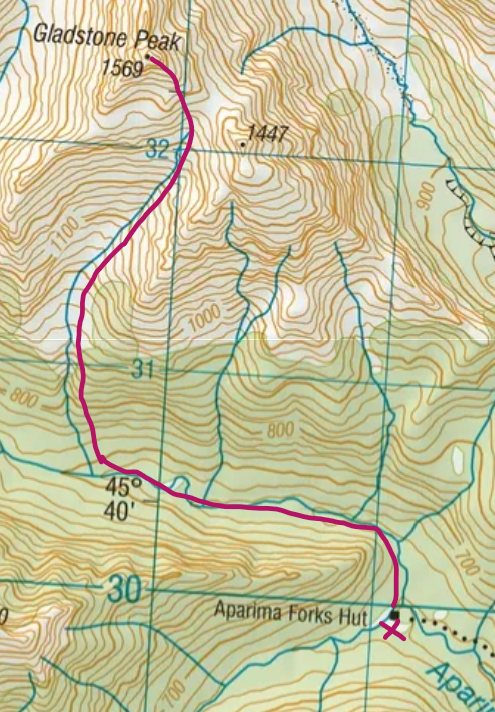
Our line from Gladstone to Aparima Forks Hut
Once we got to the saddle SE of Gladstone, travel down to the valley floor was pleasant and straight forward. The bush was relatively open and ok to get through.
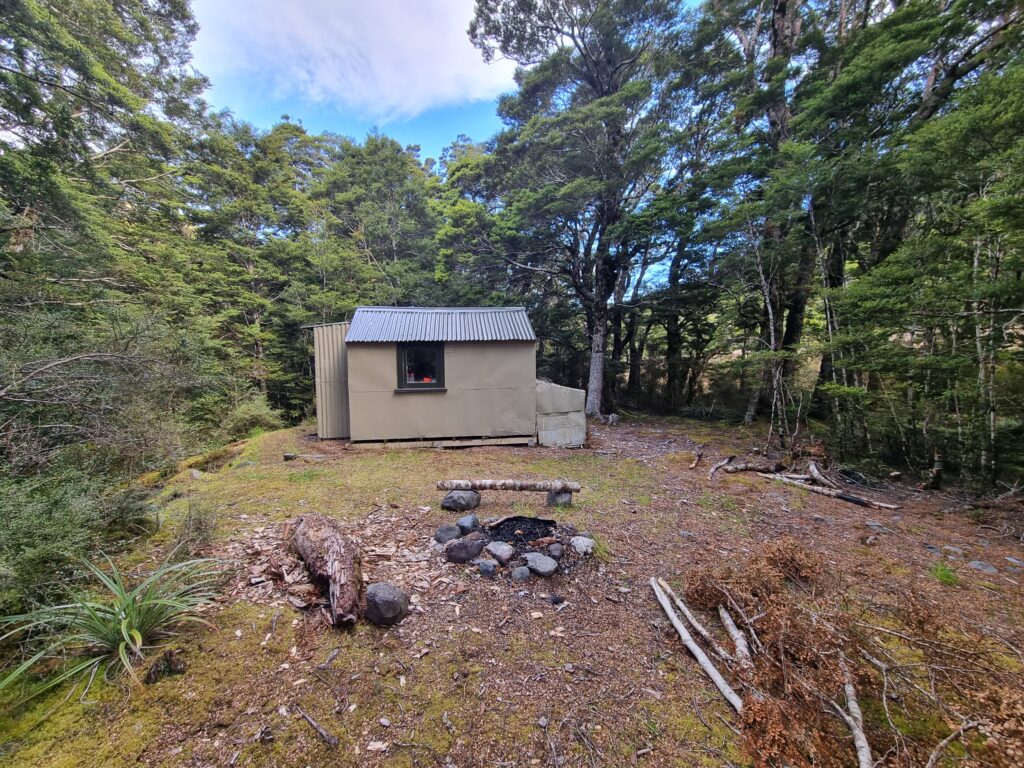
We were greeted by the super cute Aparima Forks Hut and enjoyed the rest and food after a big day.
Aparima Forks Hut
After a pleasant stay in the hut (thankfully with good sandfly protection), we spent the next day on the trails headed back to Lower Princhester Hut.
A great little loop with some interesting navigation and ridge travel.
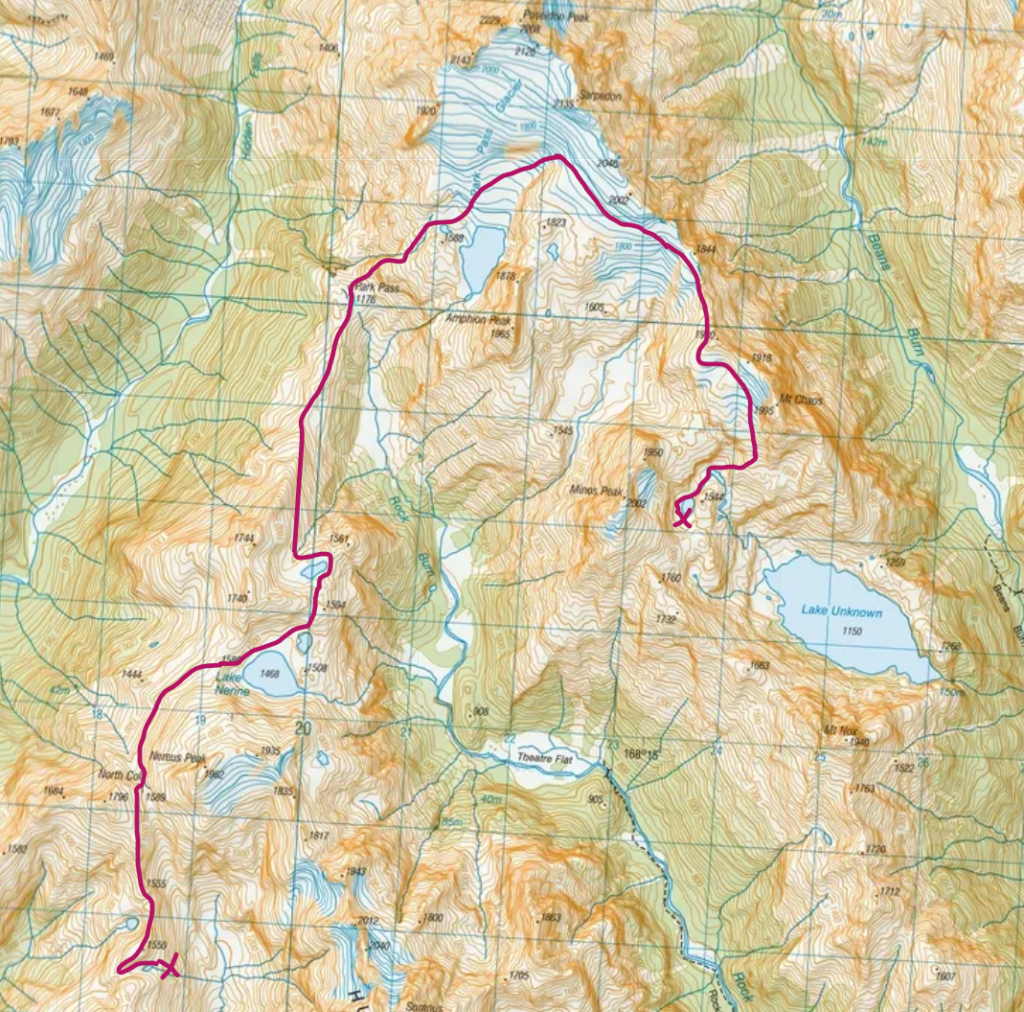
A memorable 3 day / 2 night circuit with a glacier highlight and alpine lakes.
We started and finished at the Route Burn track car pack (Glenorchy end).
Day 1 – Routeburn track / Serpentine Range (19kms – ish)
We left around 10am and aimed to reach some tarns for our first camp at the north end of Serpentine range, arriving around 6pm going at a moderate pace.
Day 1 Topo – from Routeburn track car park to the tarn on Serpentine Range
The hike up the Route Burn to Harris saddle is easy walking on the trail before heading off up through Valley of the Trolls (an obvious trail here), via Lake Wilson, and along Serpentine range.
Day 1 – Lake Wilson
Day 1 – Looking back to a tarn and Lake Wilson
There were a couple of little sections closer to the tarns that had some steep down climbing but nothing too extreme / exposed.
Day 1 – Serpentine Range
Day 1 – Camping at a tarn, Serpentine Range
We opted to camp at the first major tarn on the Range as you didn’t need to descend quite as low as the upcoming second tarn (although it did look nice passing by the next day).
Day 2 – Serpentine Range to Park Pass Glacier (16km-ish)
The highlight day from Serpentine Range via Lake Nerine and Park Pass Glacier to camp at some high tarns above Lake Unknown. We departed around 8am and arrived around 7pm.
Day 2 – Topo from Serpentine Range via Park Pass Glacier to some high tarns for camp
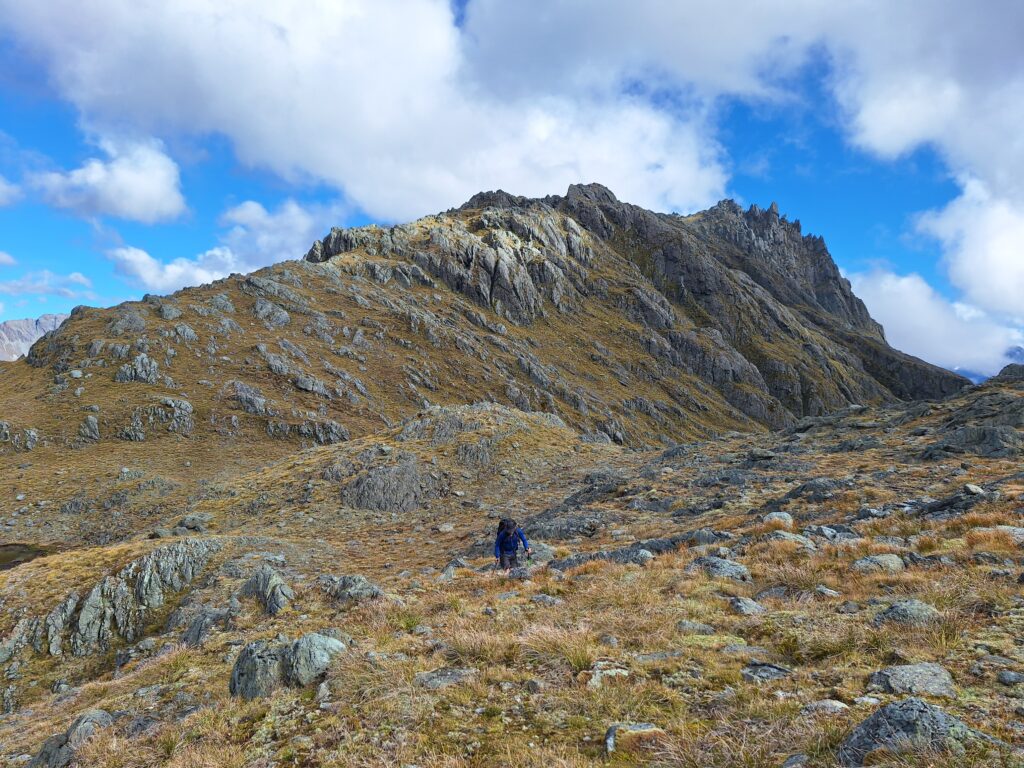
Hiking the rest of Serpentine Range was really nice terrain. Great rock and views, a nice scramble. We thought it would get steep getting down to North Col but there was a nice ledge system and plenty of cairns.
Day 2 – Serpentine Range, nearing North Col (in the distance)
Day 2 – Serpentine Range views down to Route Burn North branch – super scenic
The hike from North Col around to Lake Nerine had good views but a bit of bouldery sidling to get through. Dropping a good 100m of altitude from the Col to make your way around worked well for us.
For those that ever did Godzone chapter 7 coming up Hidden Falls – the views from this part of the hike serve as a reminder of the suffering that occurred in that valley in the middle of the night, ha.
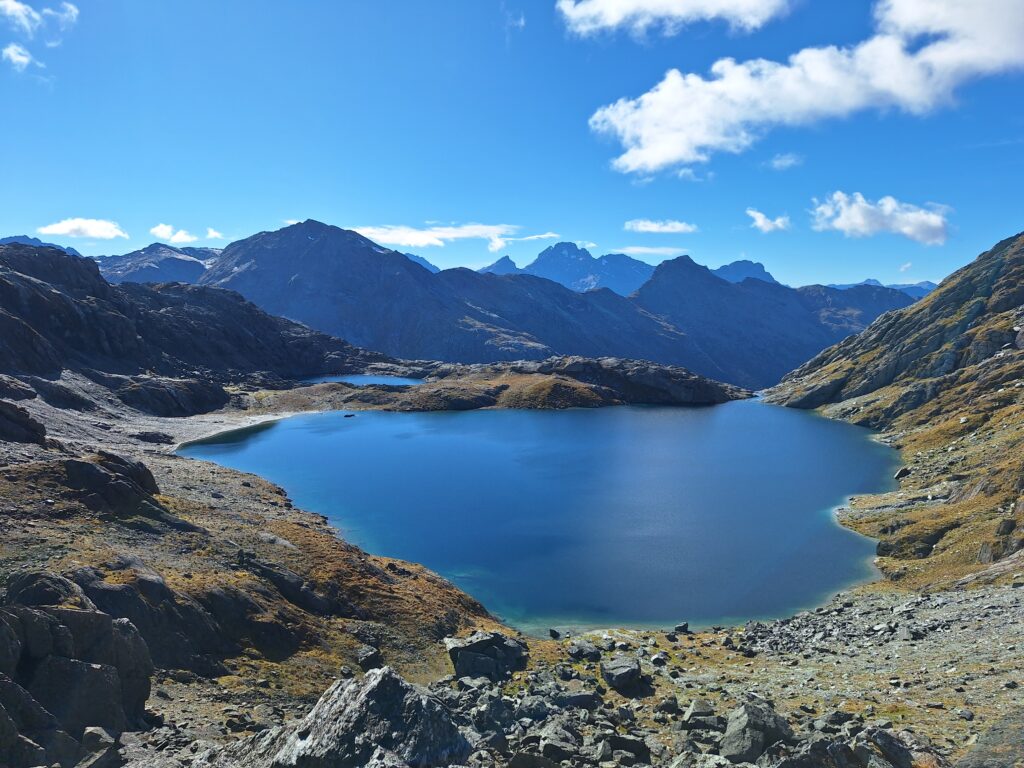
Arriving at Lake Nerine is super beautiful. We camped here on a prior trip, but this time we had a mission to get beyond Park Pass Glacier so didn’t hang about too long. We got cloud-free views this trip though!
Day 2 – Lake Nerine
Having been up to Park Pass a few times before, it was great to get into new territory and head up to the lake below Park Pass Glacier.
Day 2 – Heading up from Park Pass to the Glacier with Hidden Falls (aka trauma valley) in the background
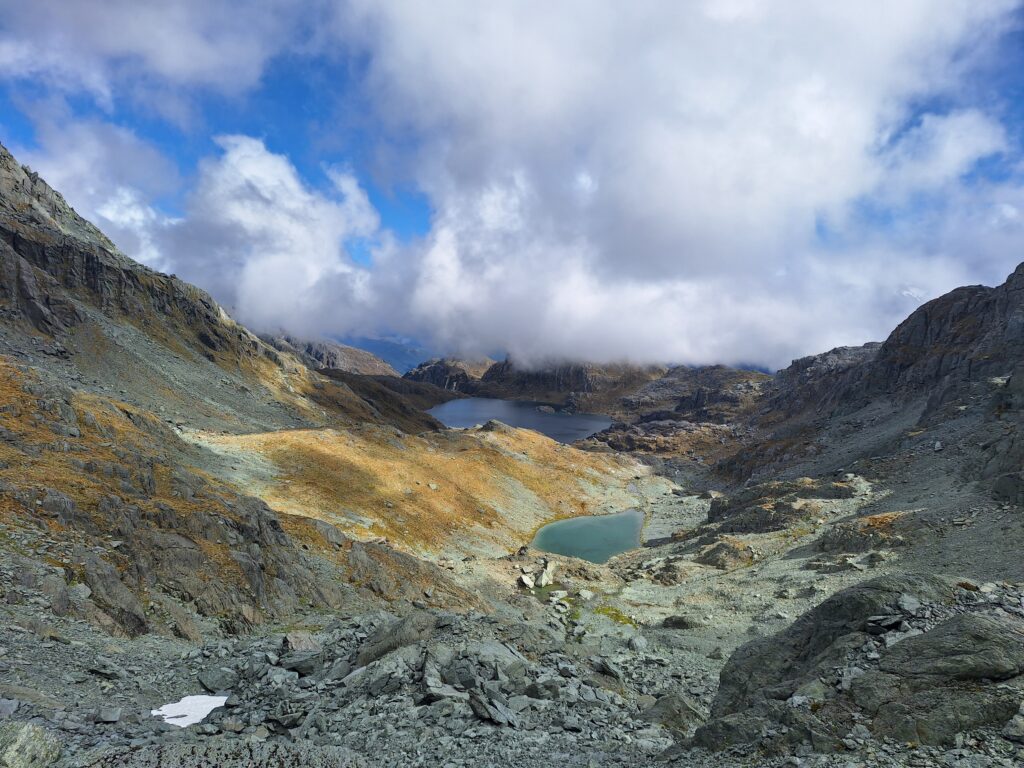
Day 2 – Arriving below Park Pass Glacier at the tarn (next to the large Lake, not in view yet)
We had originally planned to head up the main Park Pass Glacier to around 1880-1900m elevation and then follow this above the cliff band over the alpine lake. However, we were conscious of day light and options for a more time-efficient line. We spotted a viable way heading up to the Glacier, travelling in a NE direction below the cliff band up to that same elevation, which saved a little distance and time.
Getting past the Lake and up onto the glacier was probably the riskiest part of the trip on this occasion. Largely because on the sharp, bouldery rocks we had to navigate around and over (not shown). The rock was a bit loose here, so you didn’t want to trust anything entirely. We took it with care to avoid unnecessary trips and rock movement.
Arriving up on the Glacier was a highlight of the trip – the views were particularly amazing, and we knew we would now make our intended camp spot.
If things had taken longer than we planned, our fall back option was to return to back down to the lake before Park Pass Glacier, camp there, and hike down via Park Pass / Rock Burn the next day.
Day 2 – Park Pass Glacier around 1880m
Hiking from Park Pass Glacier around and under Mt Chaos and down to our tarn for camp #2 was 100% excellent. It was a nice rest from the elevation gain on the trip so far, the rock quality was good, and the snow was nice and firm for fast travel. We had crampons, an axe, and a glacier rope – opting to use crampons and an axe at the time. For a future trip, camping at the tarns below Amphion Peak looked amazing (and potentially giving that peak a go).
Day 2 – View to Amphion Peak from Park Pass Glacier
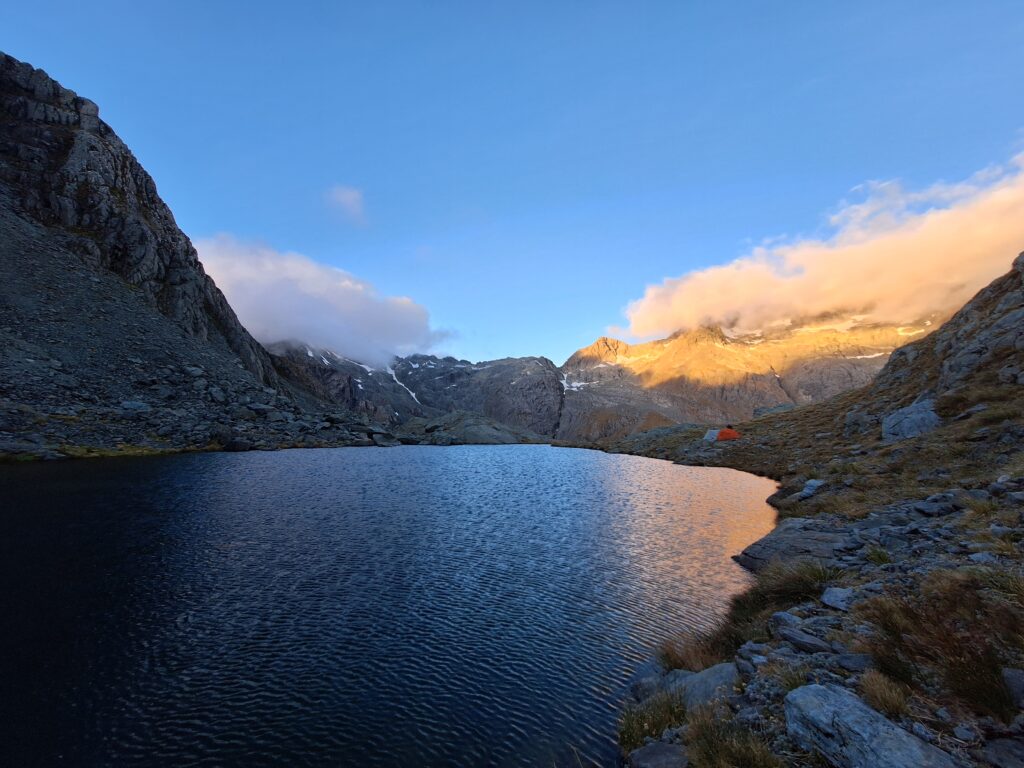
We arrived at our camp spot at some beautiful tarns a bit above Lake Unknown around 7pm, ready for dinner and some camp time.
It was surprising to see a decent chunk of snow break off above the tarn around 8pm at night (i.e., cooler/no sun), we weren’t quite sure what that was about!
It felt a little more secluded here (than the night before) – I’d definitely go back. A surprising number of hares on the rock up there and around the tarns too.
Day 3 – Down to Theatre Flat Rock Burn, over Sugarloaf pass and out (13km-ish)
After a solid sleep and calm night, it was time to head out.
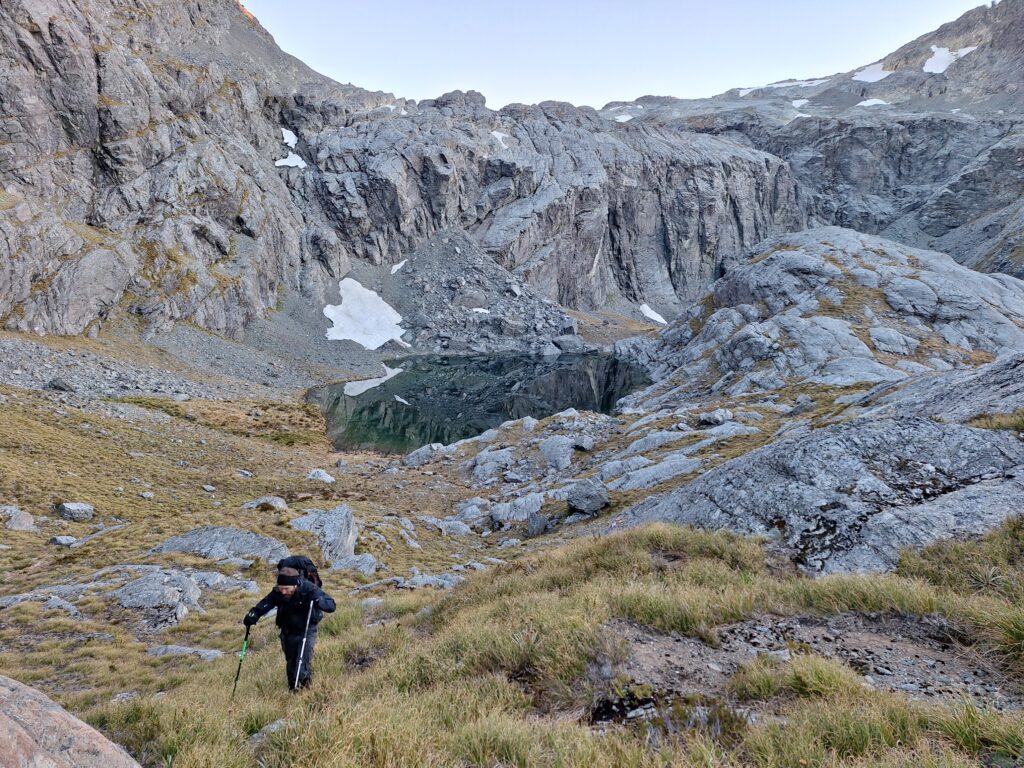
Day 3 – Leaving camp from tarn above Lake Unknown
I was a little anxious leaving camp as I wasn’t quite sure how it would feel exposure / slide risk wise getting down to the Rock Burn. Following a recent Fiordland trip in steep terrain, I have a little PTSD around topo map trust (a lot can happen within 20m – and sometimes entirely different things under the canopy line!). Anyhow, turns out it was absolutely all good for us.
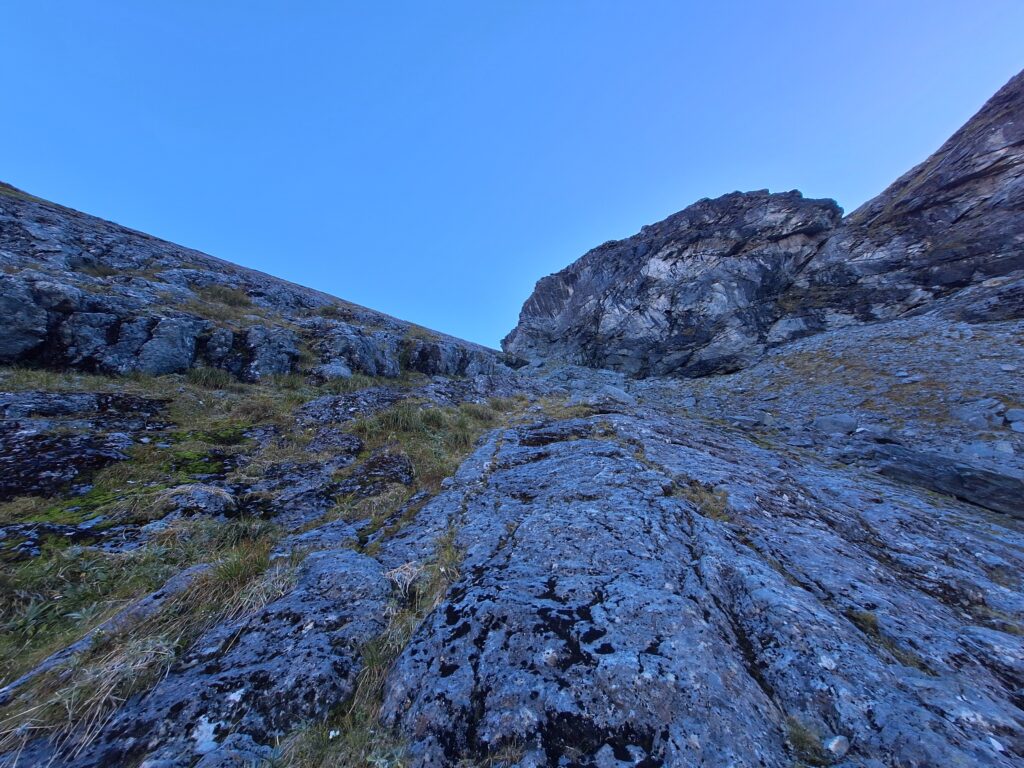
We stayed true right of the ‘creek’. Walking along weaknesses in the slabs in the upper section (between 1450-1500m). We had to do one ‘trust the grip/feet’ move for a few metres but I’m sure there are plenty of ways to avoid that if preferred. If it was raining, I’m not sure it would have felt that great on those slabs. We could see a way down the gut on true left hugging the bluffs on true left (around 1450m-1500m) – possibly that would have been the way to go in the wet to avoid slabs before crossing back to true right a bit further down.
On the topo below is the line we took, and a couple of other dotted lines I heard that others have done. I understand the ridge to pt 908 could be the most straight forward (as was out intended way down), but as we got into following the creek straight down – it felt very comfortable for us and more direct, so we stuck with that. The most niggly bit was closer to the bottom navigating around a respectable bluff. We saw some tracks from others going along overhanging stuff in the bush that we weren’t up for, so we found another way down by coming a bit closer to the river that was great (a little bushy, but safe). We left camp around 8am and got to Theatre Flat about 11am.
Day 3 – our line down to the Rock Burn, we originally considered to point 908m, and heard there is a line down from the saddle south of 1663m.
Day 3 – looking up at the ‘gut’ around 1450-1500m between the slabs on true right (we came down) and the bluffs on true left
Day 3 – our route down from camp #2 to the Rock Burn (Theatre Flat)
Day 3 – topo of our route from Theatre Flat Rock Burn out to the Route Burn track car pack
The rest of the walk was on the Rock Burn track and up over Sugarloaf Pass which we’ve done a few times before. A scenic walk, but a bit of a plod after all the interesting previous navigation choices.
We got to the car around 4pm which was perfect timing for a stop via the Glenorchy pub before heading home.
Ocean Peak, off the Routeburn trail can be completed in a day from either end of the trail – for a fit scrambler at least!
We traversed over Ocean Peak from the Route Burn track Hollyford entrance, coming down to Harris saddle, before a bivvy in the Valley of Trolls on Day 1. Day 2 we did some further ‘tops exploring’ in that area before exiting back along the Route Burn track the next day. This trip report focuses on the Ocean Peak traverse from Day 1.
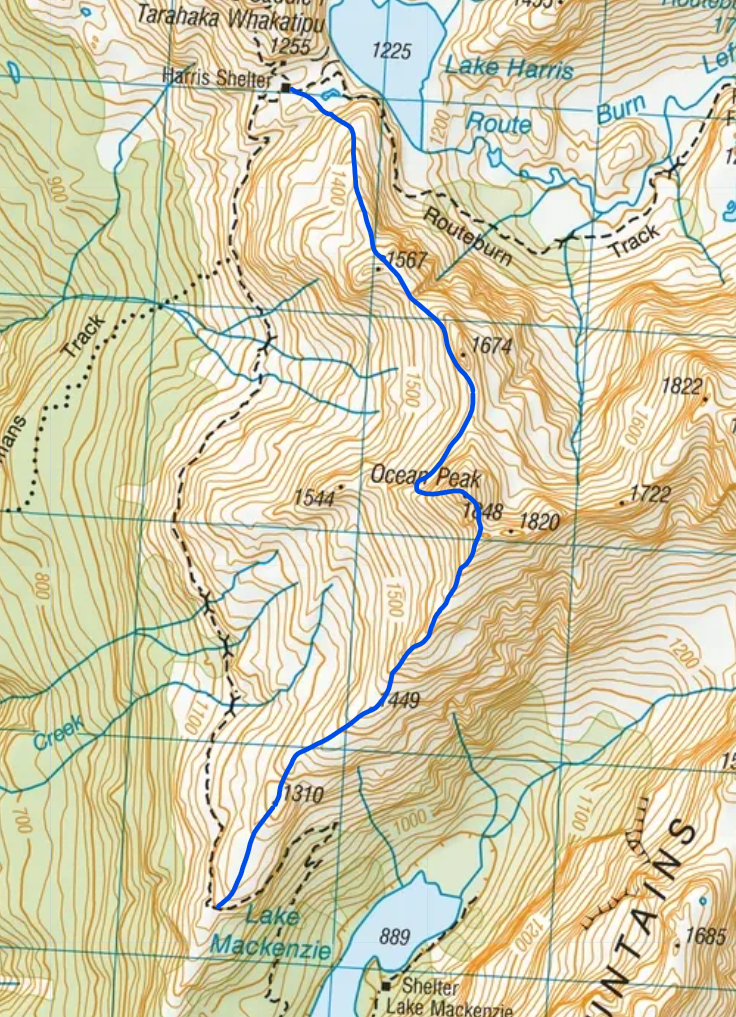
Hike from the Route Burn track start to Lake McKenzie hut is around 10kms of easy walking on the Great Walk trail. A further 2 kms from the hut brings you at an obvious ridge heading NE up to Ocean Peak (see topo below). There is a noticeable track here from prior scramblers heading onto the ridge from the Route Burn track (around 1200m).
Head up the ridge past points 1310, 1449m and up past the 1600m elevation line.
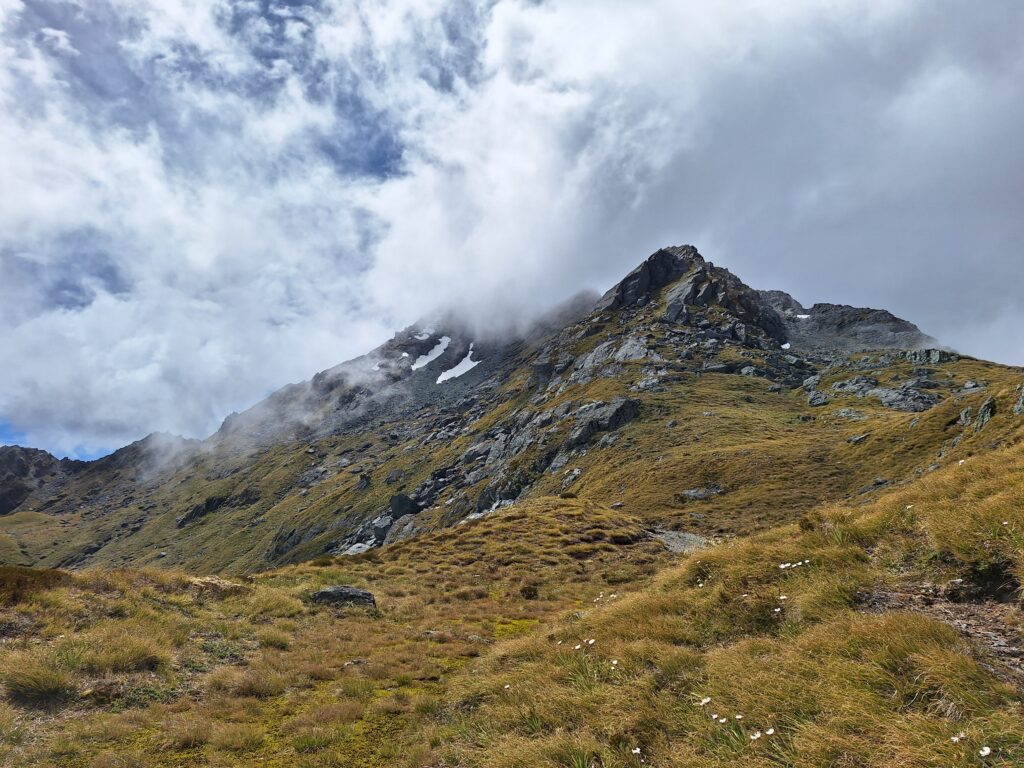
View up ridge to Ocean Peak (in cloud) – around 1449m.
From here we meandered left and right of the ridge. If you prefer more straight-forward walking, it looks like staying right of the ridge heading up was good. We hit the saddle between 1820m on the right, and Ocean Peak 1848m on the left (see pic below).
Around 1800m saddle point between Ocean Peak (shown) and 1820m.
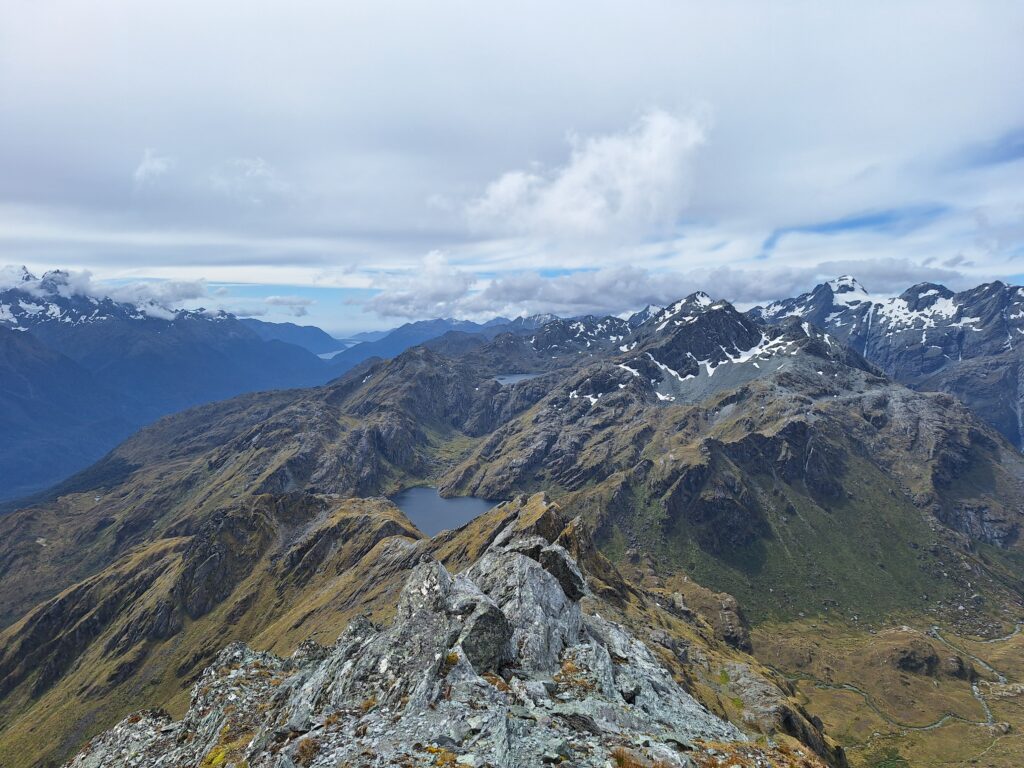
We ascended the right-hand side of the ridge from here (see grassy ledge above, before transitioning to the rock) to reach the top of Ocean peak. The Peak has great views out to the West Coast.
The West Coast Ocean view from Ocean Peak.
Getting down off Ocean Peak could be as easy or difficult as you want it to be. We opted for nothing too exposed and walked off the Peak on the west, probably dropping to around 1600-1650m before traversing under bluffs to the obvious saddle between Ocean Peak and 1674m.
There is probably a way to stay on the ridge the whole way down to Harris Saddle. We opted to sidle West of point 1674m before coming to the saddle before 1567m. There was a bit of a ravine at this saddle to navigate through, before climbing back up to 1567m and down.
We did a straight line from around 1400m to Harris saddle – in hindsight it may have been easier/possible to continue on the ridge and intersect the Route Burn track before turning left and back along to Harris saddle. There was a steep section to get through the line we chose, from around 1300m to Harris saddle.
For anyone that wanted to make this a (big) day trip, it is easy enough to hike out from here back to the road end (roughly 16kms from Harris saddle). Total distance if doing as day trip would be around 32kms-ish, with around 1350m gain (excluding undulations).
See our route on the topo below for the off-track traverse over Ocean Peak.